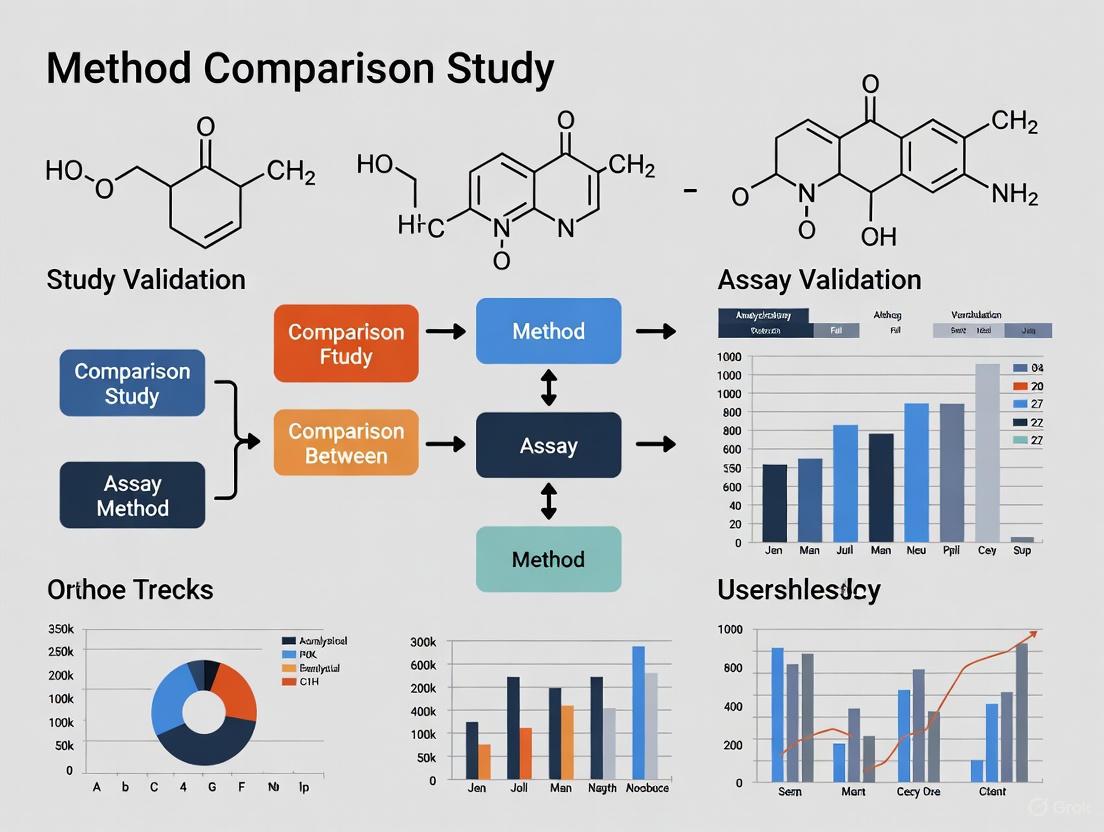
A Strategic Framework for Designing Robust Method Comparison Studies in Assay Validation
This article provides a comprehensive, step-by-step guide for researchers and drug development professionals on designing and executing method comparison studies, a critical component of assay validation.
A Strategic Framework for Designing Robust Method Comparison Studies in Assay Validation
Abstract
This article provides a comprehensive, step-by-step guide for researchers and drug development professionals on designing and executing method comparison studies, a critical component of assay validation. It covers foundational principles of validation versus verification, detailed methodological planning for accuracy and precision assessment, advanced troubleshooting for handling real-world data challenges like method failure, and final verification against regulatory standards. The content synthesizes current best practices and statistical methodologies to ensure reliable, defensible, and compliant analytical results in biomedical and clinical research.
Laying the Groundwork: Core Principles of Method Comparison and Validation
In regulated laboratory environments, the generation of reliable and defensible data is paramount. Two foundational processes that underpin data integrity are method validation and method verification. Although sometimes used interchangeably, they represent distinct activities with specific applications in the assay lifecycle. A clear understanding of the difference—where validation proves a method is fit-for-purpose through extensive testing, and verification confirms it works as expected in a user's specific laboratory—is critical for regulatory compliance and operational efficiency [1] [2].
This application note delineates the strategic roles of method validation and verification within regulated laboratories, providing a clear framework for their application. It further details the design and execution of a robust method comparison study, a critical component for assessing a new method's performance against a established one during verification or method transfer.
Core Definitions and Regulatory Context
Method Validation
Method validation is a comprehensive, documented process that establishes, through extensive laboratory studies, that the performance characteristics of a method meet the requirements for its intended analytical applications [3]. It is performed when a method is newly developed or when an existing method undergoes significant change [1].
The core objective is to demonstrate that the method is scientifically sound and capable of delivering accurate, precise, and reproducible data for a specific purpose, such as a new drug submission [1].
Method Verification
Method verification, in contrast, is the process of confirming that a previously validated method performs as expected in a particular laboratory. It demonstrates that the laboratory can competently execute the method under its own specific conditions, using its analysts, equipment, and reagents [1] [3] [2].
Verification is typically required when adopting a standardized or compendial method (e.g., from USP, EP, or AOAC) [3]. The goal is not to re-establish all performance characteristics, but to provide evidence that the validated method functions correctly in the new setting.
Regulatory Guidelines
The following table summarizes key regulatory guidelines that govern method validation and verification practices.
Table 1: Key Regulatory Guidelines for Method Validation and Verification
| Guideline | Issuing Body | Primary Focus | Key Parameters Addressed |
|---|---|---|---|
| ICH Q2(R1) | International Council for Harmonisation | Global standard for analytical procedure validation [4]. | Specificity, Linearity, Accuracy, Precision, Range, Detection Limit (LOD), Quantitation Limit (LOQ) [4]. |
| USP General Chapter <1225> | United States Pharmacopeia | Validation of compendial procedures; categorizes tests and required validation data [3] [4]. | Accuracy, Precision, Specificity, LOD, LOQ, Linearity, Range, Robustness [3]. |
| FDA Guidance on Analytical Procedures | U.S. Food and Drug Administration | Method validation for regulatory submissions; expands on ICH with a focus on robustness and life-cycle management [4]. | Analytical Accuracy, Precision, Robustness, Documentation. |
Strategic Application: A Decision Framework
The choice between performing a full validation or a verification is strategic and depends on the method's origin and status. The following workflow diagram outlines the decision-making process for implementing a new analytical method in a regulated laboratory.
Experimental Protocols for Method Validation and Verification
Protocol for a Full Method Validation
A full validation requires a multi-parameter study to establish the method's performance characteristics as per ICH Q2(R1) and USP <1225> [3] [4]. The following table details the key experiments, their methodologies, and acceptance criteria.
Table 2: Protocol for Key Method Validation Experiments
| Validation Parameter | Experimental Methodology | Typical Acceptance Criteria |
|---|---|---|
| Accuracy | Analyze samples spiked with known quantities of the analyte (e.g., drug substance) across the specified range. Compare measured value to true value [3]. | Recovery within specified limits (e.g., 98-102%). RSD < 2% [5]. |
| Precision | 1. Repeatability: Multiple injections of a homogeneous sample by one analyst in one session.2. Intermediate Precision: Multiple analyses of the same sample by different analysts, on different instruments, or on different days [3]. | RSD < 2% for repeatability; agreed limits for intermediate precision [5]. |
| Specificity | Demonstrate that the method can unequivocally assess the analyte in the presence of potential interferences like impurities, degradation products, or matrix components [3]. | No interference observed at the retention time of the analyte. Peak purity tests passed. |
| Linearity & Range | Prepare and analyze a series of standard solutions at a minimum of 5 concentration levels. Plot response vs. concentration and apply linear regression [3]. | Correlation coefficient (r) > 0.999. Residuals are randomly scattered. |
| Robustness | Deliberately introduce small, deliberate variations in method parameters (e.g., mobile phase pH ±0.1, column temperature ±2°C). Evaluate impact on system suitability [3]. | All system suitability parameters remain within specified limits despite variations. |
| LOD & LOQ | Based on signal-to-noise ratio or standard deviation of the response and slope of the calibration curve [3]. | LOD: S/N ≈ 3:1.LOQ: S/N ≈ 10:1 with defined precision/accuracy. |
Designing a Method Comparison Study
A method comparison study is a critical part of method verification or transfer. It estimates the systematic error (bias) between a new (test) method and a established (comparative) method using real patient or sample matrices [6] [7].
1. Study Design and Sample Selection:
- Sample Number: A minimum of 40, and preferably 100, patient specimens is recommended to cover the clinically meaningful range and identify matrix-related interferences [6] [7].
- Sample Analysis: Analyze samples over multiple days (at least 5) and multiple analytical runs to mimic real-world conditions. Ideally, perform duplicate measurements to minimize random variation and identify errors [6] [7].
- Sample Stability: Analyze specimens by both methods within a short timeframe (e.g., 2 hours) to prevent degradation from causing observed differences [6].
2. Data Analysis and Graphical Presentation:
- Visual Inspection: Graph the data during collection to identify discrepant results for immediate re-analysis.
- Difference Plot (Bland-Altman): Plot the difference between the test and comparative method results (y-axis) against the average of the two results (x-axis). This helps visualize bias across the concentration range [7].
- Scatter Plot: Plot test method results (y-axis) against comparative method results (x-axis). A line of equality (y=x) can be drawn to visualize deviations [6] [7].
- Statistical Analysis:
- Avoid Inadequate Statistics: Correlation coefficient (r) and t-test are not sufficient for method comparison, as they measure association, not agreement [7].
- Regression Analysis: For data covering a wide range, use linear regression (e.g., Deming or Passing-Bablok) to estimate constant (y-intercept) and proportional (slope) systematic error. The systematic error at a critical decision concentration (Xc) is calculated as SE = (a + bXc) - Xc, where 'a' is the intercept and 'b' is the slope [6].
- Bias Estimation: For a narrow concentration range, calculate the average difference (bias) between the two methods [6].
The Scientist's Toolkit: Essential Reagents and Materials
The following table lists key materials required for performing method validation and verification studies, particularly for chromatographic assays.
Table 3: Essential Research Reagent Solutions and Materials
| Item | Function / Application |
|---|---|
| Certified Reference Standard | Provides the known, high-purity analyte essential for preparing calibration standards to establish accuracy, linearity, and range. |
| Internal Standard (IS) | A compound added in a constant amount to samples and standards in chromatography to correct for variability in sample preparation and injection. |
| Matrix-Matched Quality Control (QC) Samples | Samples spiked with known analyte concentrations in the biological or sample matrix. Critical for assessing accuracy, precision, and recovery during validation/verification. |
| Appropriate Chromatographic Column | The stationary phase specified in the method. Its type (e.g., C18), dimensions, and particle size are critical for achieving the required separation, specificity, and robustness [5]. |
| HPLC/UHPLC-Grade Solvents and Reagents | High-purity mobile phase components (water, buffers, organic solvents) are essential to minimize baseline noise, ghost peaks, and ensure reproducible retention times. |
| System Suitability Test (SST) Solution | A reference preparation used to confirm that the chromatographic system is performing adequately at the time of the test (e.g., meets requirements for retention, resolution, tailing, and precision) [5]. |
In the field of clinical diagnostics and assay validation, the reliability of a measurement is paramount. Establishing the purpose of a method comparison study is a critical first step that frames the entire investigation, ensuring that the assessment of systematic error and bias is conducted with scientific rigor [8]. These studies are foundational to evidence-based medicine, providing a structured framework to evaluate whether a new or alternative method provides results that are comparable to a established reference [8]. A meticulously designed study purpose not only guides the experimental protocol and data analysis but also ensures the findings are transparent, objective, and repeatable, thereby supporting robust healthcare decision-making [8]. This document outlines detailed application notes and protocols for establishing the study purpose and conducting the subsequent analysis, framed within the broader context of designing a method comparison study for assay validation research.
Defining the Research Question and Objectives
Frameworks for Quantitative Clinical Research
The formulation of a precise and structured research question is the cornerstone of any successful method comparison study. A well-defined question guides every subsequent stage, from literature search and study design to data extraction and synthesis [8]. For quantitative studies focused on therapy, diagnosis, or prognosis, the PICO framework (Population, Intervention, Comparator, Outcome) is the most frequently used tool [8]. Its adaptability makes it suitable for a wide range of research questions in clinical accuracy studies.
Table 1: Adapting the PICO Framework for Method Comparison Studies
| Structure | Meaning | Application in Method Comparison Studies |
|---|---|---|
| P (Population/Patient) | The type of sample, matrix, or patient population under investigation. | Define the specific sample types (e.g., human serum, whole blood, tissue biopsies) and the relevant clinical population (e.g., healthy volunteers, patients with a specific disease staging). |
| I (Intervention/Index) | The new method or assay whose accuracy is being evaluated. | The novel diagnostic platform, a new reagent lot, or a modified assay protocol. |
| C (Comparator) | The reference standard or established method against which the new method is compared. | The gold-standard method, a FDA-approved assay, or the current standard of practice in the clinical laboratory. |
| O (Outcome) | The metrics used to quantify the agreement, error, and bias between the two methods. | Primary outcomes: Systematic error (bias), mean difference, correlation coefficients (e.g., Pearson's r). Secondary outcomes: Limits of agreement, total error, clinical decision point concordance. |
For more complex studies, the PICOTTS extension (Population, Intervention, Comparator, Outcome, Time, Type of Study, Setting) can be employed to provide additional granularity regarding the study duration, design, and environmental context [8].
Core Objectives in Assessing Systematic Error and Bias
The primary objective of a method comparison study is to quantitatively assess the agreement between two measurement procedures. This overarching goal can be broken down into several core analytical objectives:
- Quantify Systematic Error (Bias): Determine the constant and proportional differences between the new method and the reference method across the assay's measurable range [9].
- Evaluate Clinical Concordance: Assess the agreement at critical medical decision thresholds to ensure the new method does not alter patient classification [10].
- Identify Sources of Variation: Diagnose the components of variance, distinguishing systematic bias from random error to guide method improvement [9].
- Establish Acceptability: Judge whether the observed bias falls within pre-defined, clinically acceptable limits based on biological variation or clinical requirements.
Quantitative Data Analysis Methods and Protocols
Selecting the appropriate statistical methods is critical for a valid interpretation of method comparison data. The choice of method depends on the data type, distribution, and the specific research question [9]. The following table summarizes the core quantitative techniques used in assay validation.
Table 2: Quantitative Data Analysis Methods for Method Comparison Studies [9]
| Method Type | Primary Use Case | Key Outputs | Underlying Principle |
|---|---|---|---|
| Descriptive Analysis | Initial data exploration and summary. | Mean difference (Bias), Standard Deviation of differences, Correlation Coefficient (r). | Describes the central tendency and dispersion of the differences between paired measurements. |
| Bland-Altman Analysis | Visualizing and quantifying agreement between two quantitative methods. | Mean bias, Limits of Agreement (LoA = Bias ± 1.96*SD), plot of differences vs. averages. | Assesses the degree of agreement by analyzing the distribution of differences between paired measurements. |
| Passing-Bablok Regression | Deming Regression | A non-parametric regression method used when both methods have error; robust to outliers. Calculates the intercept (constant bias) and slope (proportional bias). | |
| Deming Regression | Method comparison where both methods have measurable error. | Intercept (constant bias), slope (proportional bias), confidence intervals for both. | A type of errors-in-variables regression that accounts for measurement error in both methods. |
| Equivalence Testing | To statistically prove that two methods are equivalent within a pre-specified margin. | Confidence intervals for the mean difference; conclusion of equivalence/non-inferiority. | Uses a reversal of the null hypothesis to test if the mean difference lies within a clinically acceptable range (the equivalence margin). |
Detailed Experimental Protocol: Bland-Altman Analysis
The Bland-Altman plot is a cornerstone technique for assessing systematic error and is widely used in clinical chemistry and laboratory medicine.
Protocol 1: Bland-Altman Analysis for Bias Assessment
Objective: To visualize and quantify the agreement between two clinical measurement methods and estimate the systematic error (bias).
Materials and Reagents:
- A set of N patient samples that span the clinical reporting range of the assay (typically N ≥ 40 is recommended).
- All reagents, calibrators, and controls for both the index and comparator methods.
- Standard laboratory equipment (pipettes, centrifuges, water baths, etc.).
- Statistical software capable of generating scatter plots and performing basic calculations (e.g., R, Python, GraphPad Prism, MedCalc).
Procedure:
- Sample Preparation and Measurement: a. Select and aliquot patient samples to ensure they are homogeneous and sufficient for duplicate testing on both platforms. b. Analyze each sample using both the index method (new) and the comparator method (reference) in a randomized sequence to avoid systematic drift. c. Record the paired results (ValueIndex, ValueReference) for each sample.
Data Calculation: a. For each sample pair, calculate the average of the two measurements:
Average = (Value_Index + Value_Reference) / 2. b. For each sample pair, calculate the difference between the two measurements:Difference = Value_Index - Value_Reference.Statistical Analysis: a. Calculate the mean of the differences. This is the estimated systematic bias.
Bias = Σ(Differences) / Nb. Calculate the standard deviation (SD) of the differences. c. Calculate the 95% Limits of Agreement (LoA):Upper LoA = Bias + 1.96 * SDLower LoA = Bias - 1.96 * SDVisualization (Plot Generation): a. Create a scatter plot with the Average of the two methods on the X-axis and the Difference on the Y-axis. b. Draw a solid horizontal line at the mean Bias. c. Draw dashed horizontal lines at the Upper LoA and Lower LoA. d. (Optional) Add a regression line of differences on averages to check for a relationship between bias and magnitude.
Interpretation:
- The Bias indicates the average systematic difference between the two methods. A positive bias means the new method consistently gives higher results than the reference.
- The Limits of Agreement define the range within which 95% of the differences between the two methods are expected to lie.
- The plot should be examined for any patterns, such as widening spread (heteroscedasticity) or a trend in the bias across the measurement range, which suggest more complex errors.
The Scientist's Toolkit: Essential Research Reagents and Materials
A successful method comparison study relies on the consistent quality and appropriate selection of materials. The following table details key reagent solutions and their critical functions in the context of assay validation.
Table 3: Essential Research Reagent Solutions for Method Comparison Studies
| Item Category | Specific Examples | Function in the Experiment |
|---|---|---|
| Calibrators | Master calibrator sets, traceable reference standards. | To establish a calibration curve for both the index and reference methods, ensuring both instruments are standardized to the same scale before sample measurement. |
| Quality Control (QC) Materials | Commercial QC sera at multiple levels (low, normal, high), third-party controls. | To monitor the precision and stability of both measurement systems throughout the testing period, verifying that they are operating within pre-defined performance specifications. |
| Patient Sample Panels | Fresh/frozen human serum, plasma, whole blood, or tissue extracts. | To serve as the core test material for the comparison. The panel should be commutable (behave like fresh patient samples) and cover the analytical range from low to high pathological values. |
| Assay-Specific Reagents | Enzymes, antibodies, substrates, buffers, probes, dyes. | To perform the core analytical reaction of the assay. Consistent lot numbers for all reagents should be used throughout the study to minimize a source of variation. |
| Sample Processing Tools | Pipettes (manual/electronic), pipette tips, microcentrifuge tubes, plate readers. | To ensure accurate and precise volumetric handling, sample preparation, and signal detection, which are critical for obtaining reliable and reproducible paired results. |
Data Visualization and Color Contrast Standards
Effective data visualization is key to communicating the results of a method comparison study. Adhering to accessibility standards ensures that charts and graphs are interpretable by all audiences, including those with color vision deficiencies [11].
Adherence to WCAG Contrast Guidelines
The Web Content Accessibility Guidelines (WCAG) set a benchmark for color contrast. For standard text and data visualizations, a contrast ratio of at least 4.5:1 is required (Level AA), while a higher ratio of 7:1 is recommended for Level AAA compliance [11]. This is crucial for elements like axis labels, data point legends, and trend lines. Sufficient contrast is not just about accessibility; it also improves overall readability in various lighting conditions and on different display devices [10].
Application in Scientific Diagrams
When creating diagrams, such as flowcharts with Graphviz, explicit color choices must be made to ensure clarity.
- Foreground vs. Background: Avoid using the same or similar colors for foreground elements (arrows, symbols, lines) and the background. The specified palette (
#4285F4,#EA4335,#FBBC05,#34A853,#FFFFFF,#F1F3F4,#202124,#5F6368) provides a range of high-contrast options [12]. - Node Text Contrast: For any shape (node) that contains text, the
fontcolormust be explicitly set to contrast highly with the node'sfillcolor. For example, use light-colored text (#FFFFFFor#F1F3F4) on dark fill colors (#202124,#5F6368,#4285F4) and dark-colored text (#202124) on light fill colors (#FFFFFF,#F1F3F4,#FBBC05).
The following diagram illustrates a generic workflow for a method comparison study, implementing these contrast rules.
In the rigorous process of assay validation, the comparison of methods experiment is a critical step for assessing the systematic error, or inaccuracy, of a new test method relative to an established procedure [6]. The selection of an appropriate comparative method is arguably the most significant decision in designing this study, as it forms the basis for all subsequent interpretations about the test method's performance. An ill-considered choice can compromise the entire validation effort, leading to inaccurate conclusions and potential regulatory challenges. This document provides a structured framework for researchers and drug development professionals to understand the types of comparative methods, select the most suitable one for a given context, and implement a robust comparison protocol. The principles outlined here are designed to align with modern regulatory expectations, including the FDA's 2025 Biomarker Guidance, which emphasizes that while validation parameters are similar to drug assays, the technical approaches must be adapted for endogenous biomarkers [13].
Types of Comparative Methods
The term "comparative method" encompasses a spectrum of procedures, each with distinct implications for the confidence of your results. The fundamental distinction lies between a reference method and a routine method.
Reference Method
A reference method is a thoroughly validated technique whose results are known to be correct through comparison with an accurate "definitive method" and/or through traceability to standard reference materials [6]. When differences are observed between a test method and a reference method, the errors are confidently attributed to the test method. This provides the highest level of assurance in an accuracy claim.
Routine Comparative Method
A routine comparative method is an established procedure used in daily laboratory practice whose absolute correctness may not be fully documented [6]. When large, medically unacceptable differences are observed between a test method and a routine method, additional investigative experiments (e.g., recovery and interference studies) are required to determine which method is the source of the error.
Table 1: Characteristics of Comparative Method Types
| Method Type | Key Feature | Impact on Result Interpretation | Best Use Case |
|---|---|---|---|
| Reference Method | Results are traceable to a higher-order standard. | Differences are attributed to the test method. | Definitive accuracy studies and regulatory submissions. |
| Routine Method | Established in laboratory practice; relative accuracy. | Differences require investigation to identify the source of error. | Verifying consistency with a current laboratory standard. |
The following diagram illustrates the decision-making workflow for selecting the appropriate comparative method.
Experimental Protocol for Method Comparison
A robust experimental design is essential to generate reliable data for estimating systematic error. The following protocol outlines the key steps and considerations.
Specimen Selection and Handling
- Number of Specimens: A minimum of 40 different patient specimens is recommended [6]. The quality of specimens is more critical than quantity; they should cover the entire working range of the method and represent the spectrum of diseases expected in its routine application.
- Selection Strategy: Carefully select specimens based on observed concentrations to ensure a wide range of values. For methods where specificity is a concern (e.g., different chemical principles), 100-200 specimens may be needed to identify matrix-specific interferences [6].
- Stability and Handling: Analyze specimens by the test and comparative methods within two hours of each other, unless stability data supports a longer interval [6]. Define and systematize specimen handling (e.g., preservatives, centrifugation, storage) prior to the study to prevent handling-induced differences.
Analysis Protocol
- Replication: While single measurements by each method are common practice, performing duplicate measurements on different aliquots is advantageous. Duplicates help identify sample mix-ups, transposition errors, and confirm whether large differences are repeatable [6].
- Time Period: Conduct the study over a minimum of 5 days using multiple analytical runs to minimize bias from a single run. Extending the study over 20 days (with 2-5 specimens per day) aligns with long-term precision studies and incorporates more routine variation [6].
- Data Collection Order: Analyze specimens in a randomized order to avoid systematic bias related to run sequence.
Table 2: Key Research Reagents and Materials for Method Comparison Studies
| Material / Reagent | Function in the Experiment | Key Considerations |
|---|---|---|
| Patient Specimens | The core test material used for comparison across methods. | Must be stable, cover the analytical measurement range, and be clinically relevant. |
| Reference Method | Provides the benchmark for assessing the test method's accuracy. | Should be a high-quality method with documented traceability. |
| Quality Control (QC) Pools | Monitors the precision and stability of both methods during the study. | Should span low, medium, and high clinical decision levels. |
| Calibrators | Ensures both methods are properly calibrated according to manufacturer specifications. | Traceability of calibrators should be documented. |
Data Analysis and Interpretation
Graphical Analysis
The first step in data analysis is always visual inspection.
- Difference Plot: For methods expected to show 1:1 agreement, plot the difference (Test Method result - Comparative Method result) on the y-axis against the Comparative Method result on the x-axis [6]. This plot helps visualize systematic errors; points should scatter randomly around the zero line.
- Comparison Plot (Scatter Diagram): Plot the Test Method result (y-axis) against the Comparative Method result (x-axis) [6]. This is useful for visualizing the overall relationship and identifying the line of best fit, especially when 1:1 agreement is not expected.
Statistical Analysis
Statistical calculations provide numerical estimates of systematic error.
- Linear Regression: For data covering a wide analytical range, use linear regression (Y = a + bX) to estimate the slope (b, proportional error) and y-intercept (a, constant error) [6]. The systematic error (SE) at a critical medical decision concentration (Xc) is calculated as: SE = (a + bXc) - Xc.
- Correlation Coefficient (r): Calculate 'r' primarily to assess if the data range is wide enough for reliable regression. An 'r' value ≥ 0.99 suggests reliable estimates [6].
- Bias (for Narrow Range Data): For analytes with a narrow range (e.g., electrolytes), calculate the average difference (bias) between the two methods using a paired t-test [6].
The following workflow diagram summarizes the key steps in the analysis and interpretation phase.
Regulatory and Practical Considerations
The Context of Use (CoU) is a paramount concept emphasized by regulatory bodies and organizations like the European Bioanalysis Forum (EBF) [13]. The validation approach and the acceptability of the comparative method should be justified based on the intended use of the assay. For biomarker assays, the FDA's 2025 guidance maintains that while the validation parameters (accuracy, precision, etc.) are similar to those for drug assays, the technical approaches must be adapted to demonstrate suitability for measuring endogenous analytes [13]. It is critical to remember that this guidance does not require biomarker assays to technically follow the ICH M10 approach for bioanalytical method validation. Sponsors are encouraged to discuss their validation plans, including the choice of a comparative method, with the appropriate FDA review division early in development [13].
For researchers designing a method comparison study for assay validation, a deep understanding of key analytical performance parameters is fundamental. These parameters provide the statistical evidence required to demonstrate that an analytical procedure is reliable and fit for its intended purpose, a core requirement in drug development and regulatory submissions [14]. This document outlines the core concepts of bias, precision, Limit of Blank (LoB), Limit of Detection (LoD), Limit of Quantitation (LoQ), and linearity. It provides detailed experimental protocols for their determination, framed within the context of a method validation life cycle, which begins with defining an Analytical Target Profile (ATP) and employs a risk-based approach as emphasized in modern guidelines like ICH Q2(R2) and ICH Q14 [15].
The following workflow diagram illustrates the logical relationship and sequence for establishing these key performance parameters in an assay validation study.
Core Parameter Definitions and Statistical Formulas
Bias measures the systematic difference between a measurement value and an accepted reference or true value, indicating the accuracy of the method [14]. Precision describes the dispersion between independent measurement results obtained under specified conditions, typically divided into repeatability (within-run), intermediate precision (within-lab), and reproducibility (between labs) [15].
The limits of Blank, Detection, and Quantitation define the lower end of an assay's capabilities. The Limit of Blank (LoB) is the highest apparent analyte concentration expected to be found when replicates of a blank sample containing no analyte are tested [16]. The Limit of Detection (LoD) is the lowest analyte concentration that can be reliably distinguished from the LoB [16]. The Limit of Quantitation (LoQ) is the lowest concentration at which the analyte can be quantified with acceptable accuracy and precision, meeting predefined goals for bias and imprecision [16]. Finally, Linearity is the ability of a method to elicit test results that are directly, or through a well-defined mathematical transformation, proportional to the concentration of the analyte within a given Range [15].
Table 1: Summary of Key Performance Parameters
| Parameter | Definition | Sample Type | Typical Replicates (Verification) | Key Statistical Formula/Description |
|---|---|---|---|---|
| Bias | Systematic difference from a true value [14]. | Certified Reference Material (CRM) or sample vs. reference method. | 20 | ( \text{Bias} = \text{Mean}{measured} - \text{True}{value} ) |
| Precision | Dispersion between independent measurements [15]. | Quality Control (QC) samples at multiple levels. | 20 per level | ( \text{SD} = \sqrt{\frac{\sum(x_i - \bar{x})^2}{n-1}} ) ; ( \text{CV} = \frac{\text{SD}}{\bar{x}} \times 100\% ) |
| LoB | Highest apparent concentration of a blank sample [16]. | Sample containing no analyte (blank). | 20 | ( \text{LoB} = \text{mean}{blank} + 1.645(\text{SD}{blank}) ) |
| LoD | Lowest concentration reliably distinguished from LoB [16]. | Low-concentration sample near expected LoD. | 20 | ( \text{LoD} = \text{LoB} + 1.645(\text{SD}_{low concentration sample}) ) |
| LoQ | Lowest concentration quantified with acceptable accuracy and precision [16]. | Low-concentration sample at or above LoD. | 20 | ( \text{LoQ} \geq \text{LoD} ); Defined by meeting pre-set bias & imprecision goals. |
| Linearity | Proportionality of response to analyte concentration [15]. | Minimum of 5 concentrations across claimed range. | 2-3 per concentration | Polynomial regression (e.g., 1st order): ( y = ax + b ) |
Detailed Experimental Protocols
Protocol for Determining Limit of Blank (LoB) and Limit of Detection (LoD)
The CLSI EP17 guideline provides a standard framework for determining LoB and LoD [16]. This protocol requires measuring replicates of both a blank sample and a low-concentration sample.
- Step 1: Prepare Samples. For LoB, use a blank sample confirmed to contain no analyte (e.g., a zero calibrator or appropriate matrix). For LoD, prepare a low-concentration sample that is expected to be slightly above the LoB [16].
- Step 2: Data Acquisition. Measure a minimum of 20 replicates each for the blank and the low-concentration sample. For a full establishment, 60 replicates are recommended to capture method variability; 20 is typical for verification [16].
- Step 3: Data Analysis. Calculate the mean and standard deviation (SD) for the blank measurements. Compute the LoB as ( \text{LoB} = \text{mean}{blank} + 1.645(\text{SD}{blank}) ). This defines the concentration value where 95% of blank measurements fall below, assuming a Gaussian distribution [16]. Next, calculate the mean and SD for the low-concentration sample. Compute the provisional LoD as ( \text{LoD} = \text{LoB} + 1.645(\text{SD}_{low concentration sample}) ) [16].
- Step 4: Verification. Test a sample with a concentration at the provisional LoD. No more than 5% of the results (about 1 in 20) should fall below the LoB. If a higher proportion falls below, the LoD must be re-estimated using a sample with a higher concentration [16].
Protocol for Determining Limit of Quantitation (LoQ)
The LoQ is the point at which a method transitions from merely detecting an analyte to reliably quantifying it.
- Step 1: Prepare Samples. Prepare a series of samples at concentrations at or above the previously determined LoD.
- Step 2: Data Acquisition. Analyze multiple replicates (e.g., 20) for each concentration level.
- Step 3: Data Analysis. For each concentration, calculate the bias and imprecision (as %CV). The LoQ is the lowest concentration where the measured bias and %CV meet pre-defined acceptance criteria (e.g., ≤20% bias and ≤20% CV, or tighter limits based on the assay's intended use) [16]. The "functional sensitivity" of an assay, often defined as the concentration yielding a 20% CV, is closely related to the LoQ [16].
Protocol for Verifying Linearity and Range
The linearity of a method and its corresponding reportable range are verified using a polynomial regression method, as described in CLSI EP06 [14].
- Step 1: Prepare Samples. Create a minimum of 5 concentrations that span the entire claimed analytical measurement range (AMR), from the lowest to the highest reportable value. These can be prepared by serial dilution or using certified linearity materials.
- Step 2: Data Acquisition. Analyze each concentration in duplicate or triplicate, randomizing the order of analysis to avoid systematic drift.
- Step 3: Data Analysis. Perform regression analysis on the mean measured value versus the expected concentration. First, fit a first-order (linear) model: ( y = ax + b ). Then, fit a second-order model: ( y = a + bx + cx^2 ).
- Step 4: Interpretation. The method is considered linear if the second-order coefficient ('c') is not statistically significantly different from zero. If it is significant, the relationship may be curvilinear, and the range may need to be constrained, or mathematical transformation may be required before quantification [14]. The verified range is the interval over which acceptable linearity, accuracy, and precision are confirmed.
The Scientist's Toolkit: Essential Research Reagents and Materials
Table 2: Key Research Reagent Solutions for Method Validation Studies
| Item | Function and Importance in Validation |
|---|---|
| Certified Reference Materials (CRMs) | Provides an traceable standard with a defined value and uncertainty; essential for the unambiguous determination of method bias and for establishing accuracy [14]. |
| Matrix-Matched Blank Samples | A sample (e.g., serum, buffer) identical to the test matrix but devoid of the analyte; critical for conducting LoB studies and for assessing specificity and potential matrix effects [16]. |
| Quality Control (QC) Materials | Stable materials with known concentrations (low, mid, high); used throughout the validation and during routine use to monitor method precision (repeatability and intermediate precision) and long-term stability [14]. |
| Linearit y/Calibration Verification Material | A set of samples with defined concentrations spanning the entire claimed range; used to verify the analytical measurement range (AMR) and the linearity of the method [14]. |
| Stable Analytic Stocks | High-purity, stable preparations of the analyte for spiking experiments; used in recovery studies to assess accuracy and in the preparation of LoD/LoQ and linearity samples [16]. |
A rigorous method comparison study is built upon the precise determination of bias, precision, LoB, LoD, LoQ, and linearity. The experimental protocols outlined herein, grounded in CLSI and ICH guidelines, provide a roadmap for generating the high-quality data necessary to prove an analytical method is fit for its purpose. By integrating these performance parameters within a phase-appropriate, lifecycle approach and starting with a clear Analytical Target Profile, researchers can efficiently design robust assay validation studies that meet the stringent demands of modern drug development [17] [15].
Blueprint for Execution: Designing and Running Your Comparison Study
In the context of assay validation research, a method comparison study is fundamental for demonstrating that a new or modified analytical method produces results comparable to a known reference method. These studies are critical in pharmaceutical development, clinical diagnostics, and biomedical research, where measurement accuracy and reliability directly impact data integrity and decision-making. The design of these studies requires careful consideration of three interdependent components: sample size (the number of independent biological samples or subjects to include), range (the concentration interval of the analyte that the method can quantitatively measure), and replication strategy (the approach for repeated measurements to estimate precision). Proper experimental design ensures that studies yield scientifically valid, reproducible, and reliable data capable of detecting clinically or practically significant differences between methods.
The fundamental objective is to strike a balance between scientific rigor and practical feasibility. An underpowered study with insufficient sample size may fail to detect important differences between methods, while an excessively large study wastes resources and potentially exposes more subjects than necessary to experimental procedures. Similarly, an inadequate replication strategy can lead to misleading precision estimates, and an insufficient analytical range may limit the clinical utility of the method. This protocol provides detailed guidance on these three critical elements to ensure robust method comparison studies.
Determining Appropriate Sample Size
Fundamental Principles and Requirements
Sample size calculation provides an objective basis for determining the number of samples or subjects needed to achieve the study's primary objective. In method comparison studies, this typically involves detecting a specified difference between methods (effect size) with adequate statistical power. All included studies reported a sample size, but only approximately 33% provided any justification for their chosen sample size, and of those, not all reported using statistical sample size formulae [18]. This represents a significant gap in methodological rigor that researchers should address.
The sample size for a method comparison study depends primarily on the statistical parameter used to assess agreement and the required precision of that estimate. Studies measuring continuous endpoints (e.g., concentration values) had a median sample size of 50 (IQR: 25 to 100), while those focusing on categorical endpoints (e.g., binary outcomes) required larger median sample sizes of 119 (IQR: 50 to 271) [18]. This difference reflects the generally greater information content in continuous measurements compared to categorical data.
Table 1: Observed Sample Sizes in Agreement Studies by Statistical Method
| Statistical Method | Endpoint Type | Median Sample Size | Interquartile Range (IQR) |
|---|---|---|---|
| Bland-Altman Limits of Agreement | Continuous | 65 | 35 - 124 |
| Intraclass Correlation Coefficient (ICC) | Continuous | 42 | 27 - 65 |
| Kappa Coefficients | Categorical | 71 | 50 - 233 |
| Significance Tests (e.g., paired t-test) | Continuous | 62 | 28 - 108 |
| Correlation Coefficients | Continuous | 50 | 30 - 89 |
Practical Steps for Sample Size Calculation
Before calculating sample size, researchers must define several key parameters:
Define the Primary Statistical Analysis: The choice of statistical method for assessing agreement directly influences sample size requirements. Bland-Altman Limits of Agreement is the most common approach for continuous variables, while Kappa statistics are preferred for categorical variables [18]. Each method has different sample size requirements, as shown in Table 1.
Determine the Effect Size of Practical Significance: The effect size represents the minimum difference between methods that would be considered clinically or practically important. This is often the most challenging parameter to specify. When possible, base this value on biological variation, clinical decision points, or regulatory requirements. If specific information is unavailable, Cohen's convention of small (0.2), medium (0.5), or large (0.8) standardized effect sizes can provide initial guidance, though these arbitrary values require careful judgment regarding their appropriateness for the specific research context [19].
Specify Statistical Power and Confidence Level: Conventional values are 80% or 90% for power (probability of detecting a true effect) and 95% for confidence level (precision of estimates). For example, to compare the mean difference between two groups using an effect size of 0.5 (medium) with a power of 80%, the total sample size required is 128 participants (64 per group) [19].
Use Specialized Software for Calculations: Sample size calculation need not be done manually. Several specialized software tools can assist, including:
- PASS (Power Analysis and Sample Size)
- G*Power (a free statistical power analysis tool)
- PS Power and Sample Size Calculation
- R packages (e.g., pwr, BlandAltmanLeh)
Engage in Team Discussion: Research team members should discuss the calculated sample size to ensure it is appropriate for the research question, available data records, research timeline, and budgetary constraints [19].
Sample Size for Descriptive Studies
For studies focused on estimating population parameters (e.g., mean concentration or prevalence) rather than comparing methods, sample size calculation follows a different approach. The required sample size depends on:
- Confidence level (typically 95%)
- Margin of error (the maximum acceptable difference between the sample estimate and the true population value)
- Expected standard deviation or proportion (based on prior knowledge or pilot studies)
For example, estimating a prevalence of 15% with a margin of error of ±5% and 95% confidence requires approximately 196 samples [19].
Establishing the Analytical Range
Defining the Measurable Interval
The analytical range (also called the reportable range) represents the interval between the lowest and highest concentrations of an analyte that the method can measure with acceptable accuracy and precision. Properly defining this range is essential for ensuring the method will be clinically useful across the concentrations encountered in practice.
The range should encompass all medically important decision levels for the test. For example, cholesterol has medical decision levels at 200 mg/dL and 240 mg/dL according to NCEP recommendations, while glucose is typically interpreted at multiple decision levels (50 mg/dL for hypoglycemia, 120 mg/dL for fasting samples, 160 mg/dL for glucose tolerance tests, and higher levels for monitoring diabetic patients) [20].
Determining Limits of Quantification
The limits of quantification define the boundaries of the analytical range and include:
- Lower Limit of Quantification (LLOQ): The lowest concentration of an analyte that can be quantitatively measured with acceptable precision and accuracy
- Upper Limit of Quantification (ULOQ): The highest concentration of an analyte that can be quantitatively measured with acceptable precision and accuracy
To establish these limits, prepare samples at progressively decreasing (for LLOQ) or increasing (for ULOQ) concentrations and analyze multiple replicates (typically n ≥ 5) at each concentration. The LLOQ is the lowest concentration where both precision (CV ≤ 20%) and accuracy (mean value within ±20% of theoretical concentration) meet acceptance criteria. Similar criteria apply for ULOQ [21].
Table 2: Key Parameters for Establishing Analytical Range
| Parameter | Definition | Experimental Approach | Acceptance Criteria |
|---|---|---|---|
| Lower Limit of Quantification (LLOQ) | Lowest concentration measurable with acceptable accuracy and precision | Analyze replicates (n≥5) of decreasing concentrations | CV ≤ 20%, Accuracy within ±20% |
| Upper Limit of Quantification (ULOQ) | Highest concentration measurable with acceptable accuracy and precision | Analyze replicates (n≥5) of increasing concentrations | CV ≤ 20%, Accuracy within ±20% |
| Medical Decision Levels | Concentrations where clinical interpretation changes | Literature review, clinical guidelines | Should fall within analytical range |
| Linearity | Ability to obtain results proportional to analyte concentration | Analyze serial dilutions of high-concentration sample | R² ≥ 0.95, deviations < 5% |
Designing Replication Strategies
Purpose of Replication Experiments
Replication experiments are performed to estimate the imprecision or random error of an analytical method. All measurement methods are subject to some random variation, where repeated measurements of the same sample yield slightly different results. The purpose of replication is to quantify this variation under normal operating conditions, which is essential for understanding the inherent variability of the method and determining whether it meets performance requirements [20].
Factors Influencing Replication Design
Several critical factors must be considered when designing replication experiments:
Time Period: The duration of the experiment significantly impacts the interpretation of results.
- Within-run: Analyses performed consecutively in a single analytical run; represents the best-case scenario for method performance.
- Within-day: Analyses performed in multiple runs within the same day; captures additional sources of variation from run-to-run changes.
- Between-day: Analyses performed over multiple days (typically 20+ days); provides the most realistic estimate of total imprecision encountered in routine practice [20].
Sample Matrix: The materials present in a sample constitute its matrix (e.g., serum, urine, whole blood). Use test samples with a matrix as close as possible to the actual patient specimens. Available options include:
- Standard solutions (simpler matrix, may provide optimistic estimates)
- Control solutions (commercially available, matrix similar to patient samples)
- Patient pools (fresh patient samples, best representation of real conditions) [20]
Number of Concentrations: Test at least 2-3 different concentrations that represent medically important decision levels. For example, for cholesterol, include concentrations at 200 mg/dL and 240 mg/dL; for glucose, include levels at 50 mg/dL, 120 mg/dL, and potentially higher concentrations for diabetic monitoring [20].
Number of Replicates: A minimum of 20 replicates per concentration is generally recommended for reliable estimates of imprecision. While more replicates provide better estimates, practical considerations often limit the number to 20 [20].
Recommended Replication Protocol
The following replication strategy is recommended for comprehensive precision estimation:
Short-term Imprecision:
- Select at least 2 different control materials representing low and high medical decision concentrations.
- Analyze 20 replicates of each material within a single run or within one day.
- Calculate mean, standard deviation (SD), and coefficient of variation (CV) for each material.
- Acceptance criterion: CV < 0.25 × TEa (where TEa is the allowable total error) [20].
Long-term Imprecision:
- Analyze 1 sample of each control material on 20 different days.
- Calculate mean, SD, and CV for each material across all days.
- Acceptance criterion: CV < 0.33 × TEa [20].
Diagram 1: Replication Experiment Workflow. This diagram illustrates the sequential steps for designing and executing replication studies to estimate method imprecision.
Data Analysis and Interpretation
For replication experiments, calculate the following statistical parameters for each concentration level:
- Mean (x̄): Average of all measurements
- Standard Deviation (s): Measure of dispersion around the mean
- Coefficient of Variation (CV): Relative standard deviation (CV = [s/x̄] × 100)
For duplicate measurements of patient specimens, calculate the standard deviation from the differences (d) between duplicates using the formula: s = √(Σd²/2n) [20]
It is useful to visualize the replication data using histograms to display the distribution of results and better understand the magnitude of random variation expected for individual measurements.
Integrated Experimental Design
Comprehensive Workflow for Method Comparison Studies
A robust method comparison study integrates sample size determination, range establishment, and replication strategies into a cohesive experimental design. The following workflow provides a structured approach:
Diagram 2: Integrated Experimental Design Workflow. This diagram shows the sequential relationship between key components in designing a method comparison study.
The Scientist's Toolkit: Essential Research Reagents and Materials
Table 3: Essential Research Reagents and Materials for Method Validation Studies
| Item Category | Specific Examples | Function in Method Validation |
|---|---|---|
| Reference Materials | Certified Reference Materials (CRMs), Standard solutions | Provide known analyte concentrations for calibration and trueness assessment |
| Quality Control Materials | Commercial control sera, Patient pools, Spiked samples | Monitor method performance over time and estimate precision |
| Clinical Samples | Patient serum/plasma, Urine, CSF, Tissue homogenates | Assess method performance with real-world matrices |
| Calibrators | Standard curves with known concentrations | Establish relationship between signal response and analyte concentration |
| Matrix Blank | Analyte-free matrix (e.g., charcoal-stripped serum) | Assess specificity and detect potential interference |
| Stability Materials | Aliquots stored under various conditions | Evaluate sample stability under different storage conditions |
Proper experimental design for method comparison studies requires careful integration of sample size determination, analytical range establishment, and replication strategies. The protocols outlined in this document provide a structured approach to ensure studies are adequately powered, cover clinically relevant concentrations, and generate reliable precision estimates. By following these guidelines, researchers can produce method validation data that meets scientific and regulatory standards, ultimately supporting the development of robust analytical methods for drug development and clinical practice.
Remember that while these protocols provide general guidance, specific applications may require modifications based on the particular methodology, analyte characteristics, and intended use of the assay. Always document any deviations from standard protocols and provide rationale for design decisions.
Within the framework of a method comparison study for assay validation, the selection and handling of specimens are foundational activities that directly determine the validity and reliability of the study's conclusions. Proper practices ensure that the estimated bias between the test and comparative method accurately reflects analytical performance, rather than being confounded by pre-analytical variables. This protocol outlines detailed procedures for selecting and handling specimens to ensure stability and cover the clinically relevant range, thereby supporting the overall thesis that a well-designed method comparison is critical for robust assay validation.
Core Principles of Specimen Selection
The objective of specimen selection is to obtain a set of patient samples that will challenge the methods across the full spectrum of conditions encountered in routine practice and enable a realistic estimation of systematic error [6]. The following principles are critical:
- Covering the Clinical Range: Specimens should be carefully selected to cover the entire working range of the method, including medically important decision concentrations [7] [6]. This is more critical than the sheer number of specimens, as a wide range of test results allows for a comprehensive assessment of method comparability.
- Representing Pathological Diversity: The specimen pool should represent the spectrum of diseases and conditions expected during the routine application of the method [6]. This helps identify potential interferences specific to certain patient populations.
- Utilizing Fresh Patient Specimens: The use of fresh patient specimens is preferred over stored or spiked samples, as they best represent the matrix and potential interferents encountered in real-world testing [7].
Specimen Handling and Stability Protocols
Maintaining specimen integrity from collection through analysis is paramount. Differences observed between methods should be attributable to analytical systematic error, not specimen degradation.
Stability and Timing
- Stability Definition: Specimens should generally be analyzed by both the test and comparative method within two hours of each other to minimize the effects of analyte deterioration [7] [6]. For tests with known shorter stability (e.g., ammonia, lactate), this window must be significantly shortened.
- Extended Studies: For comparison studies extended over multiple days, specimen handling must be carefully defined and systematized. Stability can be improved for some tests by adding preservatives, separating serum or plasma from cells, refrigeration, or freezing [6]. The chosen stabilization method must be validated and applied consistently.
Sample Handling Workflow
The following diagram illustrates the critical path for specimen handling in a method comparison study.
Experimental Design and Protocol
A robust experimental design minimizes the impact of random variation and ensures that systematic error is accurately estimated.
Specimen Volume and Replication
- Sample Size: A minimum of 40 different patient specimens should be tested, with larger numbers (100-200) being preferable to identify unexpected errors due to interferences or sample matrix effects, especially when the new method uses a different principle of measurement [7] [6].
- Replicate Measurements: While single measurements by each method are common practice, performing duplicate measurements is highly advantageous. Duplicates should be two different aliquots analyzed in different runs or at least in a randomized order—not simple back-to-back replicates. This provides a check for sample mix-ups, transposition errors, and other mistakes, and helps confirm whether large observed differences are real or artifactual [6].
Study Duration and Sample Analysis
- Time Period: The experiment should be conducted over several different analytical runs on different days to minimize the impact of systematic errors occurring in a single run. A minimum of 5 days is recommended, but extending the study over a longer period (e.g., 20 days) while analyzing fewer specimens per day is preferable [6].
- Sample Sequence: The sample analysis sequence should be randomized to avoid carry-over effects and other sequence-related biases [7].
The table below summarizes the key quantitative parameters for designing the specimen selection and handling protocol.
Table 1: Specimen Selection and Handling Protocol Specifications
| Parameter | Minimum Recommendation | Enhanced Recommendation | Comments |
|---|---|---|---|
| Number of Specimens | 40 | 100 - 200 | Larger numbers help assess method specificity and identify matrix effects [7] [6]. |
| Clinical Range Coverage | Cover medically important decision points | Even distribution across the entire reportable range | Carefully select specimens based on observed concentrations [6]. |
| Analysis Stability Window | Within 2 hours | As short as possible for labile analytes | Applies to the time between analysis by the test and comparative method [7] [6]. |
| Study Duration | 5 days | 20 days | Mimics real-world conditions and incorporates more routine variation [6]. |
| Replicate Measurements | Single measurement | Duplicate measurements | Duplicates are from different aliquots, analyzed in different runs/order [6]. |
| Sample State | Fresh patient specimens | - | Avoids changes associated with storage; use spiked samples only for supplementation [7]. |
The Scientist's Toolkit: Essential Research Reagent Solutions
The following table details key materials and reagents essential for executing the specimen handling protocols in a method comparison study.
Table 2: Essential Materials for Specimen Handling and Stability
| Item | Function & Application |
|---|---|
| Validated Sample Collection Tubes | Ensures sample integrity from the moment of collection. Tubes must be compatible with both the test and comparative methods (e.g., correct anticoagulant, no interfering substances). |
| Aliquoting Tubes/Vials | For dividing the primary sample into portions for analysis by the two methods and for any repeat testing. Must be made of materials that do not leach or adsorb the analyte. |
| Stable Reference Materials/Controls | Used to verify the calibration and ongoing performance of both the test and comparative methods throughout the study period. |
| Documented Preservatives | Chemical additives (e.g., sodium azide, protease inhibitors) used to extend analyte stability for specific tests, following validated protocols. |
| Temperature-Monitored Storage | Refrigerators (2-8°C) and freezers (-20°C or -70°C) with continuous temperature logging to ensure specimen stability when immediate analysis is not possible. |
In the context of a method comparison study for assay validation, time and run-to-run variation are critical components of the data collection protocol. Incorporating these factors is essential for robust method evaluation, as it ensures that the assessment of a candidate method's performance (e.g., its bias relative to a comparative method) reflects the typical variability encountered in routine laboratory practice. A well-designed protocol that accounts for these sources of variation increases the reliability and generalizability of the study's conclusions, ultimately supporting confident decision-making in drug development and clinical research.
Protocol for Data Collection
Core Design Considerations
Table 1: Protocol for Integrating Time and Run-to-Run Variation
| Protocol Component | Detailed Methodology | Rationale & Key Parameters |
|---|---|---|
| Time Period | Conduct the study over a minimum of 5 days, and ideally extend it to 20 days or longer [6]. Perform analyses in several separate analytical runs on different days [6]. | This design minimizes the impact of systematic errors that could occur in a single run and captures long-term sources of variation, providing a more realistic estimate of method performance [6]. |
| Run-to-Run Variation | Incorporate a minimum of 5 to 8 independent analytical runs conducted over the specified time period. Within each run, analyze a unique set of patient specimens [22]. | Using multiple runs captures the random variation inherent in the analytical process itself, from factors like reagent re-constitution, calibration, and operator differences. |
| Sample Replication | For each unique patient sample within a run, perform duplicate measurements. Ideally, these should be from different sample cups analyzed in a different order, not immediate back-to-back replicates [6]. | Duplicates provide a check for measurement validity, help identify sample mix-ups or transposition errors, and allow for the assessment of within-run repeatability [6]. |
| Specimen Selection & Stability | Select a minimum of 40 different patient specimens to cover the entire working range of the method [6]. Analyze specimens by the test and comparative methods within two hours of each other, unless specimen stability requires a shorter window [6]. | A wide concentration range is more important than a large number of specimens for reliable statistical estimation. Simultaneous (or near-simultaneous) analysis ensures observed differences are due to analytical error, not real physiological changes [6] [22]. |
Experimental Workflow
The following diagram illustrates the logical workflow for a data collection protocol that incorporates time and run-to-run variation.
The Scientist's Toolkit: Essential Research Reagents & Materials
Table 2: Key Reagent Solutions and Materials for Method Comparison Studies
| Item | Function in the Protocol |
|---|---|
| Candidate Method Reagents | The new test reagents (e.g., specific reagent lots) whose performance is being evaluated against a comparative method. Their stability over the study duration is critical [23]. |
| Comparative Method Reagents | The reagents used by the established, reference, or currently in-use method. These serve as the benchmark for comparison [6] [24]. |
| Characterized Patient Specimens | A panel of 40 or more unique patient samples that span the analytical measurement range and represent the expected pathological conditions. These are the core "test subjects" for the method comparison [6] [22]. |
| Quality Control Materials | Materials with known target values analyzed at the beginning and/or end of each run to verify that both the candidate and comparative methods are performing within acceptable parameters before study data is accepted [6]. |
| Data Management System (e.g., Validation Manager) | Specialized software used to plan the study, record instrument and reagent lot information, import results, automatically manage data pairs, perform statistical calculations, and generate reports [23]. |
In assay validation research, method comparison studies are fundamental for determining whether a new measurement method (test method) can satisfactorily replace or be used interchangeably with an existing procedure (comparative method). These studies are critical in pharmaceutical development, clinical chemistry, and biomarker research, where accurate and reliable measurements directly impact research conclusions and therapeutic decisions. The core question addressed is whether two methods provide equivalent results without affecting experimental outcomes or the scientific validity of data [7] [6].
Proper statistical analysis in method comparison moves beyond simple correlation to quantify agreement and identify specific systematic errors. While correlation analysis examines whether two variables are related, it cannot determine whether the methods agree [25]. As demonstrated in a glucose measurement example, two methods can have a perfect correlation (r = 1.00) yet exhibit substantial, clinically unacceptable differences [7]. Similarly, t-tests often fail to detect clinically meaningful differences, especially with small sample sizes [7]. Consequently, specialized statistical approaches are required, primarily including Bland-Altman analysis, Deming regression, and Passing-Bablok regression, each with specific applications and underlying assumptions [26] [25] [27].
The following table summarizes the key statistical methods used in method comparison studies, their primary applications, and fundamental assumptions.
Table 1: Statistical Methods for Method Comparison Studies
| Method | Primary Use | Key Assumptions | Data Requirements | Outputs |
|---|---|---|---|---|
| Bland-Altman Analysis [28] [25] | Assess agreement between two methods; identify systematic bias and outliers | Differences are normally distributed; no specific assumption about measurement error distribution | Paired measurements from each subject | Mean difference (bias); limits of agreement (mean ± 1.96 SD) |
| Simple Linear Regression [6] | Model relationship between methods when reference method has negligible error | Only Y variable measured with error; homoscedastic residuals | Paired measurements | Slope (proportional difference); intercept (constant difference) |
| Deming Regression [26] [29] | Estimate systematic error when both methods have measurement errors | Errors for both variables normally distributed; error ratio known or estimable | Paired measurements; error ratio or replicates for estimation | Slope with CI; intercept with CI; accounts for errors in both variables |
| Passing-Bablok Regression [30] [27] | Non-parametric method for estimating systematic error | Linear relationship; variables highly correlated; no distributional assumptions | Paired measurements covering clinical range | Robust slope and intercept with CIs; resistant to outliers |
Detailed Experimental Protocol for Method Comparison
Study Design and Sample Planning
A properly designed method comparison study requires careful experimental planning to ensure results are reliable and scientifically valid.
Sample Size Determination: A minimum of 40 patient specimens is recommended, with 100 specimens preferable to identify unexpected errors from interferences or sample matrix effects [7] [6]. For Passing-Bablok regression, sample sizes of 40-90 specimens are suggested, with at least 30 being the absolute minimum [27]. Larger sample sizes improve the precision of agreement estimates and enhance the ability to detect proportional differences between methods.
Sample Selection and Handling: Specimens should be selected to cover the entire clinically meaningful measurement range rather than simply representing random samples [7] [6]. This ensures the comparison is relevant across all potential values encountered in practice. Specimens should be analyzed within their stability period, preferably within 2 hours of each other between methods, unless stability data supports longer intervals [6]. Sample handling should be standardized to prevent introduced variability.
Measurement Protocol: The experiment should be conducted over multiple days (minimum of 5 days) to capture typical routine variability [7] [6]. When possible, duplicate measurements should be performed by both methods to minimize random variation effects and help identify sample mix-ups or transcription errors [6]. The analysis sequence should be randomized to avoid carry-over effects or systematic timing biases.
Data Collection Procedures
Measurement Process: Analyze each sample with both the test and comparative methods under identical conditions where possible. For reagent stability assessment, follow manufacturer specifications and validate stability under actual usage conditions [31]. Include appropriate controls to monitor assay performance throughout the study.
Data Recording and Management: Record all measurements systematically with appropriate metadata. Perform initial graphical analysis during data collection to identify discrepant results while specimens are still available for reanalysis [6].
Statistical Analysis Procedures
Bland-Altman Analysis
The Bland-Altman plot (also known as the Tukey mean-difference plot) provides a visual assessment of agreement between two measurement methods [28] [25].
Calculation Protocol:
- Calculate the mean of each pair of measurements:
Mean = (Method A + Method B)/2 - Calculate the difference between each pair:
Difference = Method A - Method B - Plot the means (x-axis) against the differences (y-axis) in a scatter plot
- Calculate the mean difference (bias):
d̄ = Σ(Method A - Method B)/n - Calculate the standard deviation (SD) of the differences
- Compute Limits of Agreement:
d̄ ± 1.96 × SD[25]
Interpretation Guidelines:
- The mean difference represents the systematic bias between methods
- The limits of agreement define the range within which 95% of differences between methods are expected to fall
- Outliers can be identified as points outside the limits of agreement
- The clinical relevance of agreement is determined by comparing the bias and limits of agreement to predefined acceptable differences based on biological variation or clinical requirements [25]
Figure 1: Bland-Altman Analysis Workflow - This diagram illustrates the step-by-step process for creating and interpreting a Bland-Altman plot to assess agreement between two measurement methods.
Deming Regression
Deming regression is used when both measurement methods contain random errors, unlike simple linear regression which assumes only the Y variable has measurement error [26] [29].
Calculation Protocol:
- Determine the error ratio (λ):
λ = (SD of method X error / SD of method Y error)² - Calculate the slope (B):
- Calculate the intercept (A):
Intercept = ȳ - Slope × x̄ - Compute confidence intervals for slope and intercept using jackknife or bootstrap methods [29]
Interpretation Guidelines:
- Slope ≠ 1 indicates proportional bias between methods
- Intercept ≠ 0 indicates constant bias between methods
- The 95% confidence intervals for slope and intercept determine if deviations from 1 and 0, respectively, are statistically significant
- Weighted Deming regression should be used when measurement errors are proportional to the analyte concentration [29]
Passing-Bablok Regression
Passing-Bablok regression is a non-parametric method that does not assume normal distribution of errors and is robust against outliers [30] [27].
Calculation Protocol:
- Calculate all possible pairwise slopes:
Sij = (Yj - Yi) / (Xj - Xi)for i < j - Exclude slopes with 0/0 or -1/0 denominators
- Apply correction factor (K): Count the number of slopes less than -1
- Calculate the slope as the median of all slopes:
B = median(Sij) - Calculate the intercept:
A = median(Yi - B × Xi) - Compute confidence intervals using bootstrap or approximate methods [27]
Interpretation Guidelines:
- Use the Cusum test for linearity to verify the linear relationship assumption
- Slope ≠ 1 indicates proportional differences between methods
- Intercept ≠ 0 indicates constant differences between methods
- Residual analysis helps identify outliers and nonlinearity
- The method requires variables with high correlation and linear relationship [27]
Method Selection Framework
Selecting the appropriate statistical method depends on the error structure of the measurement methods and the data characteristics. The following decision framework guides method selection.
Figure 2: Method Selection Decision Framework - This flowchart provides a systematic approach for selecting the most appropriate statistical method based on measurement error characteristics and data properties.
Integration of Multiple Approaches
Comprehensive method comparison should integrate multiple statistical approaches rather than relying on a single method:
- Begin with graphical analysis (scatter plots and difference plots) to identify outliers, nonlinear relationships, and heteroscedasticity [7] [6]
- Use Bland-Altman analysis to assess overall agreement and identify systematic biases [28] [25]
- Apply Deming or Passing-Bablok regression to quantify constant and proportional errors, depending on error structure and distributional assumptions [26] [27]
- Supplement with residual analysis to verify model assumptions and identify patterns not captured by primary analyses [27]
Research Reagent Solutions and Materials
Successful method comparison studies require appropriate reagents, materials, and analytical tools. The following table details essential components for method validation studies.
Table 2: Essential Research Reagents and Materials for Method Comparison Studies
| Category | Specific Items | Function in Method Comparison | Quality Requirements |
|---|---|---|---|
| Reference Materials | Certified reference materials (CRMs); Calibrators with traceable values | Establish measurement traceability; Verify accuracy of methods | Value assignment with stated uncertainty; Traceability to reference methods |
| Quality Controls | Commercial quality control materials; Pooled patient samples | Monitor assay performance stability throughout study | Cover clinically relevant concentrations; Commutable with patient samples |
| Clinical Samples | Fresh patient specimens; Archived samples with known stability | Provide authentic matrix for method comparison | Cover entire measuring interval; Represent intended patient population |
| Reagents | Method-specific reagents; Diluents; Buffers | Perform measurements according to manufacturer protocols | Lot-to-lot consistency documented; Stored according to specifications |
| Analytical Software | Statistical packages (R, NCSS, MedCalc, StatsDirect); Spreadsheet applications | Perform statistical analyses and create visualization | Validated algorithms; Appropriate for planned statistical methods |
Reagent Stability and Compatibility
- Reagent Stability: Determine stability under storage and assay conditions following manufacturer specifications. Test stability after multiple freeze-thaw cycles if applicable [31]
- DMSO Compatibility: For assays involving compound testing, validate compatibility with DMSO concentrations spanning expected final concentrations (typically 0-10%) [31]
- Sample Stability: Establish stability under storage conditions and between measurements (typically within 2 hours for most analytes) [6]
Proper statistical analysis selection is paramount for valid method comparison in assay validation research. The choice between Bland-Altman analysis, Deming regression, and Passing-Bablok regression depends on the error characteristics of the measurement methods and the distributional properties of the data. Bland-Altman analysis excels in visualizing agreement and identifying systematic bias, while Deming regression appropriately handles errors in both methods when errors are normally distributed. Passing-Bablok regression provides a robust, non-parametric alternative when distributional assumptions are violated.
A comprehensive approach integrating multiple statistical methods with appropriate experimental design (adequate sample size, broad concentration range, multiple measurements) provides the most rigorous assessment of method comparability. By following the detailed protocols and selection framework outlined in this article, researchers can make informed decisions about method equivalence, ultimately supporting the validity of scientific data in drug development and biomedical research.
Navigating Complexities: Advanced Analysis and Handling Method Failure
In assay validation research, confirming that a new measurement method performs equivalently to an established one is a fundamental requirement. Method-comparison studies provide a structured framework for this evaluation, answering the critical question of whether two methods for measuring the same analyte can be used interchangeably [22]. The core of this assessment lies in graphical data inspection—a powerful approach for identifying outliers, trends, and patterns that might not be apparent from summary statistics alone. These visual tools enable researchers to determine not just the average agreement between methods (bias) but also how this agreement varies across the measurement range, informing decisions about method adoption in drug development pipelines.
Within a comprehensive thesis on designing method-comparison studies, difference and comparison plots serve as essential diagnostic tools for assessing the key properties of accuracy (closeness to a reference value) and precision (repeatability of measurements) [22]. Properly executed graphical inspection reveals whether a new method maintains consistent performance across the assay's dynamic range and under varying physiological conditions, ensuring that validation conclusions are both statistically sound and clinically relevant.
Fundamental Concepts and Terminology
Table 1: Key Terminology in Method-Comparison Studies
| Term | Definition | Interpretation in Assay Validation |
|---|---|---|
| Bias | The mean difference in values obtained with two different methods of measurement [22] | Systematic over- or under-estimation by the new method relative to the established one |
| Precision | The degree to which the same method produces the same results on repeated measurements (repeatability) [22] | Random variability inherent to the measurement method |
| Limits of Agreement | The range within which 95% of the differences between the two methods are expected to fall (bias ± 1.96SD) [22] | Expected range of differences between methods for most future measurements |
| Outlier | A data point that differs significantly from other observations | Potential measurement error, sample-specific interference, or exceptional biological variation |
| Trend | Systematic pattern in differences across the measurement range | Indicates proportional error where method disagreement changes with concentration |
Understanding the relationship between accuracy and precision is crucial. Accuracy refers to how close a measurement is to the true value, while precision refers to the reproducibility of the measurement [22]. In a method-comparison study where a true gold standard may be unavailable, the difference between methods is referred to as bias rather than inaccuracy, quantifying how much higher or lower values are with the new method compared with the established one [22].
Experimental Design for Method-Comparison Studies
Key Design Considerations
Selection of Measurement Methods: The fundamental requirement for a valid method-comparison is that both methods measure the same underlying property or analyte [22]. Comparing a ligand binding assay with a mass spectrometry-based method for the same protein target is appropriate; comparing methods for different analytes is not method-comparison, even if they are biologically related.
Timing of Measurement: Simultaneous sampling is ideal, particularly for analytes with rapid fluctuation [22]. When true simultaneity is technically impossible, measurements should be close enough in time that the underlying biological state is unchanged. For stable analytes, sequential measurements with randomized order may be acceptable.
Number of Measurements: Adequate sample size is critical, particularly when the hypothesis is "no difference" between methods [22]. Power calculations should determine the number of subjects and replicates, using the smallest difference considered clinically important as the effect size. Underpowered studies risk concluding methods are equivalent when a larger sample would reveal important differences.
Conditions of Measurement: The study design should capture the full range of conditions under which the assay will be used [22]. This includes the expected biological range of the analyte (from low to high concentrations) and relevant physiological or pathological states that might affect measurement.
Sample Size Considerations
Table 2: Sample Size Guidelines for Method-Comparison Studies
| Scenario | Minimum Sample Recommendation | Statistical Basis | Considerations for Assay Validation |
|---|---|---|---|
| Preliminary feasibility | 20-40 paired measurements | Practical constraints | Focus on covering analytical measurement range |
| Primary validation study | 100+ paired measurements | Power analysis based on clinically acceptable difference [22] | Should detect differences >1/2 the total allowable error |
| Heterogeneous biological matrix | 50+ subjects with multiple replicates | Capture biological variation | Ensures performance across population variability |
| Non-normal distribution | Increased sample size | Robustness to distributional assumptions | May require transformation or non-parametric methods |
Graphical Methods for Data Inspection
Difference Plots (Bland-Altman Plots)
The Bland-Altman plot is the primary graphical tool for assessing agreement between two quantitative measurement methods [22]. It visually represents the pattern of differences between methods across the measurement range, highlighting systematic bias, trends, and outliers.
Protocol 4.1.1: Constructing a Bland-Altman Plot
Calculate means and differences: For each paired measurement (x₁, x₂), compute the average of the two methods' values [(x₁ + x₂)/2] and the difference between them (typically x₂ - x₁, where x₂ is the new method).
Create scatter plot: Plot the difference (y-axis) against the average of the two measurements (x-axis).
Calculate and plot bias: Compute the mean difference (bias) and draw a solid horizontal line at this value.
Calculate and plot limits of agreement: Compute the standard deviation (SD) of the differences. Draw dashed horizontal lines at the mean difference ± 1.96SD, representing the range within which 95% of differences between the two methods are expected to fall [22].
Add reference line: Include a horizontal line at zero difference for visual reference.
Interpret the plot: Assess whether differences are normally distributed around the bias, whether the spread of differences is consistent across the measurement range (constant variance), and whether any points fall outside the limits of agreement.
Comparison Plots
While difference plots focus on agreement, comparison plots help visualize the overall relationship between methods and identify different types of discrepancies.
Protocol 4.2.1: Creating Side-by-Side Boxplots
Organize data: Arrange measurements by method, keeping paired measurements linked in the data structure.
Calculate summary statistics: For each method, compute the five-number summary: minimum, first quartile (Q₁), median (Q₂), third quartile (Q₃), and maximum [32].
Identify outliers: Calculate the interquartile range (IQR = Q₃ - Q₁). Any points falling below Q₁ - 1.5×IQR or above Q₃ + 1.5×IQR are considered outliers and plotted individually [32].
Construct boxes: Draw a box from Q₁ to Q₃ for each method, with a line at the median.
Add whiskers: Extend lines from the box to the minimum and maximum values excluding outliers.
Plot outliers: Display individual points for any identified outliers.
Interpretation: Compare the central tendency (median), spread (IQR), and symmetry of the distributions between methods. Significant differences in median suggest systematic bias; differences in spread suggest different precision.
Protocol 4.2.2: Creating Scatter Plots with Line of Equality
Set up axes: Plot measurements from method A on the x-axis and method B on the y-axis, using the same scale for both axes.
Add points: Plot each paired measurement as a single point.
Add reference line: Draw the line of equality (y = x) where perfect agreement would occur.
Consider regression line: If appropriate, add a linear regression line to visualize systematic deviation from the line of equality.
Interpretation: Points consistently above the line of equality indicate the y-axis method gives higher values; points below indicate lower values. The spread around the line shows random variation between methods.
Interpretation of Graphical Outputs
Identifying Patterns and Anomalies
Table 3: Interpretation of Patterns in Difference Plots
| Visual Pattern | Interpretation | Implications for Assay Validation |
|---|---|---|
| Horizontal scatter of points around the bias line | Consistent agreement across measurement range | Ideal scenario – methods may be interchangeable |
| Upward or downward slope in differences | Proportional error: differences increase or decrease with concentration | New method may have different calibration or sensitivity |
| Funnel-shaped widening of differences | Increasing variability with concentration | Precision may be concentration-dependent |
| Systematic shift above or below zero | Constant systematic bias (additive error) | May require correction factor or offset adjustment |
| Multiple clusters of points at different bias levels | Categorical differences in performance | Potential matrix effects or interference in specific sample types |
Addressing Graphical Findings
When graphical inspection reveals anomalies, specific investigative actions should follow:
For outliers: Examine raw data and laboratory notes for measurement error. Re-test retained samples if possible. If the outlier represents a valid measurement, consider whether the methods perform differently for specific sample types.
For trends: Calculate correlation between the differences and the averages. Strong correlation suggests proportional error that may be correctable mathematically.
For non-constant variance: Consider variance-stabilizing transformations or weighted analysis approaches rather than simple bias and limits of agreement.
The Scientist's Toolkit: Essential Research Reagents and Materials
Table 4: Essential Research Reagent Solutions for Method-Comparison Studies
| Reagent/Material | Function in Method Comparison | Specification Requirements |
|---|---|---|
| Reference Standard | Provides accuracy base for established method; should be traceable to international standards when available | High purity (>95%), well-characterized, stability documented |
| Quality Control Materials | Monitor assay performance across validation; should span assay measurement range | Three levels (low, medium, high) covering clinical decision points |
| Matrix-Matched Calibrators | Ensure equivalent performance in biological matrix; critical for immunoassays | Prepared in same matrix as patient samples (serum, plasma, etc.) |
| Interference Test Panels | Identify substances that may differentially affect methods | Common interferents: bilirubin, hemoglobin, lipids, common medications |
| Stability Testing Materials | Assess sample stability under various conditions | Aliquots from fresh pools stored under different conditions (time, temperature) |
| Linearity Materials | Verify assay response across analytical measurement range | High-value sample serially diluted with low-value sample or appropriate diluent |
Integration with Statistical Analysis
Graphical inspection should inform and complement quantitative statistical analysis in method-comparison studies. The visual identification of patterns determines which statistical approaches are appropriate:
Normal distribution of differences: If the Bland-Altman plot shows roughly normal distribution of differences around the mean with constant variance, standard bias and limits of agreement are appropriate [22].
Non-normal distributions: If differences are not normally distributed, non-parametric approaches (such as percentile-based limits of agreement) or data transformation may be necessary.
Proportional error: When a trend is observed where differences increase with magnitude, calculation of percentage difference rather than absolute difference may be more appropriate.
The combination of graphical visualization and statistical analysis provides a comprehensive assessment of method comparability, supporting robust conclusions about the suitability of a new assay for use in drug development research.
In the rigorous context of assay validation and method comparison studies, method failure—manifesting as non-convergence, runtime errors, or missing results—poses a significant threat to the integrity and reliability of research outcomes. A systematic review revealed that less than half of published simulation studies acknowledge that model non-convergence might occur, and a mere 12 out of 85 applicable articles report convergence as a performance measure [33]. This is particularly critical in drug development, where assays must be fit-for-purpose, precise, and reproducible to avoid costly false positives or negatives [34]. Method failure complicates performance assessment, as it results in undefined values (e.g., NA or NaN) for specific method-data set combinations, thereby obstructing a straightforward calculation of aggregate performance metrics like bias or average accuracy [33]. Traditional, simplistic handlings, such as discarding data sets where failure occurs or imputing missing performance values, are often inadequate. They can introduce severe selection bias, particularly because failure is frequently correlated with specific data set characteristics (e.g., highly imbalanced or separated data) [33]. This document outlines a sophisticated, systematic protocol grounded in Quality by Design (QbD) principles to proactively manage and properly analyze method failure, moving beyond naive imputation to ensure robust and interpretable method comparisons.
A Proactive Framework: QbD and Strategic DoE
A proactive strategy, inspired by the Quality by Design (QbD) framework, embeds assay quality from the outset by identifying Critical Quality Attributes (CQAs) and Critical Process Parameters (CPPs) [34]. This approach uses a systematic Design of Experiments (DoE) to understand the relationship between variables and their effect on assay outcomes, thereby minimizing experimental variation and increasing the probability of success [35].
- Defining CQAs and CPPs: The first step involves defining the CQAs that represent the desired assay quality (e.g., precision, dynamic range, signal-to-noise ratio) and the CPPs (e.g., reagent concentrations, incubation times) that influence these CQAs [34].
- Establishing a Design Space: Through carefully crafted DoE, a design space is determined. This is the multidimensional combination of CPP levels that will result in acceptable CQA values. Operating within this design space ensures the assay is robust to small, inadvertent perturbations in protocol [34].
The following workflow diagram illustrates this proactive, systematic approach to assay development and validation, which inherently reduces the risk of method failure.
Diagram: Assay Development and Validation Workflow
Beyond Imputation: Recommended Strategies for Handling Failure
When method failure occurs despite proactive planning, conventional missing data techniques like imputation or discarding data sets are usually inappropriate because the resulting undefined values are not missing at random [33]. Instead, we recommend the following strategies, which view failure as an inherent methodological characteristic.
Implement Realistic Fallback Strategies
A fallback strategy directly reflects the behavior of a real-world user when a method fails. For instance, if an complex model fails to converge, a researcher might default to a simpler, more robust model. Documenting and implementing this logic within the comparison study provides a more realistic and actionable performance assessment [33].
Report Failure Rates as a Primary Performance Metric
The frequency of method failure itself is a critical performance metric and must be reported alongside traditional metrics like bias or accuracy. A method with high nominal accuracy but a 40% failure rate is likely less useful than a slightly less accurate but more reliable method [33].
Analyze Failure Correlates
Investigate the data set characteristics (e.g., sample size, degree of separation, noise level) that correlate with method failure. This analysis informs the boundaries of a method's applicability and provides crucial guidance for future users [33].
The table below summarizes the limitations of common handlings and outlines the recommended alternative approaches.
Table 1: Strategies for Handling Method Failure in Comparison Studies
| Common Handling | Key Limitations | Recommended Alternative Strategy |
|---|---|---|
| Discarding data sets with failure (for all methods) | Introduces selection bias; ignores correlation between failure and data characteristics [33]. | Report Failure Rates: Treat failure rate as a key performance metric for each method [33]. |
| Imputing missing performance values (e.g., with mean or worst-case value) | Can severely distort performance estimates (e.g., bias, MSE) and is often not missing at random [33]. | Use Fallback Strategies: Pre-specify a backup method to use upon primary method failure, mimicking real-world practice [33]. |
| Ignoring or not reporting failure | Creates a misleadingly optimistic view of a method's performance and applicability [33]. | Analyze Correlates: Systematically investigate and report data set features that predict failure to define a method's operating boundary [33]. |
Experimental Protocol: A 10-Step Guide for Robust Assay Method Development and Validation
This protocol provides a systematic 10-step approach for analytical method development and validation, aligning with ICH Q2(R1), Q8(R2), and Q9 guidelines to ensure robust results and properly contextualize method failure [36].
Application Notes:
- Context: This protocol is designed for the development and validation of analytical methods used in drug substance and drug product testing, crucial for method comparison studies.
- Objective: To establish a fit-for-purpose, precise, and robust analytical method while defining a control strategy for its lifecycle.
- Pre-requisites: Clear definition of the Target Product Profile (TPP) and associated Critical Quality Attributes (CQAs).
Table 2: The Scientist's Toolkit: Essential Reagents and Materials
| Category/Item | Function / Relevance in Assay Development |
|---|---|
| Design of Experiments (DoE) | A statistical approach for systematically optimizing experimental parameters (CPPs) to achieve robust assay performance (CQAs) and define a design space [35] [34]. |
| Automated Liquid Handler | Increases assay throughput, precision, and reproducibility while minimizing human error and enabling miniaturization during DoE [35]. |
| Reference Standards & Controls | Qualified materials essential for validating method accuracy, precision, and setting system suitability criteria for ongoing quality control [36]. |
| Risk Assessment Tools (e.g., FMEA) | Used to identify and prioritize assay steps and parameters that may most influence precision, accuracy, and other CQAs [36]. |
Step-by-Step Protocol:
- Identify the Purpose: Define the method's role (e.g., release testing, characterization) and its connection to CQAs and patient risk [36].
- Select the Method: Choose an analytical method with appropriate selectivity and proven validity for the intended measurement [36].
- Identify Method Steps: Map the entire analytical procedure using process mapping software (e.g., Visio) to visualize the sequence for development and risk assessment [36].
- Determine Specification Limits: Set specification limits for release testing based on patient risk, CQA assurance, and historical data [36].
- Perform a Risk Assessment: Use tools like Failure Mode and Effects Analysis (FMEA) to identify steps that may influence precision, accuracy, or linearity. This is the foundation for the characterization plan [36].
- Characterize the Method: Execute the characterization plan via DoE. This involves:
- System Design: Selecting the correct chemistry, materials, and technology.
- Parameter Design: Running DoE to find optimal parameter set points.
- Tolerance Design: Defining allowable variation for key steps to ensure consistent outcomes. Use Partition of Variation (POV) analysis to understand sources of error [36].
- Complete Method Validation and Transfer: Define and execute a validation plan assessing specificity, linearity, accuracy, precision, range, LOD, and LOQ. Use equivalence tests for method transfer [36].
- Define the Control Strategy: Establish procedures for reference materials, tracking and trending assay performance over time, and making corrections for assay drift [36].
- Train All Analysts: Train and qualify all analysts using the validated method and known reference standards to minimize analyst-induced variation [36].
- Quantify Method Impact: Use the Accuracy to Precision (ATP) model and calculate the Percent Tolerance Measurement Error to ensure assay variation is fit-for-purpose and does not lead to excessive out-of-specification rates [36].
The following diagram summarizes the logical decision process for handling method failure when it occurs within a comparison study, following the principles outlined in this protocol.
Diagram: Method Failure Handling Protocol
In the rigorous field of bioanalytical method validation, establishing a suitable concentration range is paramount for generating reliable data that supports critical decisions in drug development. The context of use (COU) for an assay dictates the necessary level of analytical validation [37]. For pharmacokinetic (PK) assays, which measure drug concentrations, a fully characterized reference standard identical to the analyte is typically available, allowing for straightforward assessment of accuracy and precision via spike-recovery experiments [37]. In contrast, biomarker assays often face the challenge of lacking a reference material that is identical to the endogenous analyte, making the assessment of true accuracy difficult [37]. Within this framework, method comparison studies, underpinned by correlation analysis, serve as a powerful tool to evaluate whether a method's concentration range is fit-for-purpose. This application note details a protocol for using correlation to assess concentration range adequacy, framed within the design of a method comparison study for assay validation research.
Theoretical Framework: Data Quality and Correlation in Bioanalysis
Foundational Data Quality Concepts
Data quality is a multidimensional concept critical to ensuring that bioanalytical data is fit for its intended use [38]. High-quality data in healthcare and life sciences is defined by its intrinsic accuracy, contextual appropriateness for a specific task, clear representational quality, and accessibility [38]. For bioanalytical methods, the concentration range is a key representational and contextual dimension. An inadequate range can lead to data that is not plausible or conformant with expected biological variation, thereby failing the test of fitness-for-use [38]. Correlation analysis, in this context, provides a quantitative measure to support the plausibility and conformity of measurements across a proposed range.
The Role of Correlation in Method Comparison
In a method comparison study, correlation analysis assesses the strength and direction of the linear relationship between two measurement methods. A high correlation coefficient (e.g., Pearson's r > 0.99) across a concentration range indicates that the methods respond similarly to changes in analyte concentration. This provides strong evidence that the range is adequate for capturing the analytical response. However, a high correlation alone does not prove agreement; it must be interpreted alongside other statistical measures like the slope and intercept from a regression analysis to ensure the methods do not have a constant or proportional bias.
Experimental Protocol: Method Comparison Study Design
This protocol outlines a procedure to compare a new method (Test Method) against a well-characterized reference method (Reference Method) to validate the adequacy of the Test Method's concentration range.
Key Research Reagent Solutions
| Item | Function & Importance in Experiment |
|---|---|
| Certified Reference Standard | A fully characterized analyte provides the foundation for preparing accurate calibration standards and quality controls (QCs), ensuring traceability and validity of measured concentrations [37]. |
| Matrix-Matched Quality Controls (QCs) | Samples prepared in the same biological matrix as study samples (e.g., plasma, serum). They are critical for assessing assay accuracy, precision, and the performance of the concentration range during validation [37]. |
| Internal Standard (for chromatographic assays) | A structurally similar analog of the analyte used to normalize instrument response, correcting for variability in sample preparation and injection, thereby improving data quality. |
| Biological Matrix (e.g., Human Plasma) | The substance in which the analyte is measured. Using the appropriate matrix is essential for a meaningful evaluation of selectivity and to mimic the conditions of the final assay [37]. |
Sample Preparation and Analysis Workflow
The following diagram illustrates the core experimental workflow for the method comparison study.
Step-by-Step Procedure
Sample Panel Preparation:
- Prepare a panel of at least 20-30 samples spanning the entire claimed concentration range of the Test Method (from Lower Limit of Quantification (LLOQ) to Upper Limit of Quantification (ULOQ)) [5].
- Samples should include calibration standards and QCs, and can be enriched by including incurred study samples to represent real-world matrix effects.
- Each sample is aliquoted for parallel analysis by both the Test and Reference Methods.
Sample Analysis:
- Analyze all aliquots using the Test Method and the Reference Method in a randomized sequence to avoid bias from instrument drift or environmental changes.
- Follow the standard operating procedures (SOPs) for each method, including system suitability tests to ensure instruments are performing adequately before analysis [5].
Data Collection:
- Record the measured concentration for each sample from both methods.
- Tabulate the data with paired results (i.e., ConcentrationTest and ConcentrationReference for each sample).
Data Analysis Procedure: Assessing Correlation and Range
Statistical Analysis Workflow
The collected paired data is subjected to a series of statistical tests, as outlined in the following decision pathway.
Analysis Steps and Acceptance Criteria
Visualization with Scatter Plot:
- Generate a scatter plot with the Reference Method concentrations on the x-axis and the Test Method concentrations on the y-axis.
- Visually inspect the plot for linearity, obvious outliers, and homoscedasticity (constant variance across the range).
Calculation of Correlation Coefficient:
- Calculate the Pearson Correlation Coefficient (r).
- Acceptance Criterion: A coefficient of r ≥ 0.99 is generally considered indicative of a strong linear relationship for bioanalytical methods, suggesting the range is adequate.
Linear Regression Analysis:
- Perform simple linear regression (Test Method = Slope × Reference Method + Intercept).
- Analyze the confidence intervals for the slope and intercept.
- Acceptance Criteria:
- Slope: The 95% confidence interval should include 1.00 (e.g., 0.98 - 1.02), indicating no proportional bias.
- Intercept: The 95% confidence interval should include 0.00, indicating no constant bias.
- Coefficient of Determination (R²): This should be ≥ 0.98 [5].
Table 1: Key statistical parameters and their interpretation for assessing concentration range adequacy.
| Parameter | Target Value | Interpretation of Deviation |
|---|---|---|
| Pearson's r | ≥ 0.99 | A lower value suggests poor correlation and that the range may not be adequately capturing a consistent analytical response. |
| Slope (95% CI) | Includes 1.00 | A slope significantly >1 indicates proportional bias in the Test Method (over-recovery); <1 indicates under-recovery. |
| Intercept (95% CI) | Includes 0.00 | A significant positive or negative intercept suggests constant bias in the Test Method. |
| R-squared (R²) | ≥ 0.98 | A lower value indicates more scatter in the data and a weaker linear relationship, questioning range suitability. |
Implementation and Troubleshooting
This correlation analysis is not a standalone activity. It must be integrated with other validation parameters as per ICH and FDA guidelines [37] [5]. The demonstrated concentration range must also support acceptable levels of accuracy and precision (e.g., ±15% bias, ≤15% RSD for QCs) across the range [5]. Furthermore, for ligand binding assays used for biomarkers, a parallelism assessment is critical to demonstrate that the dilution-response of the calibrators parallels that of the endogenous analyte in study samples [37].
Investigation of Failed Criteria
If the correlation or regression parameters fail to meet acceptance criteria, investigate the following potential causes:
- Insufficient Selectivity: The method may be interfered with by matrix components at certain concentrations.
- Incorrect Range Bounds: The LLOQ may be set too low (leading to imprecision) or the ULOQ may be set too high (leading to signal saturation or non-linearity).
- Sample Instability: The analyte may degrade in the matrix, disproportionately affecting certain concentration levels.
- Methodological Flaws: Inconsistencies in sample processing or analysis between the two methods.
A thorough investigation, potentially including a refinement of the sample panel and re-analysis, is required to resolve these issues before the concentration range can be deemed adequate.
Addressing Proportional and Constant Bias through Regression Diagnostics
In clinical laboratory sciences, method comparison studies are essential for detecting systematic errors, or bias, when introducing new measurement procedures, instruments, or reagent lots. Bias refers to the systematic difference between measurements from a candidate method and a comparator method, which can manifest as constant bias (consistent across all concentrations) or proportional bias (varying with analyte concentration) [39]. These biases can be introduced through calibrator lot changes, reagent modifications, environmental testing variations, or analytical instrument component changes [39]. Left undetected, such biases can compromise clinical decision-making and patient safety.
Regression diagnostics provide powerful statistical tools for quantifying and characterizing these biases. Unlike simple difference testing, regression approaches model the relationship between two measurement methods, allowing simultaneous detection and characterization of both constant and proportional biases [39]. This application note details protocols for designing, executing, and interpreting regression diagnostics within method comparison studies for assay validation research, providing a framework acceptable to researchers, scientists, and drug development professionals.
Theoretical Foundations of Bias
Types of Analytical Bias
- Constant Bias: A systematic difference that remains consistent across the measuring interval, represented by a difference in means between methods. In regression analysis, this manifests as a y-intercept significantly different from zero [39].
- Proportional Bias: A systematic difference that changes proportionally with the analyte concentration, often caused by differences in calibration or antibody specificity. In regression analysis, this appears as a slope significantly different from 1.0 [39].
- Total Error: The combination of both random error (imprecision) and systematic error (bias), representing the overall difference between measured and true values.
Statistical vs. Clinical Significance
A crucial distinction in bias assessment lies between statistical significance and clinical significance. A statistically significant bias (e.g., p < 0.05 for slope ≠ 1) indicates that the observed difference is unlikely due to random chance alone [40]. However, this does not necessarily translate to clinical significance, which evaluates whether the bias magnitude is substantial enough to affect medical decision-making or patient outcomes [40]. Method validation must therefore consider both statistical evidence and predefined clinical acceptability criteria based on biological variation or clinical guidelines.
Regression Approaches for Bias Detection
Various regression approaches offer different advantages for bias detection in method comparison studies, each with specific assumptions and applications.
Table 1: Comparison of Regression Methods for Bias Detection
| Method | Assumptions | Bias Parameters | Best Use Cases | Limitations |
|---|---|---|---|---|
| Ordinary Least Squares (OLS) | No error in comparator method (X-variable), constant variance | Slope, Intercept | Preliminary assessment, stable reference methods | Underestimates slope with measurement error in X |
| Weighted Least Squares (WLS) | Same as OLS but accounts for non-constant variance | Slope, Intercept | Heteroscedastic data (variance changes with concentration) | Requires estimation of weighting function |
| Deming Regression | Accounts for error in both methods, constant error ratio | Slope, Intercept | Both methods have comparable imprecision | Requires prior knowledge of error ratio (λ) |
| Passing-Bablok Regression | No distributional assumptions, robust to outliers | Slope, Intercept | Non-normal distributions, outlier presence | Computationally intensive, requires sufficient sample size |
Performance Characteristics of Regression Diagnostics
The statistical performance of regression diagnostics varies significantly based on experimental conditions. A recent simulation study evaluated false rejection rates (rejecting when no bias exists) and probability of bias detection across different scenarios [39].
Table 2: Performance of Bias Detection Methods Under Different Conditions
| Rejection Criterion | Low Range Ratio, Low Imprecision | High Range Ratio, High Imprecision | False Rejection Rate | Probability of Bias Detection |
|---|---|---|---|---|
| Paired t-test (α=0.05) | Best performance | Lower performance | <5% | Variable |
| Mean Difference (10%) | Lower performance | Better performance | ~10% | Higher in most scenarios |
| Slope <0.9 or >1.1 | High false rejection | High false rejection | Unacceptably high | Low to moderate |
| Intercept >50% lower limit | Variable performance | Variable performance | Unacceptably high | Low to moderate |
| Combined Mean Difference & t-test | High power | High power | >10% | Highest power |
Experimental Protocols for Regression Diagnostics
Sample Preparation and Measurement Protocol
Materials and Reagents:
- Patient samples covering entire measuring interval (n=40-100 recommended)
- Control materials at medical decision levels
- Candidate method reagents and calibrators
- Comparator method reagents and calibrators
- Standardized collection tubes and pipettes
Procedure:
- Sample Selection: Select 40-100 patient samples covering the entire measuring interval from routine laboratory workflow. Include concentrations near clinical decision points [39].
- Sample Storage: Aliquot samples to avoid freeze-thaw cycles if testing cannot be completed within 8 hours. Store at appropriate temperature based on analyte stability.
- Randomization:
- Assign unique identifiers to all samples
- Randomize measurement order using computer-generated sequence
- Measure all samples in single run or multiple runs within same analytical session
- Parallel Measurement:
- Measure each sample in duplicate with both candidate and comparator methods
- Maintain identical sample handling procedures for both methods
- Record all results with appropriate units and precision
- Quality Control:
- Run quality control materials at beginning, middle, and end of run
- Verify control results within established ranges before proceeding with data analysis
Data Analysis Protocol
Software Requirements:
- Statistical software with regression capabilities (R, Python, MedCalc, etc.)
- Data visualization tools for creating scatter plots and residual plots
Procedure:
- Data Preparation:
- Calculate mean of duplicate measurements for each method
- Log-transform data if variance increases with concentration
- Screen for extreme outliers using difference plots
- Regression Analysis:
- Select appropriate regression method based on error characteristics (Table 1)
- Fit regression model: Y (candidate) = β₀ + β₁X (comparator)
- Calculate 95% confidence intervals for slope and intercept
- Bias Estimation:
- Constant Bias = β₀ (intercept)
- Proportional Bias = β₁ (slope) - 1
- Calculate standard errors for both parameters
- Graphical Assessment:
- Create scatter plot with regression line and identity line (Y=X)
- Generate residual plot (residuals vs. concentration)
- Create Bland-Altman plot for additional bias assessment
Interpretation of Regression Diagnostics
Statistical Evaluation of Bias Parameters
Table 3: Interpretation of Regression Parameters for Bias Detection
| Parameter | Null Hypothesis | Alternative Hypothesis | Test Statistic | Interpretation |
|---|---|---|---|---|
| Slope (β₁) | β₁ = 1 (No proportional bias) | β₁ ≠ 1 (Proportional bias present) | t = (β₁ - 1)/SE(β₁) | Significant if confidence interval excludes 1 |
| Intercept (β₀) | β₀ = 0 (No constant bias) | β₀ ≠ 0 (Constant bias present) | t = β₀/SE(β₀) | Significant if confidence interval excludes 0 |
| Coefficient of Determination (R²) | N/A | N/A | N/A | Proportion of variance explained by linear relationship |
Clinical Decision-Making Framework
The clinical significance of detected bias should be evaluated against predefined acceptance criteria based on:
- Biological variation specifications (desirable bias < 0.125 × CV₁ + 0.125 × CV₆)
- Clinical guidelines or regulatory requirements
- Manufacturer's claims for total allowable error
- Impact on patient classification at medical decision points
For example, in procalcitonin testing for sepsis diagnosis, bias at low concentrations (0.1-0.25 μg/L) may significantly impact clinical algorithms despite small absolute values [41].
Advanced Considerations in Regression Diagnostics
Machine Learning Approaches
Recent advances in statistical learning have introduced methods like Statistical Agnostic Regression (SAR), which uses concentration inequalities of the expected loss to validate regression models without traditional parametric assumptions [42]. These approaches can complement classical regression methods, particularly with complex datasets or when traditional assumptions are violated.
Measurement Error in Real-World Data
When combining trial data with real-world evidence, outcome measurement error becomes a critical concern. Survival Regression Calibration (SRC) extends regression calibration methods to address measurement error in time-to-event outcomes, improving comparability between real-world and trial endpoints [43].
The Scientist's Toolkit: Essential Research Reagents and Solutions
Table 4: Key Research Reagent Solutions for Method Comparison Studies
| Reagent/Material | Function | Specification Guidelines |
|---|---|---|
| Patient Sample Panel | Provides biological matrix for comparison | 40-100 samples covering measuring interval; include clinical decision levels |
| Quality Control Materials | Monitors assay performance during study | At least two levels (normal and pathological); traceable to reference materials |
| Calibrators | Establishes measurement scale for both methods | Traceable to international standards when available |
| Stabilization Buffers | Preserves analyte integrity during testing | Validated for compatibility with both methods |
| Matrix-matched Materials | Assesses dilution and recovery characteristics | Commutable with patient samples |
| Reference Standard | Provides accuracy base for comparison | Higher-order reference material or validated method |
Regression diagnostics provide a robust framework for detecting and characterizing proportional and constant bias in method comparison studies. Proper experimental design, appropriate regression method selection, and correct interpretation of both statistical and clinical significance are essential for valid assay validation. By implementing these protocols, researchers and drug development professionals can ensure the reliability and comparability of measurement procedures, ultimately supporting accurate clinical decision-making and patient safety.
From Data to Decision: Performance Verification and Regulatory Compliance
Estimating Systematic Error at Critical Medical Decision Concentrations
The accurate measurement of biomarkers is fundamental to clinical diagnostics and therapeutic drug development. A critical component of method validation in this context is the precise estimation of systematic error at specified medical decision concentrations. Systematic error, or bias, refers to a consistent deviation of test results from the true value, which can directly impact clinical decision-making and patient outcomes [44]. The comparison of methods experiment serves as the primary tool for quantifying this inaccuracy, providing researchers with statistical evidence of a method's reliability versus a comparative method [44]. This document outlines a detailed protocol for designing and executing a method comparison study, framed within the requirements of modern assay validation as informed by regulatory perspectives, including the FDA's 2025 Biomarker Guidance [13].
Theoretical Background and Regulatory Context
The 2025 FDA Biomarker Guidance reinforces that while the validation parameters for biomarker assays (e.g., accuracy, precision, sensitivity) mirror those for drug concentration assays, the technical approaches must be adapted to demonstrate suitability for measuring endogenous analytes [13]. This represents a continuation of the principle that the approach for drug assays should be the starting point, but not a rigid template, for biomarker assay validation. The guidance encourages sponsors to justify their validation approaches and discuss plans with the FDA early in development [13].
Systematic error can manifest as either a constant error, which is consistent across the assay range, or a proportional error, which changes in proportion to the analyte concentration [44]. The "Comparison of Methods Experiment" is specifically designed to estimate these errors, particularly at medically important decision thresholds, thereby ensuring that the test method provides clinically reliable results [44].
Experimental Protocol: Comparison of Methods
Purpose
The primary purpose of this experiment is to estimate the inaccuracy or systematic error of a new test method by comparing its results against those from a comparative method, using real patient specimens. The focus is on quantifying systematic errors at critical medical decision concentrations [44].
Experimental Design and Workflow
The following diagram illustrates the key stages in executing a comparison of methods study.
Detailed Methodologies
Selection of Comparative Method
- Reference Method: Ideally, a high-quality method with documented correctness through traceability to definitive methods or standard reference materials. Any differences are attributed to the test method [44].
- Routine Method: A more general method without documented correctness. Large, medically unacceptable differences require further investigation (e.g., via recovery or interference experiments) to identify which method is inaccurate [44].
Specimen Selection and Handling
- Number of Specimens: A minimum of 40 different patient specimens is recommended. The quality and range of concentrations are more critical than the total number. For assessing specificity, 100-200 specimens may be needed [44].
- Concentration Range: Specimens should cover the entire working range of the method and represent the spectrum of diseases expected in routine application [44].
- Stability and Handling: Analyze specimens by both methods within two hours of each other, unless stability data indicates otherwise. Define and systematize specimen handling (e.g., preservation, refrigeration) prior to the study to prevent handling-induced differences [44].
Analysis and Data Collection
- Time Period: Conduct analyses over a minimum of 5 days, and preferably over a longer period (e.g., 20 days) to incorporate routine sources of variation [44].
- Replicates: Analyze each specimen in singlet by both test and comparative methods. However, performing duplicate measurements (on different samples in different runs) is advantageous as it provides a check for sample mix-ups or transposition errors [44].
- Data Recording: Record results in a structured table. Immediately graph the data during collection to identify discrepant results for re-analysis while specimens are still available [44].
Data Analysis and Interpretation
Graphical Analysis
- Difference Plot: For methods expected to show one-to-one agreement, plot the difference (test result minus comparative result) on the y-axis against the comparative result on the x-axis. Visually inspect for scatter around zero and identify any outliers or patterns suggesting constant/proportional error [44].
- Comparison Plot: For methods not expected to agree one-to-one, plot the test result (y-axis) against the comparative result (x-axis). Draw a visual line of best fit to understand the relationship and identify discrepant results [44].
Statistical Calculations
The choice of statistics depends on the analytical range of the data [44].
For a Wide Analytical Range (e.g., Glucose, Cholesterol)
Use linear regression analysis (least squares) to obtain the slope (b), y-intercept (a), and standard deviation of the points about the line (sy/x). The systematic error (SE) at a critical medical decision concentration (Xc) is calculated as:
- Yc = a + bXc
- SE = Yc - Xc
For a Narrow Analytical Range (e.g., Sodium, Calcium)
Calculate the average difference between the methods, also known as the "bias." This is typically derived from a paired t-test, which also provides the standard deviation of the differences.
Key Research Reagent Solutions
Table 1: Essential materials and reagents for a comparison of methods study.
| Item | Function / Description |
|---|---|
| Patient Specimens | A panel of minimally 40 unique specimens covering the analytic measurement range and intended pathological states. The cornerstone for assessing real-world performance [44]. |
| Comparative Method | The established method (reference or routine) against which the new test method is compared. Provides the benchmark result for calculating systematic error [44]. |
| Calibrators & Controls | Standardized materials used to calibrate both the test and comparative methods and to monitor assay performance throughout the study period. |
| Assay-Specific Reagents | Antibodies, enzymes, buffers, substrates, and other chemistry-specific components required to perform the test and comparative methods as per their intended use. |
Results Presentation and Decision Making
The results of the comparison study, including the estimates of systematic error, should be presented clearly to facilitate interpretation and decision-making.
Table 2: Example presentation of systematic error estimates at critical decision concentrations.
| Critical Decision Concentration (Xc) | Estimated Systematic Error (SE) | Clinically Acceptable Limit | Outcome |
|---|---|---|---|
| 200 mg/dL | +8.0 mg/dL | ±10 mg/dL | Acceptable |
| 100 mg/dL | -6.5 mg/dL | ±5 mg/dL | Unacceptable |
The statistical relationship between the methods, derived from regression analysis, can be visualized as follows.
A well-designed comparison of methods experiment, executed according to this protocol, provides robust evidence for estimating systematic error. This process is vital for demonstrating that a biomarker assay is fit-for-purpose and meets the context of use requirements, aligning with the scientific and regulatory principles emphasized in modern guidance [13]. By rigorously quantifying bias at critical decision points, researchers can ensure the reliability of their methods, thereby supporting sound clinical and drug development decisions.
Bioanalytical method validation is a critical process in drug discovery and development, culminating in marketing approval. It involves the comprehensive testing of a method to ensure it produces reliable, reproducible results for the quantitative determination of drugs and their metabolites in biological fluids. The development of sound bioanalytical methods is paramount, as selective and sensitive analytical methods are critical for the successful conduct of preclinical, bio-pharmaceutics, and clinical pharmacology studies. The reliability of analytical findings is a prerequisite for the correct interpretation of toxicological and pharmacokinetic data; unreliable results can lead to unjustified legal consequences or incorrect patient treatment [45].
Key Validation Parameters and Acceptance Criteria
The validation process assesses a set of defined parameters to establish that a method is fit for its intended purpose. The following table summarizes the core validation parameters and their typical acceptance criteria, which are aligned with regulatory guidelines from bodies such as the US Food and Drug Administration (FDA) and the International Council for Harmonisation (ICH) [45].
Table 1: Key Validation Parameters and Acceptance Criteria for Bioanalytical Methods
| Validation Parameter | Experimental Objective | Typical Acceptance Criteria |
|---|---|---|
| Selectivity/Specificity | To demonstrate that the method can unequivocally assess the analyte in the presence of other components (e.g., matrix, degradants) [45]. | No significant interference (<20% of LLOQ for analyte and <5% for internal standard) from at least six independent blank biological matrices [45]. |
| Linearity & Range | To establish that the method obtains test results directly proportional to analyte concentration [45]. | A minimum of five concentration levels bracketing the expected range. Correlation coefficient (r) typically ≥ 0.99 [45]. |
| Accuracy | To determine the closeness of the measured value to the true value. | Mean accuracy values within ±15% of the theoretical value for all QC levels, except at the LLOQ, where it should be within ±20% [45]. |
| Precision | To determine the closeness of repeated individual measures. Includes within-run (repeatability) and between-run (intermediate precision) precision [45]. | Coefficient of variation (CV) ≤15% for all QC levels, except ≤20% at the LLOQ [45]. |
| Lower Limit of Quantification (LLOQ) | The lowest concentration that can be measured with acceptable accuracy and precision. | Signal-to-noise ratio ≥ 5. Accuracy and precision within ±20% [45]. |
| Recovery | To measure the efficiency of analyte extraction from the biological matrix. | Consistency and reproducibility are key, not necessarily 100% recovery. Can be assessed by comparing extracted samples with post-extraction spiked samples [45]. |
| Stability | To demonstrate the analyte's stability in the biological matrix under specific conditions (e.g., freeze-thaw, benchtop, long-term). | Analyte stability should be demonstrated with mean values within ±15% of the nominal concentration [45]. |
Experimental Protocols for Core Validation Tests
Protocol for Establishing Selectivity and Specificity
1. Principle: This experiment verifies that the method can distinguish and quantify the analyte without interference from the biological matrix, metabolites, or concomitant medications [45].
2. Materials:
- Reference Standard: High-purity analyte.
- Biological Matrix: At least six independent sources of the relevant blank matrix (e.g., human plasma).
- Internal Standard (IS) Solution.
3. Procedure: 1. Prepare and analyze the following samples: * Blank Sample: Unfortified biological matrix. * Blank with IS: Biological matrix fortified only with the internal standard. * LLOQ Sample: Biological matrix fortified with the analyte at the LLOQ concentration and the IS. 2. Process all samples according to the defined sample preparation procedure. 3. Analyze using the chromatographic system.
4. Data Analysis: * In the blank samples, interference at the retention time of the analyte should be < 20% of the LLOQ response. * Interference at the retention time of the IS should be < 5% of the average IS response in the LLOQ samples.
Protocol for Establishing Linearity and Range
1. Principle: To demonstrate a proportional relationship between analyte concentration and instrument response across the method's working range [45].
2. Materials:
- Stock Solution: Analyte dissolved in an appropriate solvent.
- Calibration Standards: A series of at least 5-8 concentrations prepared by serial dilution of the stock solution in the biological matrix, spanning the entire range (e.g., from LLOQ to ULOQ).
3. Procedure: 1. Process each calibration standard in duplicate or triplicate. 2. Analyze the standards using the chromatographic system. 3. Plot the peak response (e.g., analyte/IS ratio) against the nominal concentration.
4. Data Analysis: * Perform a linear regression analysis on the data. * The correlation coefficient (r) is typically required to be ≥ 0.99. * The back-calculated concentrations of the standards should be within ±15% of the theoretical value (±20% at the LLOQ).
Protocol for Assessing Accuracy and Precision
1. Principle: Accuracy (bias) and precision (variance) are evaluated simultaneously using Quality Control (QC) samples at multiple concentrations [45].
2. Materials:
- QC Samples: Prepared at a minimum of three concentration levels (Low, Mid, and High) within the calibration range, plus the LLOQ.
3. Procedure: 1. Analyze at least five replicates of each QC level within a single analytical run to determine within-run precision (repeatability) and within-run accuracy. 2. Analyze the same QC levels in at least three separate analytical runs to determine between-run precision (intermediate precision) and between-run accuracy.
4. Data Analysis: * Precision: Expressed as the coefficient of variation (%CV). The %CV should be ≤15% for all QC levels, except ≤20% at the LLOQ. * Accuracy: Calculated as (Mean Observed Concentration / Nominal Concentration) × 100%. Accuracy should be within 85-115% for QC levels (80-120% at the LLOQ).
Visualizing the Method Validation Workflow
The following diagram outlines the logical sequence and key decision points in the bioanalytical method validation lifecycle.
The Scientist's Toolkit: Essential Research Reagents and Materials
The following table details key reagents and materials essential for conducting a robust bioanalytical method validation study [45].
Table 2: Essential Research Reagents and Materials for Method Validation
| Item | Function / Purpose |
|---|---|
| Analyte Reference Standard | High-purity substance used to prepare known concentrations for calibration curves and quality control samples; serves as the benchmark for quantification [45]. |
| Stable-Labeled Internal Standard (IS) | A deuterated or other isotopically-labeled version of the analyte used to correct for variability in sample preparation and instrument response, improving accuracy and precision [45]. |
| Biological Matrix | The blank fluid or tissue (e.g., plasma, serum, urine) from multiple donors used to prepare standards and QCs, ensuring the method is evaluated in a representative sample [45]. |
| Sample Preparation Materials | Solvents, solid-phase extraction (SPE) cartridges, protein precipitation plates, and other materials used to isolate and clean up the analyte from the complex biological matrix [45]. |
| LC-MS/MS System | The core analytical instrumentation, typically consisting of a liquid chromatography (LC) system for separation coupled to a tandem mass spectrometer (MS/MS) for highly specific and sensitive detection [45]. |
| Chromatographic Column | The specific LC column (e.g., C18, phenyl) that provides the chemical separation necessary to resolve the analyte from matrix interferences and isobaric compounds [45]. |
| Mobile Phase Solvents & Additives | High-purity solvents (e.g., water, methanol, acetonitrile) and additives (e.g., formic acid, ammonium acetate) that create the chromatographic environment for analyte elution and ionization [45]. |
In the context of method comparison studies for assay validation research, moving beyond simplistic p-value interpretation is critical for establishing true fitness-for-purpose. Traditional statistical significance testing, often referred to as Null Hypothesis Significance Testing (NHST), provides only a partial picture of assay performance [46] [47]. The p-value merely measures the compatibility between the observed data and what would be expected if the entire statistical model were correct, including all assumptions about how data were collected and analyzed [47]. For researchers, scientists, and drug development professionals, this limited interpretation is insufficient for demonstrating that an assay method is truly fit for its intended purpose, known as Context of Use (CoU) [13].
The 2025 FDA Biomarker Guidance reinforces that while validation parameters of interest are similar between drug concentration and biomarker assays, the technical approaches must be adapted to demonstrate suitability for measuring endogenous analytes [13]. This guidance maintains remarkable consistency with the 2018 framework, emphasizing that the approach described in ICH M10 for drug assays should be the starting point for biomarker assay validation, but acknowledges that different considerations may be needed [13]. This evolution in regulatory thinking underscores the need for more nuanced statistical interpretation that goes beyond dichotomous "significant/non-significant" determinations.
Limitations of Traditional Statistical Measures
Thep-Value Fallacy in Method Comparison
The conventional reliance on p-values in assay validation presents several critical limitations that can compromise study conclusions. A p-value represents the probability that the chosen test statistic would have been at least as large as its observed value if every model assumption were correct, including the test hypothesis [47]. This definition contains a crucial point often lost in traditional interpretations: the p-value tests all assumptions about how the data were generated (the entire model), not just the targeted hypothesis [47]. When a very small p-value occurs, it may indicate that the targeted hypothesis is false, but it may also indicate problems with study protocols, analysis conduct, or other model assumptions [47].
The degradation of p-values into a dichotomous dichotomy (using an arbitrary cut-off such as 0.05 to declare results "statistically significant") represents one of the most pervasive misinterpretations in research [47] [48]. This practice is particularly problematic in method comparison studies for several reasons:
- Sample Size Dependence: In large datasets, even tiny, practically irrelevant effects can be statistically significant [49]
- Arbitrary Thresholds: Results with
p-values of 0.04 and 0.06 are often treated fundamentally differently, despite having minimal practical difference in evidence strength - Assumption Sensitivity:
p-values depend heavily on often unstated analysis protocols, which can lead to smallp-values even if the declared test hypothesis is correct [47]
Statistical Significance vs. Practical Significance
A fundamental challenge in interpreting statistical output for fitness-for-purpose is distinguishing between statistical significance and practical (biological) significance [49]. Statistical significance measures whether a result is likely to be real and not due to random chance, while practical significance refers to the real-world importance or meaningfulness of the results in a specific context [49].
Table 1: Comparing Statistical and Practical Significance
| Aspect | Statistical Significance | Practical Significance |
|---|---|---|
| Definition | Measures if an effect is likely to be real and not due to random chance [49] | Refers to the real-world importance of the result [49] |
| Assessment Method | Determined using p-values from statistical hypothesis tests [49] |
Domain knowledge used to determine tangible impact or value [49] |
| Context Dependence | Can be significant even if effect size is small or trivial [49] | Concerned with whether result is meaningful in specific field context [49] |
| Interpretation Focus | Compatibility between data and statistical model [47] | Relevance to research goals, costs, benefits, and risks [49] |
For example, in assay validation, a new method may show a statistically significant difference from a reference method (p < 0.001), but if the difference is minimal and has no impact on clinical decision-making or product quality, it may lack practical significance [49]. Conversely, a result that does not reach statistical significance (p > 0.05) might still be practically important, particularly in studies with limited sample size where power is insufficient to detect meaningful differences [49].
Comprehensive Statistical Framework for Method Comparison
Confidence Intervals for Effect Estimation
Confidence intervals provide a more informative alternative to p-values for interpreting method comparison results. A confidence interval provides a range of plausible values for the true effect size, offering both estimation and precision information [46]. Unlike p-values, which focus solely on null hypothesis rejection, confidence intervals display the range of effects compatible with the data, given the study's assumptions [47] [48].
For method comparison studies, confidence intervals are particularly valuable because they:
- Quantify Precision: The width of the interval indicates the precision of the effect estimate
- Display Magnitude: The range shows potential effect sizes, aiding practical significance assessment [49]
- Facilitate Comparison: Overlapping confidence intervals between methods can visually demonstrate equivalence
- Support Decision-Making: The entire interval can be evaluated against predefined acceptability limits
When a 95% confidence interval is reported, it indicates that, with 95% confidence, the true parameter value lies within the specified range [46]. For instance, if a method comparison study shows a mean bias of 2.5 units with a 95% CI of [1.8, 3.2], researchers can be 95% confident that the true bias falls between 1.8 and 3.2 units. This range can then be evaluated against pre-specified acceptance criteria based on the assay's intended use.
Effect Size Measurement and Interpretation
Effect sizes provide direct measures of the magnitude of differences or relationships observed in method comparison studies, offering critical information about practical significance [46]. While p-values indicate whether an effect exists, effect sizes quantify how large that effect is, providing essential context for determining fitness-for-purpose [46].
In method comparison studies, relevant effect sizes include:
- Standardized Mean Differences: Cohen's d, Hedges' g for comparing method means
- Correlation Measures: Pearson's r, intraclass correlation coefficients for agreement assessment
- Variance Explained: R-squared values for regression-based comparisons
- Bias Estimates: Mean difference between methods with acceptability margins
The European Bioanalysis Forum (EBF) emphasizes that biomarker assays benefit fundamentally from Context of Use principles rather than a PK SOP-driven approach [13]. This perspective highlights that effect size interpretation must be contextualized within the specific intended use of the assay, including clinical or biological relevance.
Meta-Analytic Thinking for Cumulative Evidence
Meta-analysis combines results from multiple studies to provide a more reliable understanding of an effect [46]. This approach is particularly valuable in method comparison studies, where evidence may accumulate across multiple experiments or sites. By synthesizing results statistically, meta-analysis provides more precise effect estimates and helps counter selective reporting bias [46].
For assay validation, meta-analytic thinking encourages researchers to:
- Plan for Replication: Design studies with potential future synthesis in mind
- Document Thoroughly: Ensure complete reporting of methods and results to facilitate future synthesis
- Evaluate Consistency: Assess whether effects are consistent across different conditions or populations
- Contextualize Findings: Interpret results in the context of existing evidence rather than in isolation
A key requirement for meaningful meta-analysis is complete publication of all studies—both those with positive and non-significant findings [46]. Selective reporting biases the literature and can lead to incorrect conclusions about method performance when synthesized.
Experimental Protocols for Comprehensive Statistical Analysis
Protocol 1: Method Comparison with Confidence Interval Estimation
Objective: To compare a new analytical method to a reference method using confidence intervals for bias estimation.
Materials and Equipment:
- Test samples representing the analytical measurement range
- Reference method with established performance
- New method undergoing validation
- Appropriate statistical software (R, Python, SAS, or equivalent)
Procedure:
- Sample Preparation: Select a minimum of 40 samples covering the claimed measurement range [13]
- Measurement Scheme: Analyze all samples using both methods in randomized order to avoid systematic bias
- Data Collection: Record paired results for each sample, ensuring identical sample processing where possible
- Difference Calculation: Compute the difference between methods for each sample (new method - reference method)
- Bias Estimation: Calculate the mean difference (bias) and standard deviation of differences
- Confidence Interval Construction: Compute the 95% confidence interval for the mean bias using the formula:
- CI = Mean bias ± t(0.975, n-1) × (SD/√n)
- where t(0.975, n-1) is the 97.5th percentile of the t-distribution with n-1 degrees of freedom
- Visualization: Create a difference plot (Bland-Altman) with confidence intervals for mean bias
Interpretation Criteria:
- Compare the confidence interval limits to pre-defined acceptability limits based on biological relevance
- If the entire confidence interval falls within acceptability limits, conclude equivalence
- If any portion extends beyond acceptability limits, consider potential practical significance
Protocol 2: Effect Size Calculation for Assay Comparison
Objective: To calculate and interpret effect sizes for method comparison studies.
Materials and Equipment:
- Paired method comparison data set
- Statistical software with effect size calculation capabilities
- Pre-defined criteria for minimal important difference
Procedure:
- Data Preparation: Ensure data meet assumptions for selected effect size measures
- Effect Size Selection: Choose appropriate effect size based on study design:
- For continuous outcomes: standardized mean difference (Cohen's d)
- For categorical outcomes: risk ratio, odds ratio, or risk difference
- For agreement: intraclass correlation coefficient (ICC)
- Effect Size Calculation:
- For Cohen's d: d = (Mean₁ - Mean₂) / pooled SD
- Pooled SD = √[((n₁-1)SD₁² + (n₂-1)SD₂²)/(n₁+n₂-2)]
- Confidence Interval for Effect Size: Compute 95% confidence intervals for the effect size estimate
- Contextualization: Compare effect size to previously established minimal important difference
Interpretation Guidelines:
- Interpret effect size in context of assay intended use and biological relevance
- Consider both statistical precision (confidence interval width) and magnitude (point estimate)
- Evaluate whether effect size justifies practical action or method implementation
Protocol 3: Practical Significance Assessment
Objective: To evaluate the practical significance of method comparison results.
Materials and Equipment:
- Effect size estimates with confidence intervals
- Domain knowledge experts or established decision criteria
- Documentation of assay context of use and performance requirements
Procedure:
- Define Decision Context: Document the specific use case for the assay and consequences of method differences
- Establish Decision Criteria: Define minimum effect sizes that would trigger different actions (e.g., method modification, additional training)
- Stakeholder Input: Engage relevant stakeholders (clinicians, manufacturers, regulators) to establish practical significance thresholds
- Comparative Assessment: Compare statistical findings to practical significance thresholds
- Decision Framework: Apply pre-specified decision rules to determine appropriate action based on results
Interpretation Framework:
- Statistically Significant, Practically Important: Strong evidence for method difference with real-world impact
- Statistically Significant, Practically Unimportant: Method difference detectable but irrelevant for intended use
- Statistically Nonsignificant, Practically Important: Inconclusive evidence; consider increasing sample size
- Statistically Nonsignificant, Practically Unimportant: No evidence of meaningful difference
Visualization of Statistical Interpretation Workflow
The following diagram illustrates the comprehensive workflow for interpreting statistical output in method comparison studies, emphasizing the integration of multiple statistical approaches:
The Scientist's Toolkit: Essential Reagents and Materials
Table 2: Research Reagent Solutions for Method Comparison Studies
| Reagent/Material | Function in Method Comparison | Application Notes |
|---|---|---|
| Reference Standard | Provides benchmark for method comparison with known properties | Should be traceable to recognized reference materials; stability and purity must be documented |
| Quality Control Materials | Monitors assay performance across comparison studies | Should represent low, medium, and high levels of measurand; commutable with patient samples |
| Statistical Software | Performs comprehensive statistical analysis beyond basic p-values |
R, Python, SAS, or equivalent with capability for effect sizes, confidence intervals, and meta-analysis |
| Sample Panels | Represents biological variation across intended use population | Should cover entire measuring range; adequate size to detect meaningful differences (typically n≥40) [13] |
| Documentation System | Records analytical procedures and statistical plans | Critical for reproducibility and regulatory compliance; should include pre-specified analysis plans |
Interpreting statistical output for fitness-for-purpose requires moving beyond the limitations of p-values to embrace a more comprehensive approach incorporating confidence intervals, effect sizes, and practical significance assessment. The 2025 FDA Biomarker Guidance reinforces this perspective by emphasizing that biomarker assay validation must address the measurement of endogenous analytes with approaches adapted from—but not identical to—drug concentration assays [13]. By implementing the protocols and frameworks outlined in this document, researchers can provide more nuanced, informative assessments of method comparison results that truly establish fitness-for-purpose within the specific Context of Use. This approach aligns with the evolving regulatory landscape and promotes more scientifically sound decision-making in assay validation research.
In the regulated environment of pharmaceutical research and development, robust documentation and reporting practices are not merely administrative tasks; they are fundamental pillars of scientific integrity and regulatory compliance. For researchers and scientists designing method comparison studies for assay validation, adhering to established guidelines from bodies like the International Organization for Standardization (ISO) and the Clinical and Laboratory Standards Institute (CLSI) is paramount. Such adherence ensures that studies are audit-ready, meaning they can withstand rigorous scrutiny from internal quality assurance units, external auditors, and regulatory agencies like the FDA and EMA. This document provides detailed application notes and protocols, framed within the context of assay validation research, to guide professionals in creating a comprehensive and defensible documentation trail from study inception to completion.
Application Notes: Core Principles for Audit-Ready Documentation
The Role of the SPIRIT Framework in Experimental Protocol Design
A well-defined protocol is the cornerstone of any rigorous scientific study. The SPIRIT (Standard Protocol Items: Recommendations for Interventional Trials) 2025 statement provides an evidence-based checklist of 34 minimum items to address in a trial protocol, serving as an excellent model for structuring method validation protocols to ensure completeness and transparency [50]. While originally designed for clinical trials, its principles are highly applicable to method validation studies. Key relevant items from the updated SPIRIT 2025 checklist include:
- Open Science Section: The protocol should detail where the full protocol and statistical analysis plan (SAP) can be accessed, ensuring transparency [50].
- Roles and Responsibilities: Clearly document the names, affiliations, and roles of all protocol contributors, as well as the roles of sponsors and funders in the design, conduct, and analysis [50].
- Dissemination Policy: State plans for communicating results, which for internal validation studies may refer to internal technical reports and regulatory submissions [50].
Managing Protocol Complexity for Enhanced Executability
Complex protocols introduce operational risks, including execution errors and delays. A recently developed Protocol Complexity Tool (PCT) provides a framework to objectively measure and simplify study design without compromising scientific quality [51]. The PCT assesses five domains: operational execution, regulatory oversight, patient burden, site burden, and study design. Using such a framework during the protocol development phase for a method comparison study can help identify and mitigate unnecessary complexities that might otherwise lead to non-compliance during an audit.
Adherence to CLSI Guidelines for Method Validation
CLSI guidelines form the bedrock of reliable laboratory method validation and verification. These standards provide concise explanations and step-by-step instructions for evaluating critical test method performance characteristics, thereby enabling labs to comply with accreditation requirements [52]. For instance:
- CLSI EP07: Focuses on interference testing in clinical chemistry, guiding manufacturers and laboratories in evaluating interferents, determining the medical significance of effects, and informing customers of known error sources [52].
- CLIA Proficiency Testing (PT) Criteria: Adherence to CLIA PT standards, which were updated in 2025, is a direct measure of a laboratory method's performance and is a critical focus during audits [53].
Experimental Protocols: A Template for Method Comparison Study Documentation
This protocol template is designed for a method comparison study, aligning with principles from SPIRIT 2013 and CLSI guidelines to ensure audit readiness.
Protocol Administrative Information
- Title: A Method Comparison Study for the Validation of [Assay Name] against a Reference Method.
- Version: 1.0
- Version Date: [Date]
- Roles and Responsibilities:
- Principal Investigator: [Name, Affiliation] - Overall scientific and operational oversight.
- Study Scientist: [Name, Affiliation] - Execution of experimental procedures.
- Bioanalyst/Statistician: [Name, Affiliation] - Data analysis and interpretation.
- Quality Assurance: [Name, Affiliation] - Independent audit of study conduct and data.
Objectives
To compare the performance of the new [Test Method] to the established [Reference Method] by evaluating bias, precision, and linearity across the assay's measurable range.
Methodology
Materials and Reagents:
- Test Method: [Instrument, Reagent Lot]
- Reference Method: [Instrument, Reagent Lot]
- Patient Sample Panel: [Number] of residual, de-identified human samples covering the assay's analytical range.
Experimental Procedure:
- Sample Analysis: Each sample in the panel will be analyzed in duplicate on both the test and reference methods in a single run.
- Calibration and QC: Both methods will be calibrated according to manufacturer instructions. Quality Control (QC) materials at three levels (low, medium, high) will be run at the start and end of the analytical run to ensure system stability.
Data Analysis Plan:
- Passing-Bablok Regression: Will be used to assess the relationship and constant/proportional bias between the two methods.
- Bland-Altman Plot: Will be used to visualize the difference between methods against their average.
- Acceptance Criteria: The new method will be considered comparable if the 95% confidence interval for the slope and intercept from Passing-Bablok regression falls within [pre-defined, scientifically justified limits, e.g., 0.95-1.05 for slope and -5 to 5 for intercept].
Data Presentation and Visualization
Structured Data Tables
Presenting quantitative data in clearly structured tables is essential for audit clarity and easy comparison of acceptance criteria.
Table 1: CLIA 2025 Proficiency Testing Acceptance Limits for Select Chemistry Analytes [53]
| Analyte | NEW 2025 CLIA Criteria (Allowable Performance, AP) | OLD CLIA Criteria (AP) |
|---|---|---|
| Alanine Aminotransferase (ALT) | Target Value (TV) ± 15% or ± 6 U/L (greater) | TV ± 20% |
| Creatinine | TV ± 0.2 mg/dL or ± 10% (greater) | TV ± 0.3 mg/dL or ± 15% (greater) |
| Glucose | TV ± 6 mg/dL or ± 8% (greater) | TV ± 6 mg/dL or ± 10% (greater) |
| Hemoglobin A1c | TV ± 8% | None |
| Potassium | TV ± 0.3 mmol/L | TV ± 0.5 mmol/L |
| Total Protein | TV ± 8% | TV ± 10% |
Table 2: Example Summary of Method Comparison Data
| Sample ID | Reference Method (Units) | Test Method (Units) | Difference | Mean |
|---|---|---|---|---|
| 1 | 10.5 | 10.7 | +0.2 | 10.6 |
| 2 | 25.0 | 24.5 | -0.5 | 24.75 |
| ... | ... | ... | ... | ... |
| Statistical Summary | Average Bias: | Standard Deviation: |
Experimental Workflow and Data Relationship Diagrams
Visualizing the experimental workflow and data relationships simplifies complex processes for auditors and reviewers. The following diagram, created with Graphviz using the specified color palette and contrast rules, outlines the core workflow of a method comparison study.
Method Comparison Study Workflow
The following diagram illustrates the logical relationship between key documentation components and how they contribute to overall audit readiness.
Documentation Trail for Audit Readiness
The Scientist's Toolkit: Essential Research Reagent Solutions
A well-documented list of critical materials is a key component of an audit-ready study package.
Table 3: Key Research Reagent Solutions for Method Comparison Studies
| Item | Function & Importance | Documentation Requirement |
|---|---|---|
| Certified Reference Material (CRM) | Provides a metrologically traceable standard with a defined value and uncertainty. Used for calibration to ensure accuracy and standardization across methods. | Certificate of Analysis (CoA) with lot number, expiration, assigned value, and uncertainty. |
| Quality Control (QC) Materials | Monitors the stability and precision of the analytical system over time. Run at defined intervals to ensure the method remains in control. | CoA with target values and acceptable ranges for each level (e.g., low, med, high). Lot number and stability data. |
| Calibrators | Used to establish the relationship between the instrument response and the analyte concentration. Critical for defining the analytical measurement range. | CoA with assigned values and traceability statement. Lot-specific information. |
| Interference Test Kit | Systematically evaluates the effect of potential interferents (e.g., hemolysis, icterus, lipids) on the assay result, as guided by CLSI EP07 [52]. | Documentation of interferent concentrations and preparation methodology. |
| Patient Sample Panel | Represents the real-world biological matrix and concentration range. Used for the core comparison and correlation analysis. | Documentation of inclusion/exclusion criteria, stability data, and pre-characterization results (if any). |
Conclusion
A well-designed method comparison study is not merely a statistical exercise but a fundamental pillar of assay validation that ensures the generation of reliable and clinically relevant data. By systematically addressing the foundational, methodological, troubleshooting, and verification intents outlined, researchers can confidently demonstrate that an analytical method is fit for its intended purpose. The strategic application of these principles, from robust experimental design to the thoughtful handling of real-world complexities like method failure, directly supports regulatory submissions and enhances the quality and integrity of biomedical research. Future directions will likely involve greater integration of automated data analysis platforms and continued evolution of statistical standards to keep pace with complex biologics and novel biomarker development.
References
- 1. Method Validation vs Method Verification: Which is Better ... [https://www.labmanager.com/method-validation-vs-method-verification-which-is-better-for-use-in-laboratories-33982]
- 2. Method Validation vs. Verification: Breaking Down the ... [https://www.idexxcurrents.com/en/latest/method-validation-vs-verification-breaking-down-the-difference/]
- 3. Method Validation Vs. Verification - A Simple Breakdown [https://cptclabs.com/method-validation-vs-verification/]
- 4. 3 Key Regulatory Guidelines for Method Validation [https://altabrisagroup.com/regulatory-guidelines-for-method-validation/]
- 5. Development and validation of a novel isocratic RP-HPLC ... [https://www.sciencedirect.com/science/article/pii/S092809872500274X]
- 6. The Comparison of Methods Experiment [https://www.westgard.com/lessons/basic-method-validation/lesson23.html]
- 7. Statistical analysis in method comparison studies part one [https://acutecaretesting.org/en/articles/statistical-analysis-in-method-comparison-studies-part-one]
- 8. A comprehensive guide to conduct a systematic review and ... [https://pmc.ncbi.nlm.nih.gov/articles/PMC12366998/]
- 9. A Practical Guide to Quantitative Data Analysis Methods ... [https://www.looppanel.com/blog/quantitative-data-analysis-methods]
- 10. Strategic color use in UX design: from accessibility to user ... [https://www.uxstudioteam.com/ux-blog/color-in-ux-ui-design]
- 11. Understanding Success Criterion 1.4.6: Contrast (Enhanced) [https://www.w3.org/WAI/WCAG21/Understanding/contrast-enhanced.html]
- 12. How to Choose Color Combinations for Website [https://verpex.com/blog/website-tips/how-to-choose-color-combinations-for-website]
- 13. The 2025 FDA Biomarker Guidance: Understanding ... [https://www.linkedin.com/pulse/2025-fda-biomarker-guidance-understanding-lxoke]
- 14. A practical guide to validation and verification of analytical ... [https://www.sciencedirect.com/science/article/abs/pii/S006524231930006X]
- 15. ICH and FDA Guidelines for Analytical Method Validation [https://www.labmanager.com/ich-and-fda-guidelines-for-analytical-method-validation-34252]
- 16. Limit of Blank, Limit of Detection and Limit of Quantitation [https://pmc.ncbi.nlm.nih.gov/articles/PMC2556583/]
- 17. A Phase-Appropriate Approach For Assay Validation In ... [https://www.cellandgene.com/doc/a-phase-appropriate-approach-for-assay-validation-in-cell-gene-therapies-0001]
- 18. A descriptive study of samples sizes used in agreement ... [https://bmcmedresmethodol.biomedcentral.com/articles/10.1186/s12874-022-01723-5]
- 19. Sample size determination: A practical guide for health ... [https://pmc.ncbi.nlm.nih.gov/articles/PMC10000262/]
- 20. The Replication Experiment - Basic Method Validation [https://www.westgard.com/lessons/basic-method-validation/lesson22.html]
- 21. A Practical Guide to Immunoassay Method Validation - PMC [https://pmc.ncbi.nlm.nih.gov/articles/PMC4541289/]
- 22. Design, Analysis and Interpretation of Method-Comparison ... [https://pmc.ncbi.nlm.nih.gov/articles/PMC2944826/]
- 23. A step by step guide to quantitative comparisons in ... [https://finbiosoft.com/a-step-by-step-guide-to-quantitative-comparisons-in-validation-manager/]
- 24. A Central Requirement for New Test Methods [https://dcndx.com/insights/method-comparison-experiment-central-requirement-new-test-methods/]
- 25. Understanding Bland Altman analysis - PMC [https://pmc.ncbi.nlm.nih.gov/articles/PMC4470095/]
- 26. Method Comparison | Bland-Altman Plot [https://www.ncss.com/software/ncss/method-comparison-in-ncss/]
- 27. Passing-Bablok regression - method comparison [https://www.medcalc.org/en/manual/passing-bablok-regression.php]
- 28. Bland-Altman Plot: Assessing Agreement [https://numiqo.com/tutorial/bland-altman-plot]
- 29. Method Comparison Regression [https://www.statsdirect.com/help/agreement/mcr.htm]
- 30. Comparison of methods: Passing and Bablok regression [https://pubmed.ncbi.nlm.nih.gov/22141206/]
- 31. HTS Assay Validation - Assay Guidance Manual - NCBI - NIH [https://www.ncbi.nlm.nih.gov/books/NBK83783/]
- 32. 14 Comparing quantitative data between individuals [https://bookdown.org/pkaldunn/SRM-Textbook/BetweenQuantData.html]
- 33. Rethinking the handling of method failure in comparison ... [https://arxiv.org/html/2408.11594v3]
- 34. Quality by Design for Preclinical In Vitro Assay Development [https://pmc.ncbi.nlm.nih.gov/articles/PMC11788254/]
- 35. Boosting Accuracy and Efficiency: Assay Development ... [https://dispendix.com/blog/boosting-accuracy-and-efficiency-assay-development-and-validation-process-for-drug-discovery]
- 36. Assay Development and Method Validation Essentials [https://www.biopharminternational.com/view/assay-development-and-method-validation-essentials]
- 37. Why is Biomarker Assay Validation Different from that of ... [https://link.springer.com/article/10.1208/s12248-025-01135-5]
- 38. Data quality assessment in healthcare, dimensions, methods ... [https://pmc.ncbi.nlm.nih.gov/articles/PMC12335082/]
- 39. and regression-based approaches for detection of bias [https://www.sciencedirect.com/science/article/abs/pii/S000991202300036X]
- 40. Clinical vs. statistical significance: considerations for... [https://www.degruyterbrill.com/document/doi/10.1515/cclm-2025-0219/html?lang=en&srsltid=AfmBOoq8UbEM7m2-D2WeVnMygPtrYr3HbDPvPCFhU_q-TRcDXEg_DK-q]
- 41. Analytical evaluation of the performances of point-of-care ... [https://pmc.ncbi.nlm.nih.gov/articles/PMC12209313/]
- 42. A machine learning method to validate regression models [https://www.sciencedirect.com/science/article/pii/S209012322500270X]
- 43. mitigating bias due to measurement error in real-world ... [https://pmc.ncbi.nlm.nih.gov/articles/PMC12464481/]
- 44. The Comparison of Methods Experiment - Westgard QC [https://westgard.com/lessons/basic-method-validation/lesson23.html]
- 45. Bioanalytical method validation: An updated review - PMC [https://pmc.ncbi.nlm.nih.gov/articles/PMC3658022/]
- 46. Beyond p-Values: Embracing The New Statistics for ... [https://medium.com/@sahin.samia/beyond-p-values-embracing-the-new-statistics-for-reliable-data-analysis-29b20b2cbac1]
- 47. Statistical tests, P values, confidence intervals, and power [https://pmc.ncbi.nlm.nih.gov/articles/PMC4877414/]
- 48. Common misinterpretations of statistical significance and P ... [https://www.sciencedirect.com/science/article/pii/S2666910225001462]
- 49. BEYOND THE P-VALUE - Statistical Significance vs ... [https://vsni.co.uk/beyond-the-p-value-statistical-significance-vs-practical-significance/]
- 50. SPIRIT 2025 statement: Updated guideline for protocols of ... [https://pmc.ncbi.nlm.nih.gov/articles/PMC12037212/]
- 51. Development of a protocol complexity tool [https://bmcmedresmethodol.biomedcentral.com/articles/10.1186/s12874-025-02652-9]
- 52. Guidelines on Clinical Method Validation & Verfication [https://clsi.org/resources/insights/interference-with-laboratory-tests/]
- 53. 2025 CLIA Acceptance Limits for Proficiency Testing [https://www.westgard.com/clia-a-quality/quality-requirements/2024-clia-requirements.html]