Mastering Sample Preparation for UV-Vis Analysis in Pharmaceutical Formulations: A Guide from Fundamentals to GMP Compliance
This article provides a comprehensive guide for researchers, scientists, and drug development professionals on sample preparation for UV-Vis spectroscopy in pharmaceutical quality control and R&D.
Mastering Sample Preparation for UV-Vis Analysis in Pharmaceutical Formulations: A Guide from Fundamentals to GMP Compliance
Abstract
This article provides a comprehensive guide for researchers, scientists, and drug development professionals on sample preparation for UV-Vis spectroscopy in pharmaceutical quality control and R&D. It covers the foundational principles of UV-Vis spectroscopy and its critical role in ensuring drug identity, purity, and potency. The content details methodological workflows for various formulation types, addresses common troubleshooting and optimization challenges, and outlines the rigorous validation and comparative strategies required for regulatory compliance under ICH and FDA guidelines. By synthesizing foundational knowledge with advanced practical applications, this guide aims to enhance analytical accuracy, efficiency, and data reliability in pharmaceutical development.
The Pillars of Precision: Core Principles of UV-Vis and Pharmaceutical Sample Integrity
UV-Vis spectroscopy is a cornerstone analytical technique in pharmaceutical quality assurance and quality control (QA/QC). It provides a rapid, reliable, and non-destructive means to ensure that drugs meet stringent regulatory standards for identity, purity, and potency [1]. This document details the application of UV-Vis spectroscopy within the critical framework of pharmaceutical analysis, with a specific focus on the sample preparation protocols essential for accurate and reproducible results.
Ultraviolet-Visible (UV-Vis) spectroscopy measures the absorption of light in the ultraviolet and visible regions of the electromagnetic spectrum by a sample. The fundamental principle is that the amount of light absorbed is directly proportional to the concentration of the absorbing species in a solution, as described by the Beer-Lambert Law [2]. In the highly regulated pharmaceutical industry, this technique is indispensable for verifying that Active Pharmaceutical Ingredients (APIs) and finished drug products conform to predefined specifications for identity, strength, quality, and purity [3] [1].
Regulatory bodies like the FDA mandate that pharmaceutical manufacturers provide proof of their quality control efforts, addressing critical attributes such as identity, assay, impurities, and dissolution [3]. UV-Vis spectroscopy is a validated tool for meeting these requirements, supporting everything from raw material inspection to final product release testing.
Key Applications in Pharmaceutical QA/QC
The following table summarizes the primary applications of UV-Vis spectroscopy in ensuring the identity, purity, and potency of pharmaceuticals.
Table 1: Key QA/QC Applications of UV-Vis Spectroscopy
| QA/QC Parameter | Application | Typical UV-Vis Protocol | Regulatory Citation |
|---|---|---|---|
| Identity Testing | Verification of chemical identity via absorption spectrum | Comparison of sample spectrum against a reference standard [1] [4]. | USP, EP, JP [4] |
| Potency/Assay | Quantification of Active Pharmaceutical Ingredient (API) concentration | Measurement of absorbance at λ~max~ and calculation via calibration curve [1]. | USP <611>, ICH Q2(R1) [1] [4] |
| Purity & Impurity Profiling | Detection of unwanted contaminants or degradation products | Spectral scan for unexpected absorbance peaks; specific tests for impurities like in ethanol [1] [5]. | USP, EP [5] |
| Dissolution Testing | Monitoring the release of API from solid dosage forms | Periodic sampling and analysis of dissolution medium [3] [1]. | USP <711> [3] [4] |
| Color Analysis | Quantitative assessment of drug product color for consistency and stability | Measurement of % Transmittance or Reflectance across the visible spectrum [6]. | USP <1061>, ASTM [6] |
Detailed Protocols and Sample Preparation
Proper sample preparation is paramount to obtaining accurate, precise, and regulatory-compliant results. Inadequate preparation is a leading cause of signal interference and out-of-specification findings [1].
Protocol for Identity Verification of an API (e.g., Ibuprofen)
This protocol follows the general monographs for ibuprofen as outlined in the USP and EP [4].
1. Principle: The identity of a substance is confirmed by matching the characteristic absorption spectrum of the sample to that of a compendial reference standard.
2. The Scientist's Toolkit:
Table 2: Essential Research Reagents and Materials for Identity Verification
| Item | Function | Critical Notes |
|---|---|---|
| Reference Standard | Provides the benchmark spectral fingerprint for comparison. | Must be a certified and traceable standard. |
| UV-Transparent Solvent (e.g., Methanol) | Dissolves the analyte without interfering in the UV range. | Must be spectroscopically pure; check cutoff wavelength. |
| Quartz Cuvettes (matched pair) | Holds the sample and reference solutions for analysis. | Quartz is essential for UV range; ensure clean, scratch-free surfaces. |
| Analytical Balance | Precisely weighs the sample and reference standard. | Regular calibration is required for data integrity. |
| Volumetric Flasks | Precisely dilutes the sample and standard to the target concentration. |
3. Procedure:
- Step 1: Solution Preparation. Accurately weigh the ibuprofen sample and the USP/EP reference standard. Dissolve both in the same specified solvent (e.g., methanol) to prepare solutions of a specified concentration, typically within the linear range of the instrument (absorbance < 1.0) [2] [4].
- Step 2: Blank Preparation. Prepare a blank solution containing only the solvent.
- Step 3: Spectral Acquisition. Using a double-beam UV-Vis spectrophotometer, scan both the sample and standard solutions across the specified wavelength range (e.g., 200-350 nm) against the solvent blank.
- Step 4: Data Analysis. The wavelength of maximum absorption (λ~max~) in the sample spectrum should coincide with that of the reference standard spectrum, typically within a specified tolerance (e.g., ±2 nm). The overall spectral profile should be identical.
Protocol for Potency Assay and Content Uniformity
This protocol is used to verify the labeled amount of API in a dosage form, a critical potency test [1].
1. Principle: The concentration of the API is determined by measuring absorbance at its λ~max~ and comparing it to a calibration curve constructed from standard solutions of known concentration.
2. Procedure:
- Step 1: Standard Curve Preparation. Prepare a series of at least five standard solutions of the API reference standard covering a concentration range that yields absorbances between 0.1 and 1.0 AU. Use an appropriate solvent that completely dissolves the API and does not interfere.
- Step 2: Sample Preparation. For a tablet, crush and homogenize a representative number of tablets. Accurately weigh a portion of the powder equivalent to one dose. Extract the API using an appropriate solvent, followed by dilution to the final volume. The solution will likely require filtration or centrifugation to become optically clear [1].
- Step 3: Absorbance Measurement. Measure the absorbance of each standard and the prepared sample solution at the determined λ~max~ (e.g., 280 nm for many compounds) against a solvent blank.
- Step 4: Quantification. Plot the absorbance versus concentration for the standard solutions to generate a calibration curve. The equation of the line (y = mx + c) is used to calculate the concentration of the API in the sample solution, which is then back-calculated to the amount per dosage unit.
Critical Sample Preparation Considerations
The workflow below outlines the key decision points in sample preparation to ensure data quality and regulatory compliance.
Diagram 1: Sample Preparation Workflow
- Solvent Selection: The solvent must be optically transparent in the spectral region of interest. For UV measurements below ~300 nm, high-purity solvents like water, acetonitrile, or hexane are required. The solvent's UV cutoff wavelength must be known and should be lower than the analyte's λ~max~ [1].
- Pathlength and Dilution: Standard cuvettes have a 1 cm pathlength. If the sample absorbance is too high (>1.0 AU), the sample must be diluted to remain within the instrument's linear dynamic range. Alternatively, cuvettes with a shorter pathlength (e.g., 1 mm) can be used, especially with limited sample volume [2] [7].
- Clarity and Particulates: Samples must be free of particulates that cause light scattering, leading to erroneously high absorbance readings. Filtration or centrifugation is often a critical final step before analysis [1].
- Cuvette Material: For any analysis involving UV light (wavelengths < ~350 nm), quartz cuvettes are mandatory as they are transparent in this range. Glass or plastic cuvettes, which absorb UV light, may only be used for visible light measurements [2].
Regulatory Compliance and Instrument Qualification
UV-Vis methods used for pharmaceutical release must be validated according to international guidelines such as ICH Q2(R1) [1]. This involves establishing method parameters including accuracy, precision, specificity, linearity, range, and robustness.
Furthermore, the instruments themselves must be qualified upon installation (IQ/OQ) and their performance verified at regular intervals according to pharmacopeial standards such as USP <857>, Ph. Eur. 2.2.5, and JP <2.24> [8]. Parameters verified typically include wavelength accuracy, photometric accuracy, stray light, and resolution. Data integrity is paramount, and systems must be compliant with 21 CFR Part 11, requiring features like electronic signatures and audit trails [4] [8].
UV-Vis spectroscopy remains a vital, versatile, and robust tool in the pharmaceutical analyst's arsenal. Its ability to provide fast, accurate, and non-destructive analysis of identity, purity, and potency makes it indispensable for QA/QC. However, the reliability of the data is profoundly dependent on rigorous sample preparation and strict adherence to validated methodologies and regulatory guidelines. By following the detailed protocols and considerations outlined in this document, pharmaceutical professionals can ensure the safety, efficacy, and quality of drug products, thereby protecting public health.
In the field of pharmaceutical research, the quantitative analysis of active pharmaceutical ingredients (APIs) and impurities is fundamental to ensuring drug efficacy and safety. UV-Visible spectrophotometry serves as a cornerstone technique for this purpose, and its quantitative application is almost entirely reliant on the Beer-Lambert Law (also known as Beer's Law). This principle provides the foundational relationship between the concentration of an analyte in solution and the amount of light it absorbs, enabling scientists to make precise and accurate determinations. For drug development professionals, a thorough understanding of this law—including its correct application, its limitations, and the necessary experimental controls—is critical for generating reliable analytical data that meets rigorous quality control standards. This application note details the practical implementation of the Beer-Lambert Law in the context of pharmaceutical formulation analysis [2] [9].
Theoretical Foundation
The Beer-Lambert Law Equation
The Beer-Lambert Law establishes a linear relationship between the absorbance of light by a solution and the concentration of the absorbing species within it, as well as the path length the light travels through the solution. It is formally stated as:
[ A = \varepsilon l c ]
Where:
- A is the Absorbance (a dimensionless quantity).
- ε is the Molar Absorptivity (or molar absorption coefficient), with typical units of L mol⁻¹ cm⁻¹.
- l is the Path Length of the light through the solution, measured in cm.
- c is the Molar Concentration of the absorbing solute, measured in mol L⁻¹ [10] [11] [9].
Absorbance itself is defined logarithmically from the ratio of incident light intensity ((I_0)) to transmitted light intensity ((I)):
[ A = \log{10} \left( \frac{I0}{I} \right) ]
This logarithmic relationship means that absorbance increases as the transmittance of light through the sample decreases. The following table shows this inverse correlation [10] [11]:
Table 1: Relationship between Absorbance and Transmittance
| Absorbance (A) | Percent Transmittance (%T) |
|---|---|
| 0 | 100% |
| 0.3 | 50% |
| 1 | 10% |
| 2 | 1% |
| 3 | 0.1% |
Conceptual Diagram of the Beer-Lambert Law
The following diagram illustrates the core concepts and relationships defined by the Beer-Lambert Law.
Experimental Protocol: Developing a Calibration Curve for an API
This protocol outlines the steps to create a calibration curve for an active pharmaceutical ingredient using UV-Vis spectrophotometry, enabling the quantification of the API in an unknown sample, such as a formulated drug product extract.
Materials and Equipment
Table 2: Essential Research Reagent Solutions and Materials
| Item | Specification / Function |
|---|---|
| UV-Vis Spectrophotometer | Equipped with a deuterium lamp (UV) and tungsten/halogen lamp (visible light). Must use quartz cuvettes for UV analysis [2]. |
| Cuvettes | Quartz for UV light analysis (below ~350 nm); optical glass or plastic may be suitable for visible light only [2]. |
| Analytical Balance | For accurate weighing of standards. |
| Volumetric Flasks | Class A, for precise preparation of stock and standard solutions. |
| Reference Solvent | High-purity solvent used to prepare the API stock and standard solutions. This serves as the "blank." |
| API Reference Standard | Certified, high-purity material of known identity and potency. |
Step-by-Step Procedure
Preparation of Stock Solution: Accurately weigh a known quantity of the pure API reference standard. Quantitatively transfer it to a volumetric flask and dilute to volume with the appropriate solvent to create a stock solution of known concentration (e.g., 1 mg/mL).
Preparation of Standard Solutions: Using serial dilution, prepare a series of at least 5 standard solutions covering a concentration range where the API is expected to follow the Beer-Lambert Law. For example, prepare standards at 25%, 50%, 75%, 100%, and 125% of the target assay concentration.
Spectrophotometer Setup: a. Turn on the instrument and allow the lamps to warm up for the time specified by the manufacturer. b. Select the wavelength of maximum absorption (λ_max) for the API, as determined from a prior spectral scan. c. Fill a cuvette with the reference solvent (blank), place it in the sample holder, and record a baseline absorbance or set the instrument to 100% transmittance.
Measurement of Standards: a. Rinse the cuvette multiple times with a small portion of the first standard solution. b. Fill the cuvette with the standard, place it in the spectrophotometer, and record the absorbance. c. Repeat this process for all standard solutions and for the unknown sample solution. Measure each solution in duplicate or triplicate.
Data Analysis and Calibration: a. Calculate the average absorbance for each standard solution. b. Plot the average absorbance (y-axis) versus the corresponding known concentration (x-axis) to create a scatter plot. c. Perform a linear regression analysis on the data points to obtain the equation of the calibration curve in the form (y = mx + b), where (y) is absorbance, (m) is the slope (equivalent to (εl)), (x) is concentration, and (b) is the y-intercept. A valid curve should have a correlation coefficient (R²) > 0.995.
Quantification of Unknown: Use the regression equation from the calibration curve to calculate the concentration of the API in the unknown sample based on its measured absorbance.
Table 3: Example Data Table for Calibration Curve of a Hypothetical API
| Standard Solution | Concentration (μg/mL) | Absorbance (Average, n=3) |
|---|---|---|
| 1 | 10.0 | 0.205 |
| 2 | 20.0 | 0.395 |
| 3 | 30.0 | 0.612 |
| 4 | 40.0 | 0.798 |
| 5 | 50.0 | 1.005 |
| Unknown Sample | Unknown | 0.570 |
Critical Considerations and Limitations in Pharmaceutical Applications
The Beer-Lambert Law is an idealization, and several factors can lead to deviations from the predicted linear behavior, potentially compromising quantitative accuracy.
Fundamental Limitations of the Law
- Chemical and Instrumental Deviations: The law assumes monochromatic light, non-interacting absorbing species, and a homogeneous solution without scattering [12] [13]. Real-world deviations include:
- Scattering and Reflection: In biological or turbid samples, light scattering (e.g., from cellular components or protein aggregates) can cause significant apparent absorption, leading to overestimation of concentration. This is particularly relevant for biopharmaceuticals [13].
- Molecular Interactions: At high concentrations, solute molecules can interact, altering their absorptivity. This includes phenomena like dimerization or stacking, which is why the law is typically applicable only in diluted solutions [12] [14].
- Stray Light and Instrumental Noise: Imperfections in the spectrophotometer, such as stray light or detector non-linearity, can cause deviations, especially at high absorbances (typically >1) [2] [9].
Best Practices for Robust Quantification
Work within the Linear Range: The calibration curve must be linear. For many systems, this requires keeping analyte concentrations such that the measured absorbance is below 1.0, and preferably between 0.1 and 0.8, to minimize relative error and stay within the instrument's dynamic range [2].
Use an Appropriate Blank: The blank solution must compensate for all absorbance not originating from the analyte of interest. For a pharmaceutical formulation, this may require a placebo solution containing all excipients but not the API.
Account for Sample Form: The standard BLL is for transmission measurements. For solid dosage forms, reflectance measurements may be required for color analysis, as per USP methodologies [6].
Understand Advanced Modifications: In complex matrices like living tissues or concentrated biological fluids, the standard BLL fails. Researchers in related areas (e.g., in vivo oxygen saturation measurement) use a Modified Beer-Lambert Law (MBLL) that incorporates a Differential Pathlength Factor (DPF) to account for increased photon pathlength due to scattering [13].
In the development and quality control (QC) of pharmaceutical formulations, the accuracy, reproducibility, and regulatory compliance of analytical data are non-negotiable [8]. Ultraviolet-Visible (UV-Vis) spectroscopy is a cornerstone technique for tasks ranging from raw material identification and dissolution testing to biomolecule quantification and assay development. The reliability of these analyses is fundamentally rooted in the performance and understanding of the instrument's core components. This Application Note details the essential components of a UV-Vis spectrophotometer, framed within the stringent requirements of pharmaceutical research. It provides detailed methodologies for instrument qualification and quantitative analysis, supporting robust sample preparation and data integrity in compliance with global pharmacopoeia standards [8] [15].
Core Components and Their Function in Pharmaceutical Analysis
A UV-Vis spectrophotometer operates on a relatively straightforward principle, yet its optical configuration is critical for generating reliable data. The instrument measures the amount of ultraviolet or visible light absorbed by a sample in solution, which is then related to the analyte's concentration via the Beer-Lambert Law [2]. The following sections break down this process into its essential components.
The Journey of Light: A Simplified Workflow
The diagram below illustrates the logical sequence and relationship between the key components of a single-beam UV-Vis spectrophotometer during the measurement of a pharmaceutical sample.
Detailed Breakdown of Key Components
Light Source
A stable light source emitting across a broad wavelength range is fundamental. Instruments often use two lamps to cover the full UV-Vis spectrum [2] [16].
- Deuterium Lamp: Provides intense, continuous light in the UV range (190 - 350 nm) and is essential for analyzing active pharmaceutical ingredients (APIs) with UV chromophores [16].
- Tungsten-Halogen Lamp: Covers the visible range (330 - 3200 nm), used for colorimetric assays common in pharmaceutical QC, such as the Bradford or BCA protein assays [2] [16]. The switch between lamps typically occurs seamlessly between 300-350 nm [2].
Wavelength Selection System: Monochromator
The monochromator is critical for selecting discrete wavelengths from the broad-spectrum light source. Its quality directly determines the instrument's spectral resolution and purity of light [17] [16].
- Key Elements: It consists of an entrance slit, a dispersive element (diffraction grating), and an exit slit [17].
- Diffraction Grating: This is the heart of the monochromator. A grating with a higher groove density (e.g., ≥ 1200 grooves per mm) provides better optical resolution, which is necessary for distinguishing sharp absorption peaks in API spectra [2]. The grating is rotated to select specific wavelengths.
- Spectral Bandwidth (SBW): The width of the exit slit determines the SBW, which is the narrow band of wavelengths that ultimately reaches the sample. A narrower SBW (e.g., 1 nm) provides better peak resolution, which is crucial for identifying and quantifying APIs in complex mixtures, while a wider SBW (e.g., 5 nm) allows more light through, improving signal-to-noise for dilute samples but with poorer resolution [16].
Sample Compartment
The prepared sample, contained in an appropriate cuvette, is placed here. The choice of cuvette material is a critical sample preparation consideration [2].
- Quartz Cuvettes: Are essential for UV analysis (below 350 nm) as quartz is transparent to UV light. Plastic and glass cuvettes absorb UV light and are suitable only for measurements in the visible range [2].
- Path Length: Standard path length is 1 cm. For highly concentrated samples, a shorter path length (e.g., 1 mm) can be used to keep absorbance within the ideal linear range (below 1 AU), thereby avoiding dilution and potential error [2] [18].
Detector
The detector converts the transmitted light intensity into an electrical signal. The choice of detector impacts the sensitivity and signal-to-noise ratio of the measurement [2] [16].
- Photomultiplier Tube (PMT): Highly sensitive detectors that amplify the initial photoelectric signal through a series of dynodes. They are excellent for detecting very low light levels and are widely used in high-performance spectrophotometers [2] [16].
- Silicon Photodiode: Less sensitive than PMTs but offer a faster response time, broader spectral range, and are a cost-effective alternative. They are commonly found in diode-array detectors and many modern instruments [2] [16].
Table 1: Essential Components of a UV-Vis Spectrophotometer and Their Pharmaceutical Relevance
| Component | Key Types | Function | Pharmaceutical Application Consideration |
|---|---|---|---|
| Light Source | Deuterium Lamp, Tungsten-Halogen Lamp [2] [16] | Provides continuous light across UV and/or visible spectra. | Lamp stability and intensity are critical for reproducibility in quantitative QC assays. |
| Monochromator | Diffraction Grating-based (Czerny-Turner) [17] [19] | Isolates a narrow band of wavelengths to probe the sample. | Spectral bandwidth must be set per pharmacopoeial methods (e.g., USP <857>) for method compliance [8]. |
| Sample Holder | Quartz Cuvette (UV), Glass/Plastic Cuvette (Vis) [2] | Holds the sample solution in the consistent light path. | Quartz is mandatory for UV analysis of APIs; path length must be known and accurate for concentration calculations. |
| Detector | Photomultiplier Tube (PMT), Silicon Photodiode [2] [16] | Measures the intensity of light transmitted through the sample. | High sensitivity (PMT) is needed for low-concentration impurities; linearity is key for accurate quantification over a wide range. |
Critical Performance Parameters for Pharmaceutical QC
Understanding instrument parameters that affect data quality is vital for developing and validating analytical methods.
- Beer-Lambert Law and Absorbance Linearity: The foundational principle for quantification states that absorbance (A) is proportional to concentration (c): A = εlc, where ε is the molar absorptivity and l is the path length [2]. A spectrometer's absorbance linearity defines the range over which this relationship holds true. Instruments with linearity up to 2 Absorbance Units (AU) allow for accurate measurement of highly concentrated samples without dilution, preserving sample integrity and saving time [18].
- Stray Light: This is any light that reaches the detector without passing through the sample at the intended wavelength. It becomes a significant source of error at high absorbances, causing deviations from the Beer-Lambert Law and resulting in inaccurate concentration readings [16]. Double-monochromator instruments are specifically designed to minimize stray light for the most demanding applications [16].
- Photometric Accuracy and Precision: For regulated environments, instruments must meet strict criteria for accuracy (closeness to a true value) and precision (repeatability). Specifications are often defined against certified reference materials (CRMs), with requirements such as an absorbance accuracy of ±0.005 A and a precision (standard deviation) of less than 0.5% being typical for "fitness-for-purpose" in pharmaceutical control [20].
Application in Pharmaceutical Research: Diffusion Coefficient Measurement
Understanding the diffusion coefficient of an API is critical for predicting release rates from formulated products. The following protocol adapts a method using a standard UV-Vis spectrometer to investigate the effect of dissolution media on drug diffusivity [15].
Protocol: Measuring API Diffusion Coefficient in Dissolution Media
1. Principle: A 3D-printed cover with a defined open slit is attached to a standard quartz cuvette. The drug diffuses from a high-concentration zone at the cuvette bottom to the slit area. The local drug concentration at the slit is measured as a function of time using UV-Vis absorbance, and the diffusion coefficient is calculated based on Fick's law of diffusion [15].
2. The Scientist's Toolkit: Essential Materials
Table 2: Key Reagents and Materials for Diffusion Coefficient Studies
| Item | Function/Description | Example/Specification |
|---|---|---|
| API/Protein Solution | The analyte of interest. | Prepared in relevant dissolution medium (e.g., buffer at pH 6.8). |
| Dissolution Media | Simulates the biological environment for drug release. | Aqueous buffers, biorelevant media (e.g., FaSSIF), polymer solutions. |
| Quartz Cuvette | Holds the sample for UV-Vis analysis. | 1 cm pathlength; required for UV transparency [2]. |
| 3D-Printed Slit Cover | Creates a defined diffusion path for localized concentration measurement. | Custom-designed to fit standard cuvette; slit dimensions are critical. |
| UV-Vis Spectrophotometer | Measures absorbance at the slit over time. | Equipped with a deuterium lamp for UV analysis; temperature control recommended. |
3. Experimental Workflow:
The multi-step process for determining the diffusion coefficient is outlined below, from sample preparation to data analysis.
4. Step-by-Step Procedure:
- Sample Preparation: Prepare a concentrated solution of the small molecule or protein API in the selected dissolution medium (e.g., phosphate buffer saline). Filter the solution if necessary to remove any particulate matter [15].
- Instrument Setup: Assemble the 3D-printed slit cover onto a quartz cuvette. Place the cuvette in the spectrophotometer's sample compartment. Set the spectrophotometer to the wavelength of maximum absorbance (λmax) for the API, previously determined by a full wavelength scan. Configure the software for kinetic mode, setting appropriate measurement intervals for the duration of the experiment (e.g., every 30 seconds for 1-2 hours) [15].
- Loading and Measurement:
- Carefully pipette the concentrated API solution into the prepared cuvette, ensuring no air bubbles are trapped.
- Immediately start the kinetic measurement. The API will begin to diffuse upwards towards the slit.
- The instrument will automatically record the absorbance at the slit location at each time interval, generating a profile of increasing concentration over time.
- Data Analysis:
- Export the time (t) and absorbance (A) data. Convert absorbance to concentration (C) using a pre-established calibration curve (A = εlc).
- Fit the concentration-time data to the solution of Fick's second law of diffusion, as described in the source literature [15]. This can be done using analytical equations or numerical fitting in software like MATLAB or Python.
- The diffusion coefficient (D) is the primary output of this model fitting.
- Investigation of Media Effects: Repeat the entire procedure for the same API in different dissolution media (e.g., buffers of varying pH or viscosity). Compare the calculated diffusion coefficients to understand how formulation conditions affect molecular diffusivity. Studies suggest different aqueous media can affect the diffusion coefficients of small molecules by <10% and proteins by <15% [15].
The path from a light source to a detector in a UV-Vis spectrophotometer encompasses a sophisticated optical system where each component—the source, monochromator, sample holder, and detector—plays a critical role in generating accurate and reliable data. For pharmaceutical scientists, a deep understanding of these components and associated performance parameters like absorbance linearity and photometric accuracy is essential for developing robust methods and ensuring regulatory compliance. Furthermore, as demonstrated by the diffusion coefficient protocol, the versatility of the UV-Vis spectrometer can be extended with innovative approaches to solve complex biopharmaceutical problems, making it an indispensable tool in modern drug development and quality control.
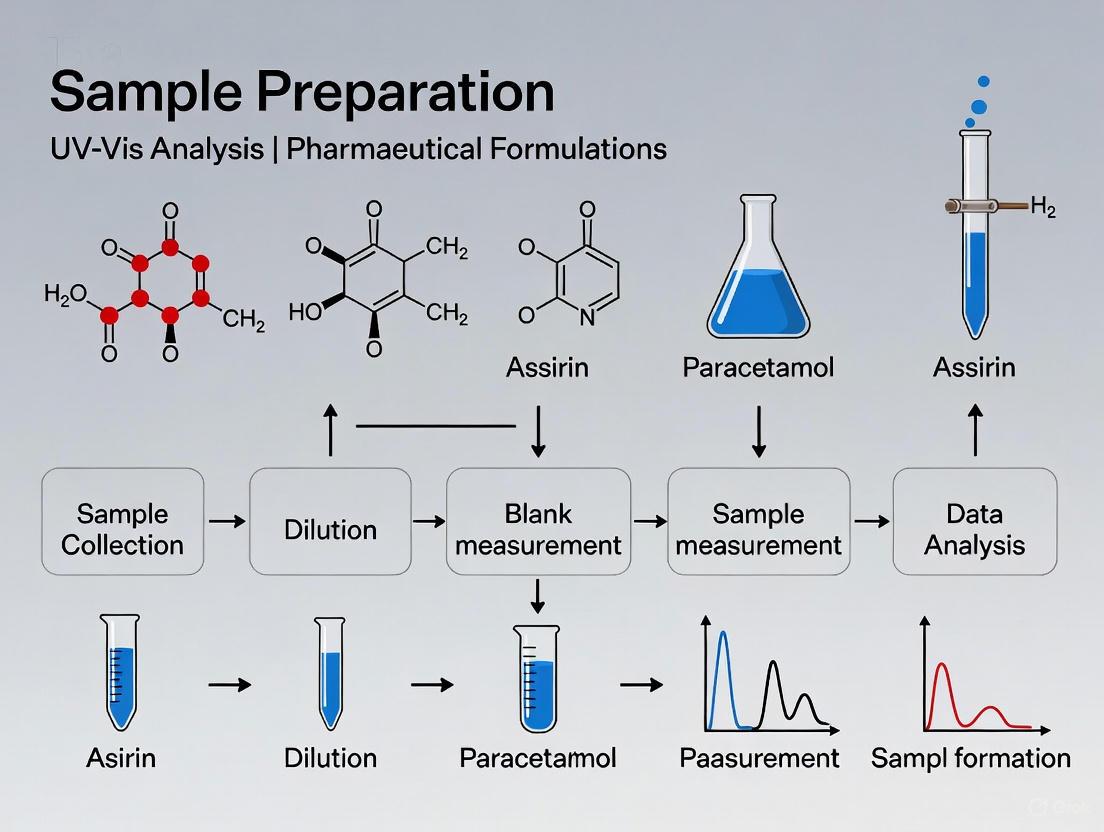
Why Sample Preparation is the Most Critical Step in Your Analytical Workflow
In pharmaceutical development, the integrity of analytical data is paramount. While advanced spectroscopic instruments like UV-Vis are critical for quantifying Active Pharmaceutical Ingredients (APIs), the data they generate is only as reliable as the samples they analyze. Sample preparation is the foundational step that transforms a raw, complex formulation into a solution suitable for instrumental analysis. Errors introduced at this stage are not merely carried forward; they are often amplified, leading to inaccurate potency assessments, stability profiles, and ultimately, decisions that can compromise product quality and patient safety [21] [22]. This application note, framed within UV-Vis analysis of pharmaceutical formulations, details why meticulous sample preparation is indispensable and provides validated protocols to ensure data reliability.
The Impact of Sample Preparation on Analytical Results
Sample preparation is the critical bridge between a raw pharmaceutical product and the analytical instrument. Its quality directly dictates the accuracy, precision, and sensitivity of the final result.
- Error Amplification: Any inconsistency, contamination, or incomplete extraction during sample preparation introduces errors that the analytical instrument cannot distinguish from true signal. For instance, an incomplete extraction of an API from a tablet matrix will lead to an underestimation of potency, regardless of the sensitivity of the subsequent UV-Vis spectrophotometer [22].
- Foundation for Accuracy: Proper sample preparation ensures the sample is representative, homogeneous, and free of interferents that could affect the spectroscopic reading. A well-prepared sample allows the UV-Vis instrument to perform at its optimum, providing accurate quantification of the analyte as demonstrated in the validation data in Section 4 [23].
- Direct Correlation to Data Quality: The relationship between sample preparation rigor and the final analytical result is direct and profound. The following workflow illustrates how errors at the sample preparation stage propagate through the entire analytical process, ultimately compromising data integrity.
The Scientist's Toolkit: Essential Reagents and Materials
A successful sample preparation workflow relies on high-quality, purpose-specific materials. The following table details key reagents and consumables essential for the sample preparation of pharmaceutical formulations for UV-Vis analysis.
Table 1: Key Research Reagent Solutions for Sample Preparation
| Item | Function in Sample Preparation |
|---|---|
| Primary Solvent (e.g., Methanol) | Dissolves the Active Pharmaceutical Ingredient (API) from the solid dosage form to create a primary stock solution [23]. |
| Artificial Biological Fluids (e.g., AVF pH 4.1) | Mimics the physiological environment for dissolution testing and analysis of formulations designed for specific administration routes [23]. |
| Certified Reference Materials (CRMs) | Serves as a benchmark with known purity and composition to calibrate instruments and validate the entire analytical method for accuracy [24]. |
| Ultrapure Water Purification System | Produces water free of ions and organic impurities that could interfere with UV-Vis analysis, crucial for preparing blanks, buffers, and dilution solvents [25]. |
| Filters and Solid-Phase Extraction (SPE) Columns | Removes particulate matter and interfering compounds from the sample matrix, clarifying the solution and reducing background noise in the spectrophotometer [22]. |
| Standardized Tubes and Plates | Provides consistent, inert containers for sample processing and storage, minimizing analyte adsorption and cross-contamination [22]. |
Case Study: UV-Vis Analysis of Voriconazole
A recent study on the development and validation of a UV-Vis method for estimating the antifungal drug Voriconazole provides a clear illustration of a robust sample preparation protocol and its critical role in achieving valid analytical results [23].
Sample Preparation Protocol
This protocol is adapted from the method developed by Kanojiya et al. (2025) for the analysis of Voriconazole in bulk powder and formulated products [23].
- Materials: Voriconazole standard, methanol (HPLC grade), artificial vaginal fluid (AVF) pH 4.1, volumetric flasks (10 mL, 100 mL), analytical balance, micropipettes, ultrasonic bath, syringe filters (0.45 µm).
- Standard Stock Solution (100 µg/mL): Accurately weigh 10 mg of Voriconazole standard and transfer to a 100 mL volumetric flask. Dissolve and dilute to volume with methanol (for bulk analysis) or AVF pH 4.1 (for formulation analysis). Sonicate for 5 minutes to ensure complete dissolution.
- Calibration Curve Standards: From the stock solution, prepare a series of working standards in the concentration range of 10–50 µg/mL by performing appropriate serial dilutions using the same solvent (methanol or AVF).
- Tablet Sample Preparation: Weigh and finely powder not less than 10 tablets. Accurately weigh a portion of the powder equivalent to 10 mg of Voriconazole and transfer to a 100 mL volumetric flask. Add approximately 70 mL of solvent (methanol or AVF pH 4.1), sonicate for 20 minutes with intermittent shaking to ensure complete drug extraction, and dilute to volume. Filter a portion of the solution through a 0.45 µm syringe filter, discarding the first few mL of the filtrate.
- UV-Vis Analysis: Measure the absorbance of the standard and sample solutions at 256 nm against a blank of the respective solvent.
Method Validation and Results
The sample preparation method and subsequent analysis were rigorously validated as per ICH guidelines. The quantitative results, summarized in the table below, demonstrate the high performance achieved through a well-controlled preparation process [23].
Table 2: Validation Parameters for the UV-Vis Determination of Voriconazole [23]
| Validation Parameter | Result in Methanol | Result in AVF pH 4.1 |
|---|---|---|
| Linearity Range (µg/mL) | 10 - 50 | 10 - 50 |
| Correlation Coefficient (R²) | 0.998 | 0.999 |
| Accuracy (% Recovery) | 98 - 102% | 98 - 102% |
| Limit of Detection (LOD) (µg/mL) | 2.55 | 2.00 |
| Limit of Quantification (LOQ) (µg/mL) | 7.75 | 6.08 |
A Standardized Sample Preparation Workflow
Adhering to a standardized workflow is key to ensuring reproducibility and reliability in pharmaceutical analysis. The following chart outlines a generalized, robust protocol for preparing solid oral dosage forms for UV-Vis analysis.
In the rigorous world of pharmaceutical analysis, the pathway to reliable and meaningful data is paved long before the sample is placed in the spectrophotometer. As demonstrated, sample preparation is not a mere preliminary step but the most critical phase where the battle for data accuracy is won or lost. A meticulously developed and executed sample preparation protocol, as exemplified in the voriconazole case study, ensures that the powerful analytical instrumentation used in modern labs, such as UV-Vis, can perform to its full potential. By standardizing workflows, understanding the function of key reagents, and implementing rigorous validation, scientists and researchers can transform this fundamental process from a potential source of error into a cornerstone of quality and confidence in drug development.
Ultraviolet-Visible (UV-Vis) spectroscopy stands as a cornerstone analytical technique within pharmaceutical research and development, providing a rapid, cost-effective, and non-destructive means for analyzing drug substances and products [1] [26]. The technique operates on the principle of measuring the absorption of light in the 190 to 800 nm range, which corresponds to electronic transitions in molecules with chromophores [27] [1]. The fundamental relationship between absorbance and concentration is governed by the Beer-Lambert law (A = ε·c·l), making it inherently quantitative and ideal for determining the concentration of Active Pharmaceutical Ingredients (APIs) in various matrices [26]. This application note details standard methodologies and protocols for the UV-Vis analysis of common pharmaceutical formulations, contextualized within a broader research thesis on sample preparation. The content is structured to provide drug development professionals with detailed application notes and experimentally validated protocols, emphasizing robust sample preparation to ensure data accuracy and regulatory compliance.
Theoretical Foundations and Relevance to Sample Preparation
The interaction of light with matter in the UV-Vis range is dominated by electronic transitions in molecules possessing aromatic or conjugated pi-electron systems [27]. This makes the technique particularly suitable for the vast majority of organic APIs, which often contain such chromophores. The resulting spectrum serves as both a qualitative fingerprint and a quantitative tool [26].
The choice of solvent is a critical component of sample preparation, as it must not only dissolve the analyte but also be transparent in the spectral region of interest. Common solvents include water, methanol, and 0.1N hydrochloric acid, selected for their low UV cutoff and compatibility with the API [1] [26]. Proper sample preparation must also account for the removal of particulates that cause light scattering, ensuring that absorbance measurements are accurate and reproducible [1]. For solid dosage forms, the preparation process must efficiently extract the API from the excipient matrix without inducing degradation, a key consideration in research on formulation stability.
Figure 1: UV-Vis Analysis Workflow for Pharmaceutical Formulations. This diagram outlines the generalized workflow from sample preparation to result validation, highlighting the critical sample preparation stage common to all formulation types.
Applications in Pharmaceutical Analysis
UV-Vis spectroscopy is a versatile tool applied across multiple stages of drug development and quality control. Its applications are critical for ensuring the identity, potency, purity, and performance of pharmaceutical products.
Table 1: Key Applications of UV-Vis Spectroscopy in Pharmaceutical Analysis
| Application | Objective | Typical Formulations | Key Sample Preparation Considerations |
|---|---|---|---|
| Drug Assay & Potency [1] [26] | Quantify the percentage of API in a dosage form. | Tablets, Capsules, Oral Liquids | Complete extraction of API from excipients; dilution into linear Beer-Lambert range (Abs ~0.1-1.0 AU). |
| Content Uniformity [28] [26] | Ensure each individual dosage unit contains API within a specified range. | Tablets, Capsules | Individual unit processing; use of a validated, robust method for high precision. |
| Dissolution Testing [1] [26] | Monitor the rate and extent of API release from a solid dosage form. | Tablets, Capsules | Withdrawal and filtration of aliquots from dissolution vessels at specified time points. |
| Impurity Profiling [1] [26] | Detect and quantify UV-absorbing impurities or degradation products. | APIs, Finished Products | Sample preparation should not introduce artifacts; may involve comparison of spectral shapes or use of HPLC-UV. |
| Stability Studies [26] | Track changes in drug potency or formation of degradants over time. | All Formulations | Comparison of absorbance at λ_max and full spectral overlay against a fresh reference standard. |
Advanced and Emerging Applications
The role of UV-Vis is expanding with technological and methodological advancements. UV-Vis Diffuse Reflectance Spectroscopy (UV-Vis DRS) allows for the direct, non-destructive analysis of solid powder mixtures, fulfilling green chemistry principles by eliminating solvent use [29]. This technique is particularly suited for Process Analytical Technology (PAT) initiatives for real-time monitoring of blend homogeneity in solid formulations [29]. Furthermore, in the context of emerging point-of-care (POC) manufacturing and personalized medicine, UV-Vis serves as a vital at-line method for verifying API ink concentration prior to drop-on-demand dispensing, ensuring dosing accuracy for narrow therapeutic index drugs [28].
Experimental Protocols
Protocol 1: API Assay and Content Uniformity of Tablet Formulations
This protocol details the analysis for the total assay of a batch and the content uniformity of individual tablets, using a representative study on a commercial tablet (e.g., Neo Nisidine containing acetylsalicylic acid, paracetamol, and caffeine) as a model [29].
4.1.1 Research Reagent Solutions and Materials
Table 2: Essential Materials for Tablet Analysis
| Item | Function / Specification |
|---|---|
| UV-Vis Spectrophotometer | Double-beam instrument preferred for stability; equipped with 1 cm matched quartz cuvettes [26]. |
| Analytical Balance | Precision of 0.1 mg for accurate weighing of samples and standards. |
| Reference Standard | Certified API of known purity and identity for calibration [1]. |
| Solvent | Appropriately purified and transparent in the spectral region of analysis (e.g., 0.1N HCl, methanol, water) [26]. |
| Volumetric Flasks | Class A, of various capacities (e.g., 10 mL, 100 mL, 1000 mL) for precise dilution. |
| Syringe Filters | 0.45 µm porosity, compatible with the solvent, for sample clarification after extraction [1]. |
4.1.2 Procedure
- Standard Solution Preparation: Accurately weigh about 50 mg of the API reference standard into a 100 mL volumetric flask. Dissolve and dilute to volume with the appropriate solvent to create a primary stock solution (e.g., 500 µg/mL). Serially dilute this stock to prepare a series of standard solutions (e.g., 5, 10, 15, 20 µg/mL) covering the expected sample concentration.
- Sample Solution Preparation (For Total Assay):
- Accurately weigh and finely powder not less than 20 tablets.
- Transfer an accurately weighed portion of the powder, equivalent to about 50 mg of the API, into a 100 mL volumetric flask.
- Add approximately 70 mL of solvent, shake or sonicate for 15-30 minutes to ensure complete extraction of the API.
- Dilute to volume with the solvent and mix well.
- Filter a portion of the solution through a 0.45 µm syringe filter, discarding the first few mL of the filtrate.
- Pipette a precise volume of the clear filtrate and perform a secondary dilution to bring the concentration within the linear range of the calibration curve.
- Sample Solution Preparation (For Content Uniformity):
- Individually place one whole tablet into a suitable volumetric flask (e.g., 100 mL or 250 mL based on dosage).
- Add a sufficient volume of solvent to dissolve the API, sonicate for 30 minutes with intermittent shaking.
- Dilute to volume, filter, and dilute as described in step 4.1.2.2.
- Spectrum Acquisition and Quantification:
- Using the solvent as a blank, zero the spectrophotometer.
- Scan the standard solutions and determine the wavelength of maximum absorption (λmax).
- Measure the absorbance of all standard and sample solutions at the predetermined λmax.
- Generate a calibration curve by plotting the absorbance of the standard solutions versus their concentrations. Perform linear regression to obtain the equation of the line.
- Calculate the concentration of the API in the sample solutions using the regression equation. Back-calculate to determine the average API content per tablet (for total assay) or the individual content of each tablet (for content uniformity).
Protocol 2: Analysis of Liquid Dosage Forms (Oral Solutions)
This protocol is designed for the assay of APIs in simple oral solutions or suspensions. For suspensions, an appropriate filtration or centrifugation step is added to ensure a clear solution for analysis.
4.2.1 Procedure
- Standard Solution Preparation: Prepare as described in Protocol 4.1.2.1.
- Sample Solution Preparation:
- For solutions: Pipette a measured volume of the well-mixed liquid dosage form directly into a volumetric flask. Dilute quantitatively with solvent to produce a solution within the Beer-Lambert linear range.
- For suspensions: Pipette a measured volume of the homogenized suspension into a volumetric flask. Extract and dilute as for a solution, then filter through a 0.45 µm filter to obtain a clear analyte solution.
- Spectrum Acquisition and Quantification:
- Follow the same procedure as in Protocol 4.1.2.4. Measure the absorbance of the diluted sample solution and calculate the API concentration using the calibration curve. Report the result as the amount of API per unit volume (e.g., mg/mL).
Protocol 3: Dissolution Testing with UV-Vis Analysis
This protocol outlines the use of UV-Vis for analyzing samples withdrawn from dissolution apparatus.
4.3.1 Procedure
- Dissolution Medium: Select an appropriate medium as per pharmacopeial guidelines (e.g., pH 6.8 phosphate buffer, 0.1N HCl). The volume is typically 500-900 mL, maintained at 37±0.5°C.
- Standard Solution: Prepare a standard solution of the API in the dissolution medium at a concentration equivalent to the final concentration upon 100% dissolution of the dosage form (C~100%~).
- Dissolution Run:
- Place one dosage unit into each vessel of the dissolution apparatus and start the test.
- At specified time intervals (e.g., 10, 15, 30, 45 minutes), withdraw a predetermined volume (e.g., 5-10 mL) from each vessel, ensuring the sampling position is not perturbed.
- Immediately replace the withdrawn volume with fresh, pre-warmed medium to maintain a constant volume.
- Sample Analysis:
- Filter each withdrawn sample through a 0.45 µm filter.
- Measure the absorbance of the standard and each filtered test sample at the API's λ_max, using fresh dissolution medium as the blank.
- Calculate the percentage of API dissolved at each time point using the formula:
% Dissolved = (A_sample / A_standard) * 100%.
Advanced Chemometric Protocol: Solid Analysis via UV-Vis DRS with Net Analyte Signal
For direct analysis of solid formulations without dissolution, UV-Vis DRS coupled with multivariate calibration can be employed [29].
4.4.1 Procedure
- Sample Preparation: Prepare homogeneous solid powder mixtures of the API and excipients using geometric dilution to simulate the final formulation. For standard addition, spike the real tablet powder with known increments of pure API (e.g., 0%, 5%, 10%, 15% w/w) [29].
- Spectrum Acquisition: Pack each powder mixture into a sample cup and acquire its diffuse reflectance spectrum using a UV-Vis spectrophotometer equipped with an integrating sphere.
- Data Processing: Transform reflectance data (R) to apparent absorbance (A = log(1/R)). Process the multidimensional spectral data using the Net Analyte Signal (NAS) algorithm. NAS calculates the part of the spectrum that is unique to the analyte of interest, orthogonal to the spectra of all other components in the mixture [29].
- Quantification: Construct a pseudo-univariate calibration curve by plotting the magnitude of the NAS versus the concentration of the added API for each standard addition sample. The concentration of the API in the unknown sample is determined from the x-intercept of this curve [29].
Data Analysis and Regulatory Considerations
For univariate analysis, standard calibration curves are constructed, and the correlation coefficient (R²), slope, and intercept are reported [1]. The Limit of Detection (LOD) and Limit of Quantitation (LOQ) can be calculated based on the standard deviation of the response and the slope of the calibration curve. In complex matrices, such as those analyzed by UV-Vis DRS, multivariate techniques like Partial Least Squares Regression (PLSR) or the Net Analyte Signal (NAS) method are required to handle spectral overlaps [27] [29].
All analytical procedures must be validated according to ICH Q2(R1) guidelines, establishing parameters such as accuracy, precision, specificity, linearity, and range [1]. Compliance with good manufacturing practice (GMP) regulations (e.g., 21 CFR Part 211) is mandatory, which includes strict controls on instrument calibration, qualification (IQ/OQ/PQ), and documentation adhering to ALCOA+ principles (Attributable, Legible, Contemporaneous, Original, and Accurate) [1].
Figure 2: Conceptual Diagram of a Double-Beam UV-Vis Spectrophotometer. The diagram illustrates the instrument's key components and the principle of simultaneous measurement of sample (I) and reference (I₀) beams, which corrects for source instability and solvent absorption.
From Theory to Practice: Optimized Sample Preparation Workflows for Different Formulations
Ultraviolet-visible (UV-Vis) spectroscopy is an indispensable analytical technique in pharmaceutical research, used for tasks ranging from drug identification and nucleic acid purity checks to quality control [2]. The technique measures the amount of discrete wavelengths of UV or visible light that are absorbed by or transmitted through a sample [2]. The reliability of these analyses is profoundly influenced by the sample composition and the solvent environment.
The core principle governing quantitative UV-Vis analysis is the Beer-Lambert Law, which states that absorbance (A) is proportional to the concentration (c) of the analyte, the path length (b) of the sample holder, and the molar absorptivity (ε) of the compound [30]. Any component of the sample matrix that alters this relationship constitutes an interference. The central challenge in sample preparation is to select a solvent that completely dissolves the pharmaceutical analyte without itself absorbing significantly in the spectral region of interest. A poorly chosen solvent can introduce significant errors, reducing the accuracy, precision, and overall reliability of the analytical method.
This application note provides a structured framework for researchers to select optimal solvents, thereby minimizing interference and maximizing solubility for the UV-Vis analysis of pharmaceutical formulations.
Understanding Solvent Interference and UV Transparency
The Nature of Solvent Interference
In an ideal scenario, the absorbance spectrum of a solution containing a single analyte should be a single, well-defined absorption band at its wavelength of maximum absorbance (λmax). In real pharmaceutical samples, the spectrum is influenced by the presence of the solvent and other excipients [31]. These interferences can be physical or chemical in nature.
- Physical Interferences: Scattering of light caused by the presence of suspended solid impurities or undissolved analyte in the solution is a common physical interference [31]. This scattering results in a background absorbance that elevates the apparent absorbance of the analyte of interest, leading to positive errors in quantification.
- Chemical Interferences: These arise from the presence of other UV-absorbing compounds in the solution [31]. In pharmaceutical formulations, these can include excipients, stabilizers, preservatives, or impurities. Their absorption bands can overlap with those of the active pharmaceutical ingredient (API), causing spectral overlap and making accurate quantification difficult.
The UV Cut-Off Concept
A fundamental property of any solvent is its UV cut-off wavelength. This is the wavelength below which the solvent itself absorbs significant UV light (typically with an absorbance >1 AU in a 1 cm pathlength). Using a solvent at wavelengths below its cut-off is not feasible because the solvent absorbance will overwhelm the signal from the analyte, resulting in a poor signal-to-noise ratio.
The solvent's cut-off is a critical parameter because it defines the usable UV spectrum for your analysis. For an analyte with a λmax of 250 nm, a solvent with a cut-off of 220 nm would be suitable, whereas a solvent with a cut-off of 260 nm would not.
Key Criteria for Solvent Selection
Selecting the right solvent requires a balanced consideration of multiple factors. The following table summarizes the primary and secondary criteria for evaluation.
Table 1: Key Criteria for Analytical Solvent Selection
| Criterion | Description | Impact on Analysis |
|---|---|---|
| UV Transparency | The wavelength range where solvent absorbance is minimal (above its UV cut-off). | Determines the available spectral window for analyte detection; using a solvent below its cut-off causes high background noise [2]. |
| Solubility Power | The ability to dissolve the target analyte at the required concentration. | Ensures the analyte is in solution for accurate measurement; prevents light scattering from particulates [31]. |
| Chemical Inertness | The solvent should not react with the analyte. | Preserves the chemical integrity of the analyte, ensuring the spectrum measured is accurate. |
| Purity Grade | Solvents must be of high-purity "HPLC" or "Spectroscopic" grade. | Minimizes interference from UV-absorbing impurities present in lower-grade solvents. |
| Pathlength Compatibility | The solvent's absorptivity must be compatible with the chosen cuvette pathlength. | A highly absorbing solvent may require a shorter pathlength cuvette to keep the background absorbance within the instrument's measurable range. |
A Systematic Workflow for Solvent Evaluation
The following diagram outlines a logical, step-by-step protocol for evaluating and selecting a solvent for your UV-Vis analysis.
Experimental Protocol for Solvent Screening
Materials:
- Active Pharmaceutical Ingredient (API)
- Candidate solvents (e.g., water, methanol, acetonitrile, hexane) of spectroscopic grade
- Volumetric flasks (e.g., 10 mL)
- Analytical balance
- Ultrasonic bath
- UV-Vis spectrophotometer with quartz cuvettes (required for UV range) [2]
Method:
- Define Analytical Wavelength: Determine the λmax of your target API using a literature search or a preliminary scan in a known, compatible solvent.
- Preselect Solvents: Compile a list of solvents with UV cut-off values well below the analyte's λmax to ensure a usable baseline.
- Solubility Test: For each candidate solvent, attempt to dissolve the API to a concentration near the expected working range. Use gentle heating and sonication to aid dissolution. Visually inspect for undissolved particles, which cause light scattering [31].
- Blank Solvent Analysis: a. Fill a quartz cuvette with the pure, candidate solvent. This is your blank [2]. b. Using the spectrophotometer, record a baseline spectrum from 200 nm to at least 50 nm beyond the analyte's λmax. c. Examine the baseline for flatness and low absorbance in the region of interest. A steeply sloping or high-absorbance baseline indicates the solvent is unsuitable.
- Analyte Solution Analysis: a. Prepare a standard solution of the API in the candidate solvent at a known concentration. b. Using the blank from step 4, measure the absorbance spectrum of the standard solution. c. Assess the spectrum for a clear, undistorted absorption peak at the expected λmax.
The Scientist's Toolkit: Essential Research Reagents and Materials
The following table details key materials and their functions for preparing samples for UV-Vis analysis.
Table 2: Essential Materials for UV-Vis Sample Preparation
| Item | Function / Rationale |
|---|---|
| Quartz Cuvettes | Required for UV range analysis as quartz is transparent to most UV light; glass and plastic cuvettes absorb UV light and are inappropriate [2]. |
| Spectroscopic Grade Solvents | High-purity solvents with minimal UV-absorbing impurities, essential for achieving a low background signal. |
| Volumetric Flasks | For accurate, precise preparation of standard and sample solutions to ensure correct concentration values. |
| Micro-pipettes or Syringes | For precise handling and transfer of small liquid volumes, especially when working with limited sample amounts. |
| Ultrasonic Bath | To aid in dissolving analytes and ensuring a homogeneous solution, free of micro-bubbles or undissolved particles that scatter light [31]. |
| Syringe Filters (0.45 μm or 0.2 μm) | For removing suspended particles from samples through filtration, thereby reducing physical light scattering interferences [31]. |
Advanced Techniques for Managing Interference
Even with careful solvent selection, complex pharmaceutical matrices may still present challenges. Several advanced techniques can be employed to overcome these.
- Derivative Spectroscopy: This is a powerful technique for background and noise correction [31]. By converting the normal absorbance spectrum into its first or second derivative, broad background absorption from the matrix can be effectively suppressed, resolving closely spaced or overlapping peaks from the API and an interferent.
- Multi-Component Analysis: Modern software in diode array detector (DAD) systems can deconvolute overlapping spectra [31]. If the spectra of the pure API and the interfering compound are known, the software can calculate their individual contributions to the total absorbance of the mixture, allowing for accurate quantification of the API.
- Three-Point Correction (Background Subtraction): For a sloping or curved baseline, this method selects two wavelengths close to the analytical wavelength (on either side) [31]. The background interference is estimated at the analytical wavelength by linear interpolation between these two points and then subtracted from the total measured absorbance.
The selection of an appropriate solvent is a critical step in the development of a robust and reliable UV-Vis spectroscopic method for pharmaceutical analysis. A methodical approach that prioritizes UV transparency and solubility power, while systematically evaluating potential interferences, is fundamental. By adhering to the protocols and principles outlined in this application note, researchers and drug development professionals can significantly enhance the quality of their analytical data, ensuring accurate quantification and characterization of active pharmaceutical ingredients.
In pharmaceutical research and quality control, UV-Visible (UV-Vis) spectroscopy serves as a fundamental analytical technique for characterizing solid dosage forms, quantifying active pharmaceutical ingredients (APIs), and detecting impurities [2] [5]. The reliability of these analyses is highly dependent on the quality of the sample preparation process. Proper sample preparation—encompassing extraction, filtration, and dilution—ensures that the measured absorbance accurately represents the analyte concentration, thereby guaranteeing the safety, efficacy, and quality of the final pharmaceutical product [32] [6]. This protocol details a systematic approach to preparing solid oral dosage forms (OSDs), such as tablets and capsules, for UV-Vis analysis.
Theoretical Foundations
UV-Vis spectroscopy measures the amount of ultraviolet or visible light absorbed by a sample. The fundamental principle governing quantitative analysis is the Beer-Lambert Law, which states that the absorbance (A) of a solution is directly proportional to the concentration (c) of the absorbing species and the path length (L) of the light through the solution [2]. The law is expressed as:
A = εlc
Where:
- A is the measured absorbance (no units)
- ε is the molar absorptivity (L·mol⁻¹·cm⁻¹)
- l is the path length of the cuvette (cm)
- c is the concentration of the analyte (mol·L⁻¹)
For this relationship to hold true, the sample must be in a form that allows light to pass through with minimal obstruction, which is achieved by creating a homogeneous, particulate-free solution of the analyte at an appropriate concentration [2] [32]. The sample preparation process for solid dosage forms is designed to meet these exact conditions, transitioning the API from a solid matrix into a clear solution suitable for spectroscopic analysis.
Materials and Equipment
Research Reagent Solutions and Essential Materials
Table 1: Key materials and equipment for sample preparation.
| Item | Specification/Function |
|---|---|
| UV-Vis Spectrophotometer | Double-beam instrument with a wide linear dynamic range is preferred [5]. |
| Cuvettes | Quartz cuvettes are mandatory for UV light transmission; path length typically 1 cm [2] [32]. |
| Solvent | High-purity solvent in which the API is freely soluble and that does not absorb significantly at the wavelength of interest (e.g., water, buffered solutions, alcohol) [32]. |
| Volumetric Flasks | For precise dilution and standard solution preparation. |
| Syringe Filters | Hydrophilic PVDF or nylon membranes with a pore size of 0.45 µm or less for removing fine particulates [32]. |
| Analytical Balance | For accurate weighing of the solid dosage form. |
| Ultrasonic Bath | To aid in the dissolution and extraction of the API from the dosage form matrix. |
Methodology
Sample Preparation Workflow
The following diagram illustrates the complete protocol for preparing solid dosage forms for UV-Vis analysis.
Detailed Experimental Protocols
Extraction Protocol
The goal of extraction is to completely dissolve the Active Pharmaceutical Ingredient (API) from the excipient matrix into a suitable solvent.
- Weighing: Accurately weigh the required number of tablets or the contents of capsules to obtain a quantity representative of the labeled API content. For a single unit, the entire dose may be used.
- Communition: If using tablets, gently crush them into a fine powder using a mortar and pestle to increase the surface area for extraction.
- Initial Dissolution: Quantitatively transfer the powder to an appropriate volumetric flask (e.g., 100 mL). Add a portion of the selected solvent (typically 50-70% of the final volume) to the flask.
- Agitation and Sonication: Seal the flask and agitate vigorously using a mechanical shaker or by hand. Subsequently, place the flask in an ultrasonic bath for 15-30 minutes to ensure complete dissolution of the API and to disrupt any agglomerates [32]. The choice of solvent is critical and should be based on the solubility properties of the API, which are determined during pre-formulation studies [33].
Filtration and Clarification Protocol
After extraction, the solution contains dissolved API but may also contain insoluble excipients that can cause light scattering and interfere with the UV-Vis measurement.
- Cooling: Allow the solution from the extraction step to cool to room temperature if heating was applied during sonication.
- Bring to Volume: Dilute the solution to the final mark on the volumetric flask with the solvent and mix thoroughly.
- Filtration: Pass a portion of the solution through a membrane filter with a pore size of 0.45 µm or less [32]. The initial 1-2 mL of the filtrate should be discarded to avoid potential analyte adsorption onto the filter membrane. The resulting filtrate should be a clear, particulate-free solution ready for analysis or further dilution.
Dilution Protocol
The concentration of the stock solution after extraction is often too high for UV-Vis analysis, as absorbance values should ideally be kept below 1.0 to remain within the instrument's linear dynamic range [2].
- Concentration Check: Perform a quick scan of the filtered stock solution to estimate the absorbance. If the maximum absorbance is greater than 1.0, further dilution is required.
- Serial Dilution: Prepare a series of dilutions using clean volumetric glassware. For example, a 1 in 10 dilution can be made by pipetting 5 mL of the stock solution into a 50 mL volumetric flask and diluting to volume with the solvent.
- Path Length Adjustment: As an alternative to dilution, using a cuvette with a shorter path length (e.g., 1 mm instead of 1 cm) can also lower the measured absorbance without altering the sample concentration, which is particularly useful when sample volume is limited [2] [32].
Table 2: Troubleshooting common sample preparation issues.
| Issue | Potential Cause | Solution |
|---|---|---|
| Absorbance too high | Sample concentration is too high. | Dilute the sample further or use a cuvette with a shorter path length [2]. |
| Precipitation in solution | Solvent incompatibility or supersaturation. | Ensure the solvent is appropriate for the API. Filter the solution again or re-prepare with a different solvent system. |
| High background noise | Dirty cuvette or particulate in sample. | Ensure cuvettes are meticulously cleaned. Re-filter the sample using a finer pore size filter [32]. |
| Non-linear calibration | Stray light effects at high absorbance; chemical interactions. | Keep absorbance readings below 1.0. Verify the stability of the analyte in the solvent. |
Data Analysis and Validation
Quantitative Analysis
For API quantification, a calibration curve must be constructed using standard solutions of known concentration. The absorbance of the prepared sample is then measured, and its concentration is determined by interpolating from the calibration curve, followed by back-calculation to account for all dilution factors to determine the content in the original solid dosage form.
Method Validation
To ensure the sample preparation protocol and analytical method are fit for purpose, key validation parameters should be assessed:
- Accuracy: Determined by performing a spike recovery study, where a known amount of standard is added to the sample, with recovery ideally between 98-102%.
- Precision: Evaluated by repeatability (multiple preparations of the same sample) and intermediate precision (different days, analysts), expressed as % Relative Standard Deviation (%RSD).
- Specificity: The method should be able to unequivocally assess the analyte in the presence of excipients, which is confirmed by the absence of spectral interference from the placebo.
Robust and reproducible sample preparation is the cornerstone of reliable UV-Vis spectroscopic analysis of solid dosage forms. The protocols outlined herein for extraction, filtration, and dilution provide a structured framework for researchers to generate accurate data critical for drug development and quality assurance. Adherence to these procedures, coupled with an understanding of the underlying principles of UV-Vis spectroscopy, ensures the integrity of the analytical results and supports the overall goal of delivering safe and effective pharmaceutical products to patients.
Within the context of sample preparation for UV-Vis analysis in pharmaceutical research, the handling of liquid formulations presents distinct challenges. The accuracy of analytical results is fundamentally dependent on two key factors: appropriate dilution strategies to ensure the analyte concentration falls within the instrument's linear dynamic range, and the mitigation of matrix effects, where other components in the formulation interfere with the analysis of the target compound. This application note provides detailed protocols and considerations for researchers and drug development professionals to navigate these complexities, ensuring reliable and reproducible quantitative results from UV-Vis spectroscopic analysis.
Theoretical Background
Fundamentals of UV-Vis Spectroscopy in Quantitative Analysis
Ultraviolet-visible (UV-vis) spectroscopy is a cornerstone technique for obtaining the absorbance spectra of compounds in solution or as a solid [30]. The fundamental principle involves the absorbance of light energy, which excites electrons from the ground state to the first singlet excited state of the compound. The UV-vis region of the electromagnetic spectrum covers 1.5 - 6.2 eV, corresponding to a wavelength range of 800 - 200 nm [30]. Quantitative analysis is governed by the Beer-Lambert Law (Equation 1), which forms the basis for absorbance spectroscopy.
Equation 1: Beer-Lambert Law [ A = \varepsilon b c ] Where:
- ( A ) is the absorbance (unitless, often arbitrary units)
- ( \varepsilon ) is the molar absorptivity of the compound or molecule in solution (M⁻¹cm⁻¹)
- ( b ) is the path length of the cuvette (cm)
- ( c ) is the concentration of the solution (M) [30]
Understanding Matrix Effects
The "matrix" refers to all components of a sample other than the analyte of interest [34]. In pharmaceutical formulations, this can include excipients, preservatives, stabilizers, and impurities. The matrix effect is the alteration of the analyte signal caused by the presence of these co-eluting or co-absorbing matrix components [34]. In UV-Vis spectroscopy, this typically manifests as signal suppression or enhancement, leading to inaccurate concentration determinations. These effects are particularly problematic in complex biological matrices or in formulations with multiple active and inactive ingredients, where matrix components may have overlapping absorbance bands or scatter light, thereby compromising the accuracy of the analysis [34].
Materials and Methods
The Scientist's Toolkit: Essential Research Reagents and Materials
Table 1: Essential materials and reagents for sample preparation in UV-Vis analysis.
| Item | Function/Brief Explanation |
|---|---|
| Quartz Cuvettes | Sample holder with high transmission of UV and visible light; available in various path lengths (e.g., 1 cm) to adjust effective absorbance [32]. |
| Volumetric Flasks | For accurate preparation and dilution of standard and sample solutions to ensure precise concentration [30]. |
| Digital Pipettes | For accurate and precise transfer of liquid volumes during serial dilution and sample preparation [30]. |
| Appropriate Solvent | High-purity solvent to dissolve the analyte; used to zero the instrument and as a diluent [30] [32]. |
| Filter Membranes | For removing particulate contaminants from solutions before analysis to prevent light scattering [32]. |
| Standard/Calibration Solutions | Known concentrations of the pure analyte for constructing a calibration curve [30]. |
Critical Considerations for Sample Preparation
The physical state of the sample—whether measured as a solution or a solid thin film—profoundly impacts the optical properties and the resulting data [32]. For liquid formulations, solution-based measurement is most common and involves confining the material within a controlled environment of known path length using a standard quartz cuvette [32]. Key considerations include:
- Solvent Choice: The solvent must dissolve the analyte completely and should not absorb significantly at the wavelengths of interest [32].
- Path Length Optimization: Using a cuvette with a smaller path length can be useful if the sample concentration cannot be reduced without altering results, or to minimize the volume of a precious sample [32].
- Concentration Optimization: The sample concentration must be optimized to ensure the absorbance is within the linear range of the detector. An overly concentrated sample will not transmit enough light, while an overly dilute sample will provide a weak signal [32].
Experimental Protocols
Protocol 1: Dilution of Liquid Formulations for UV-Vis Analysis
Objective: To accurately dilute a concentrated liquid pharmaceutical formulation to a concentration suitable for quantitative UV-Vis analysis.
Workflow:
Figure 1: Workflow for sample dilution.
Materials:
- Concentrated liquid formulation
- High-purity solvent (as determined in Section 3.1)
- Volumetric flasks (of appropriate sizes, e.g., 10 mL, 25 mL, 50 mL)
- Digital pipettes and calibrated pipette tips
- Analytical balance
Procedure:
- Solvent Selection: Choose a solvent that completely dissolves the formulation and is transparent in the spectral region to be scanned. A reference measurement should be taken of the cuvette filled with this pure solvent to establish a baseline [32].
- Initial Dilution: Using a digital pipette, transfer an accurately known volume of the concentrated formulation into a volumetric flask. Dilute to the mark with the selected solvent and mix thoroughly to ensure homogeneity [30].
- Concentration Estimation: If the approximate concentration is unknown, perform a preliminary scan of the initial dilution. If the maximum absorbance is significantly above 2, further dilution is required [32].
- Serial Dilution: For high concentrations, perform serial dilutions to achieve the desired concentration. For example, a 1:100 dilution can be accurately achieved with two sequential 1:10 dilutions.
- Filtration: If the solution appears cloudy or contains particulates, filter it using an appropriate syringe filter (e.g., 0.45 µm or 0.2 µm pore size) to prevent light scattering [32].
- Analysis: The diluted sample is now ready for UV-Vis analysis.
Protocol 2: Evaluation and Mitigation of Matrix Effects
Objective: To quantify the matrix effect in a liquid formulation and apply strategies to mitigate its impact on analytical accuracy.
Workflow:
Figure 2: Process for evaluating and mitigating matrix effects.
Materials:
- Pure analyte standard
- Placebo formulation (matrix without active ingredient)
- Solvent
- Volumetric flasks and pipettes
Procedure:
- Preparation of Neat Standard: Prepare a standard solution of the pure analyte dissolved directly in the solvent at a known concentration, ( C ).
- Preparation of Matrix-Matched Standard: Prepare a standard solution at the same concentration, ( C ), by spiking the pure analyte into the placebo formulation. This sample should undergo the same dilution and preparation procedure as the test formulation [35].
- UV-Vis Measurement: Measure the absorbance of both the neat standard and the matrix-matched standard at the analytical wavelength.
- Quantification of Matrix Effect: Calculate the matrix effect (ME) using the formula below. A value of 100% indicates no matrix effect, <100% indicates signal suppression, and >100% indicates signal enhancement. [ ME (\%) = \frac{A{\text{matrix-matched}}}{A{\text{neat}}} \times 100\% ] This formula is adapted from the principles used in mass spectrometry to quantify matrix effects [35].
- Interpretation and Action: A significant matrix effect (e.g., ME <85% or >115%) necessitates mitigation.
Mitigation Strategies:
- Standard Addition: This method involves spiking known amounts of the analyte into separate aliquots of the sample. The calibration curve is generated for each sample, effectively accounting for the matrix-induced signal change [34].
- Matrix-Matched Calibration: Construct the calibration curve using standards prepared in the placebo matrix, which experiences the same matrix effect as the sample [34].
- Sample Dilution: Diluting the sample can reduce the concentration of interfering matrix components below a threshold where they significantly affect the signal. However, this also dilutes the analyte and must be balanced with maintaining adequate detector response [34].
Data Presentation and Analysis
Calibration and Quantitative Analysis
For quantitative information, calibrating the instrument using known concentrations of the compound is required [30]. A minimum of three concentrations is needed, but five or more are ideal for a more accurate calibration curve [30].
Table 2: Example calibration curve data for a hypothetical active pharmaceutical ingredient (API).
| Standard Solution | Concentration (µg/mL) | Absorbance (arb. units) | Notes |
|---|---|---|---|
| Blank | 0.000 | 0.000 | Solvent only |
| Std 1 | 5.000 | 0.245 | |
| Std 2 | 10.000 | 0.501 | |
| Std 3 | 15.000 | 0.748 | |
| Std 4 | 20.000 | 0.992 | |
| Std 5 | 25.000 | 1.210 |
Table 3: Comparison of quantitative results for an API with and without matrix-effect correction.
| Sample ID | Claimed Concentration (mg/mL) | Measured Concentration (mg/mL) (Neat Calibration) | Measured Concentration (mg/mL) (Matrix-Matched Calibration) | Accuracy vs. Claimed (Matrix-Matched) | Matrix Effect (%) |
|---|---|---|---|---|---|
| Formulation A | 10.00 | 9.45 | 10.05 | 100.5% | 94.0% (Suppression) |
| Formulation B | 10.00 | 10.62 | 10.08 | 100.8% | 106.0% (Enhancement) |
Troubleshooting and Best Practices
- High Absorbance/No Transmission: This indicates the sample is too concentrated. Further dilute the sample and re-analyze [32].
- Poor Linear Fit of Calibration Curve (R² < 0.9): Try re-preparing the calibration solutions. If the problem persists, check the instrument, as the lamp may be degrading [30].
- Scattering in Spectra: If the sample is a suspension of solid particles, it will scatter light. Filter the sample or use a diffraction apparatus if available [30].
- Inconsistent Replicates: Ensure the sample is completely dissolved and homogeneous. Always rinse the cuvette with the sample solvent before loading a new sample to prevent cross-contamination [32].
Within pharmaceutical research and development, Ultraviolet-Visible (UV-Vis) spectroscopy serves as a fundamental analytical technique for quantifying active pharmaceutical ingredients (APIs), excipients, and impurities in drug formulations. The reliability of these analyses hinges on the fundamental principle of the Beer-Lambert Law, which states that a sample's absorbance is directly proportional to both its concentration and the path length of light through the sample [11] [10]. Achieving optimal absorbance readings—typically within the instrument's linear dynamic range—is paramount for generating accurate, reproducible, and valid data.
This Application Note provides a structured framework for researchers and drug development professionals to strategically select sample concentration and path length. The guidance ensures absorbance measurements fall within the ideal range, enhancing the reliability of analytical results in pharmaceutical quality control and formulation studies.
Theoretical Foundation
The Beer-Lambert Law
The Beer-Lambert Law forms the cornerstone of quantitative UV-Vis spectroscopy. It establishes a linear relationship between absorbance (A) and the concentration (c) of an analyte in a solution, for a given path length (l) [11]. The law is expressed as:
A = ε * l * c
Where:
- A is the measured Absorbance (a unitless quantity) [10] [36].
- ε is the Molar Absorptivity (or molar extinction coefficient), a compound-specific constant with units of L·mol⁻¹·cm⁻¹ [11] [37].
- l is the Path Length, the distance light travels through the sample, typically measured in cm [11] [38].
- c is the Molar Concentration of the analyte in the solution (mol·L⁻¹) [11] [37].
Absorbance is logarithmically related to transmittance (T), which is the fraction of incident light that passes through a sample (I/I₀) [10] [36]: A = -log₁₀(T) = -log₁₀(I / I₀)
The Imperative of Optimal Absorbance Range
Deviating from the optimal absorbance range can significantly compromise data integrity. Table 1 outlines the practical limits for absorbance measurements.
Table 1: Practical Limits for Absorbance Measurements in Quantitative Analysis
| Absorbance (A) | Percent Transmittance (%T) | Data Quality Assessment | Recommended Action |
|---|---|---|---|
| < 0.1 | > 80% | Low signal-to-noise ratio; high relative error [36] | Concentrate the sample or use a longer path length [2] |
| 0.1 - 1.0 | 40% - 10% | Optimal range for reliable quantitation [36] | Ideal for accurate measurement |
| 1.0 - 1.5 | 10% - 3% | Approaching non-linearity; decreased sensitivity and precision [36] | Dilute sample or use a shorter path length [2] |
| > 1.5 | < 3% | Significant deviation from Beer-Lambert Law; high error due to insufficient light reaching the detector [2] [38] | Requires sample dilution or a substantially shorter path length [38] |
The following workflow diagram outlines the logical decision process for optimizing absorbance measurements.
Practical Framework for Parameter Selection
A Systematic Approach to Concentration and Path Length
The following protocol provides a step-by-step method for determining the ideal combination of concentration and path length for UV-Vis analysis of pharmaceutical compounds.
Protocol 1: Method for Parameter Selection
Define the Molar Absorptivity (ε):
- Obtain the molar absorptivity coefficient (ε) for the target analyte at the chosen wavelength (λₘₐₓ) from literature, certificate of analysis (CoA), or prior experimental data [11]. If unknown, proceed to step 4 to establish it empirically.
Establish Target Concentration Range:
- Using the Beer-Lambert Law and a standard path length (e.g., 1 cm), calculate the concentration range that will yield an absorbance between 0.1 and 1.0 AU.
- Calculation:
c = A / (ε * l) - Example: For a target absorbance of 0.5 AU, with ε = 10,000 L·mol⁻¹·cm⁻¹ and l = 1 cm, the ideal concentration is c = 0.5 / (10,000 * 1) = 5 x 10⁻⁵ M.
Select Path Length Strategically:
- Standard Cuvettes (1 cm): The default for most applications with suitable sample volume [2].
- Microvolume Systems (Variable Path Length): For scarce samples or ultra-high concentrations. Modern spectrophotometers can automatically adjust the path length from 1 mm down to 0.02 mm to bring high-concentration samples into the detectable range [7] [38].
- Long Path Length Cuvettes (e.g., 5 cm or 10 cm): For analyzing very dilute samples or trace impurities, enhancing the effective absorbance [2].
Empirical Determination via Calibration Curve (If ε is unknown):
- Prepare a series of standard solutions of known concentration across the expected range.
- Measure the absorbance of each standard using a 1 cm path length.
- Plot absorbance vs. concentration. The slope of the resulting linear curve is the product (ε * l). For a 1 cm path length, the slope equals ε [10].
The Scientist's Toolkit: Essential Research Reagents and Materials
Table 2: Key Reagents and Materials for UV-Vis Sample Preparation
| Item | Function / Description | Pharmaceutical Analysis Consideration |
|---|---|---|
| UV-Transparent Solvent | Dissolves the analyte without interfering with its absorbance. Common examples include methanol, water, and buffer solutions [39]. | The solvent must not absorb significantly at the analyte's λₘₐₓ. Ensure compatibility with drug substance stability [2]. |
| Analytical Balance | Precisely weighs the API or standard for preparing stock and working solutions. | Critical for achieving accurate and traceable concentrations; requires regular calibration in a GMP/GLP environment. |
| Volumetric Glassware | (Flasks, pipettes) for accurate dilution and solution preparation. | Use Class A glassware to ensure measurement precision and support method validation. |
| Spectrophotometer Cuvette | Holds the sample for analysis. Can be quartz (for UV), glass, or plastic (for Vis). | Quartz is essential for UV range analysis. Cuvettes must be scrupulously clean to avoid contamination and light scattering [2]. |
| Microvolume Spectrophotometer | Instrument capable of measuring tiny sample volumes (e.g., 2 µL) using short, fixed, or variable path lengths [7] [38]. | Ideal for high-throughput analysis of precious samples (e.g., purified APIs, biological drugs) and for measuring very high concentrations without dilution [7]. |
Advanced Considerations for Pharmaceutical Applications
Addressing Real-World Complexities
- Mixture Analysis and Chemometrics: For fixed-dose combination drugs where APIs have overlapping spectra, advanced chemometric models like Principal Component Regression (PCR), Partial Least Squares (PLS), and Multivariate Curve Resolution-Alternating Least Squares (MCR-ALS) can resolve the overlapping signals, enabling simultaneous quantification without physical separation [40].
- Green Chemistry and Sustainability: The principles of Green Analytical Chemistry (GAC) encourage minimizing hazardous solvent use. Where method development allows, prioritize greener solvents like water or ethanol. Tools like the AGREE metric and ComplexGAPI can be used to quantitatively assess a method's environmental impact [40] [39].
- Path Length Correction: In microplate readers or variable path length systems, the path length can differ from the standard 1 cm. Ensure the instrument software automatically corrects absorbance values to a 1 cm equivalent, or manually apply the correction factor (
A_corrected = A_measured * (1 cm / l_actual)) for accurate concentration calculations using published ε values [36].
Strategic selection of concentration and path length is a critical, yet manageable, aspect of robust UV-Vis method development in pharmaceutical analysis. By rigorously applying the Beer-Lambert Law and adhering to the optimal absorbance range of 0.1 to 1.0 AU, researchers can ensure their spectroscopic data is precise, accurate, and fit-for-purpose. The protocols and frameworks provided herein empower scientists to efficiently optimize these key parameters, thereby enhancing the reliability of drug quantification, purity assessments, and formulation studies.
In the pharmaceutical industry, the move towards real-time release testing (RTRT) to enhance quality while reducing costs is gaining momentum [41]. UV-Vis spectroscopy has emerged as a promising tool for RTRT due to its simplicity, sensitivity, and cost-effectiveness [41]. However, the reliability of the results hinges on several critical pre-analytical steps. For researchers and drug development professionals, proper sample preparation technique is not merely a preliminary requirement but a fundamental component of data integrity. This application note details three foundational pillars for obtaining reliable UV-Vis results in pharmaceutical formulation research: the scientific selection of cuvette material, rigorous cleaning protocols, and accurate blank correction procedures. Neglect in any of these areas introduces systematic errors that can compromise analytical outcomes and subsequent decision-making.
Cuvette Selection Guide
The selection of an appropriate cuvette is the first critical step in ensuring accurate spectroscopic data. The cuvette material must be transparent to the wavelengths of light used in the analysis; otherwise, it will absorb light and interfere with the results [42].
Material Properties and Spectral Transmission
The choice of cuvette material dictates the usable wavelength range of an analysis, its durability, chemical resistance, and cost. The primary rule is that the material must be transparent at the analytical wavelength. The table below provides a comparative overview of common cuvette materials.
Table 1: Optical Properties and Applications of Common Cuvette Materials
| Material | Wavelength Range | Primary Applications | Advantages | Disadvantages |
|---|---|---|---|---|
| Optical Glass [43] [42] | ~340 nm to 2500 nm | Colorimetric assays, OD measurements in cell cultures, visible light applications [42]. | Affordable, reusable, good for visible/NIR range [43] [42]. | Opaque in UV range (<340 nm); not for nucleic acid/protein quantification [43] [42]. |
| UV-Grade Quartz [43] [42] | ~190 nm to 2500 nm | UV-Vis spectroscopy, nucleic acid/protein quantification, high-precision work [42]. | Transparent from deep UV to NIR, excellent chemical/thermal resistance [43] [42]. | Expensive, fragile [43] [42]. |
| Plastic (Standard) [43] [42] | ~380 nm to 780 nm | Educational labs, protein assays (e.g., BCA, Bradford), bacterial OD measurements [42]. | Inexpensive, disposable, unbreakable [43] [42]. | Not for UV measurements, can absorb UV light; limited chemical resistance [43] [42]. |
| UV-Transparent Plastic [42] | ~220 nm to 900 nm | Disposable alternative for UV work when quartz is not available [42]. | Convenient, disposable, usable in UV range [42]. | Lower optical quality than quartz, limited chemical resistance [42]. |
Selection Protocol and Workflow
Choosing the correct cuvette requires a structured decision-making process that aligns the experimental needs with material properties. The following workflow provides a systematic approach for researchers.
Diagram 1: Cuvette selection workflow.
Experimental Protocol: Cuvette Selection
Define Analytical Wavelength: Confirm the primary wavelength required for your assay.
- UV Analysis (e.g., DNA/RNA at 260 nm, proteins at 280 nm): You must use UV-grade quartz cuvettes. Neither glass nor standard plastic transmits light effectively in this range [43] [42].
- Visible Analysis (e.g., colorimetric assays like BCA/Bradford): Optical glass or plastic cuvettes are suitable and cost-effective [42].
Assess Solvent Compatibility:
- Glass and Quartz: Highly compatible with a wide range of organic solvents (e.g., acetone, chloroform), acids, and bases. These are the default choice for organic solvents [42].
- Plastic: Sensitive to many organic solvents, which can dissolve or craze the material, leading to damage and inaccurate readings. Use only with aqueous or mild alcoholic solutions unless specified as chemically resistant by the manufacturer [42].
Evaluate Reusability and Budget:
Cuvette Cleaning and Handling Protocols
Proper cleaning and handling are essential for maintaining the optical integrity and longevity of precision cuvettes, especially reusable quartz and glass cells.
Detailed Cleaning Methodologies
No single cleaning method applies to all contaminants. The appropriate technique must be selected based on the nature of the sample analyzed [44].
Table 2: Cuvette Cleaning Methods Based on Contaminant Type
| Contaminant/Solvent | Cleaning Protocol | Precautions |
|---|---|---|
| General / Aqueous [44] [45] | 1. Rinse thoroughly with purified water.2. Clean with ethanol or acetone.3. Air-dry or wipe with lint-free tissue [45]. | Avoid abrasive materials that can scratch optical surfaces. |
| Severe or Stubborn Contamination [44] | 1. Soak in a 2% solution of specialized cleaning concentrate (e.g., Hellmanex) for 10-30 minutes at 30-50°C [44] [46].2. Rinse extensively with ultrapure water [46].3. Optionally, soak in dilute nitric acid with hydrogen peroxide [44].4. Rinse and dry. | Do not let the alkaline cleaning solution evaporate in the cuvette, as the high pH can damage the surface [46]. |
| Organic Solvents [44] | 1. Rinse with the specific organic solvent used in the sample.2. Follow with a rinse of ethanol or acetone.3. Proceed with a general aqueous cleaning method. | Ensure the cuvette material is compatible with the solvent (use glass/quartz for most organics). |
| Stubborn Residues [44] | Gently scrub the interior with a soft cotton swab moistened with a compatible cleaning solvent. | Avoid using excessive force. Do not use metal tweezers or hard objects that can scratch the windows [46]. |
Handling and Storage Best Practices
Improper handling is a major cause of cuvette damage and measurement error.
Handling Precautions:
- Always use gloves to prevent fingerprints on optical windows.
- When filling, never let the pipette tip touch the polished optical surface of the cuvette [46].
- Avoid using metal tweezers; use soft-coated or plastic-tipped tweezers instead [46].
- Take care when inserting cuvettes into a metal holder to avoid chipping [46].
Storage:
Warnings:
- Ultrasonic Cleaners: Avoid them, as the cavitation can damage polished surfaces and break cuvettes [44] [46].
- Temperature Shock: Avoid extreme temperature changes, which can cause fragile materials like quartz to fracture [46].
- Overfilling: When using a stopper, do not force it or fill the cuvette completely, as pressure from thermal expansion can break the cell [46].
Blank Correction Principles and Protocol
The blank measurement is the most critical step for achieving accurate and reproducible sample readings in UV-Vis spectrophotometry [47]. It is a prerequisite for all photometric measurements.
The Principle of Blank Correction
A blank measurement is a reference measurement of everything except the analyte of interest. Typically, this is the solvent (e.g., buffer, distilled water) the sample is dissolved in [47]. The purpose of the blank is to account for and subtract any light absorption caused by the solvent, the cuvette itself, or other non-analyte components. After measuring the blank, the instrument sets this absorbance value to zero, ensuring that the subsequent sample measurement reflects only the absorbance of the target analyte [47].
Modern spectrophotometers, whether single or double-beam, use this blank measurement to perform an internal correction. In double-beam systems, which are more stable, the instrument records the ratio of the sample beam to the reference beam intensity during the blank measurement, and this ratio is used as the baseline for subsequent sample measurements, effectively canceling out fluctuations in the light source [48].
Step-by-Step Blank Correction Protocol
Experimental Protocol: Performing a Blank Correction
Preparation of Blank Solution:
- The blank must contain all the same components as the sample solution, except for the analyte of interest [47]. For a drug dissolved in a phosphate buffer, the blank is the phosphate buffer alone.
Cuvette Preparation:
- Use the same cuvette for both blank and sample measurements, or a matched pair if using a dual-beam instrument. Ensure the cuvette is meticulously clean and dry.
- Fill the cuvette with the blank solution, ensuring the liquid level is high enough for the light beam to pass through unimpeded.
Instrument Blanking:
- Place the cuvette containing the blank solution into the sample compartment.
- Execute the "Auto Zero" or "Blank" function on the spectrophotometer. This sets the absorbance of the blank to zero at all wavelengths.
Blank Quality Control (Critical Step):
- After the blank measurement, remove the cuvette, empty it, and then refill it with a fresh aliquot of the same blank solution.
- Remeasure this fresh blank as if it were a sample. The resulting spectrum should be a flat line with near-zero absorbance. A significant signal indicates a problem with the blank solution, a dirty cuvette, or improper instrument cleaning, which will lead to inaccurate sample readings [47].
Sample Measurement:
- Replace the blank with the sample solution and perform the measurement. The instrument will now report the absorbance difference between the sample and the blank.
Table 3: Essential Research Reagent Solutions for UV-Vis Analysis
| Reagent / Material | Function / Purpose |
|---|---|
| UV-Grade Quartz Cuvettes | To hold liquid samples for analysis in the UV and visible wavelength ranges (190-2500 nm); essential for nucleic acid and protein quantification [42]. |
| Hellmanex III or similar | A specialized alkaline cleaning concentrate for effectively removing organic contaminants from glass and quartz cuvettes without leaving UV-active residues [46]. |
| High-Purity Solvents (H₂O, Ethanol, Acetone) | For rinsing and cleaning cuvettes after use. High purity prevents the introduction of new contaminants [44] [45]. |
| Matched Cuvette Pair | A pair of cuvettes with nearly identical optical properties, used in dual-beam instruments to eliminate errors from slight differences between cells. |
| Blank Solution (e.g., Buffer) | A solution containing everything except the analyte, used to zero the instrument and account for background absorbance [47]. |
In the context of pharmaceutical research, where data integrity is paramount, robust sample preparation practices are non-negotiable. The reliability of UV-Vis spectroscopy for tasks ranging from routine quality control to advanced real-time release testing is fundamentally dependent on three pillars: selecting a cuvette material that is transparent to the analytical wavelength, adhering to rigorous and specific cleaning protocols to maintain optical clarity, and performing a meticulous blank correction to isolate the signal of the target analyte. By integrating the guidelines and protocols outlined in this application note, scientists and drug development professionals can significantly enhance the accuracy and reproducibility of their spectroscopic data, thereby ensuring the quality and safety of pharmaceutical formulations.
Solving Common Challenges: A Troubleshooting Guide for Reliable UV-Vis Results
Top 10 Sample Preparation Mistakes and How to Avoid Them
Sample preparation is a foundational step in the analytical process, particularly for the UV-Vis analysis of pharmaceutical formulations. Inaccurate preparation can compromise data integrity, leading to incorrect potency assessments, misrepresentation of impurity profiles, and ultimately, decisions that risk product quality and patient safety. This application note details the ten most prevalent sample preparation mistakes and provides targeted protocols to mitigate them, ensuring the generation of reliable, reproducible, and regulatory-compliant data for drug development professionals.
In pharmaceutical analysis, the journey from a raw sample to a reliable analytical result is fraught with potential errors. Proper sample preparation is paramount for achieving accuracy in quantifying active pharmaceutical ingredients (APIs) and related substances using UV-Vis spectroscopy. Errors introduced at this stage are often systematic, affecting all subsequent measurements and potentially leading to out-of-specification (OOS) results [49]. This document outlines a systematic approach to identifying, understanding, and avoiding the top ten sample preparation mistakes, framed within the context of robust quality control (QC) practices for UV-Vis analysis.
Top 10 Sample Preparation Mistakes: Identification and Mitigation
The following table summarizes the critical mistakes, their impact on analytical results, and the essential steps to avoid them.
Table 1: Top 10 Sample Preparation Mistakes and Avoidance Strategies for UV-Vis Analysis
| Mistake Number | Mistake Description | Impact on Analysis | Key Avoidance Strategies |
|---|---|---|---|
| 1 | Inaccurate Weighing and Transfer | Systematic error in concentration calculation; affects accuracy of potency results [49]. | Use calibrated, appropriate balance; allow refrigerated samples to reach room temperature; use folded weighing paper or boat [49]. |
| 2 | Inadequate Solubilization or Extraction | Incomplete recovery of analyte; low and irreproducible results [49]. | Optimize dissolution (sonication, shaking); ensure all particles are dissolved; validate extraction time and method [49]. |
| 3 | Incorrect Sample Concentration or Dilution | Absorbance outside ideal range (0.1-1.0); non-adherence to Beer-Lambert law [50] [32]. | Perform pre-analysis dilution tests; use appropriate pathlength cuvettes to adjust effective concentration [50] [32]. |
| 4 | Use of Inappropriate Solvents or Buffers | High background absorbance; spectral interference from solvent [50]. | Select solvents with low absorbance in UV-Vis range; use the same buffer for blank and sample [50] [51]. |
| 5 | Sample Contamination | Altered absorbance readings; introduction of foreign impurities [52] [53]. | Clean cuvettes with compatible solvents; use lint-free wipes; filter samples if necessary; avoid touching cuvette optical surfaces [32] [52]. |
| 6 | Neglecting the Blank Measurement | High baseline absorbance; inaccurate sample absorbance values [50] [52]. | Always zero instrument with a blank containing all components except the analyte; use same cuvette for blank and sample when possible [50] [52]. |
| 7 | Improper Cuvette Handling and Selection | Light scattering; pathlength inaccuracies; damaged optics [50] [32]. | Use quartz cuvettes for UV; inspect for scratches; ensure proper orientation in holder; clean thoroughly between uses [50] [32] [51]. |
| 8 | Insufficient Sample Homogenization | Non-representative sampling; poor precision and data reproducibility [53] [51]. | Grind tablets to fine powder; mix solutions thoroughly before sampling; use homogenization techniques for solid composites [49] [53]. |
| 9 | Ignoring Sample Stability and Degradation | Analyte degradation leading to artificially low API content and higher impurity levels [49] [53]. | Control sample temperature; use amber vials for light-sensitive compounds; minimize preparation time for labile analytes [49] [53]. |
| 10 | Inconsistent or Non-Robust Protocols | Poor inter-laboratory reproducibility; inability to transfer methods [49] [53]. | Develop and validate robust Standard Operating Procedures (SOPs); train analysts thoroughly; document all steps meticulously [49] [53]. |
Detailed Experimental Protocols
Protocol for Drug Substance (API) Sample Preparation ("Dilute and Shoot")
This protocol is designed for the accurate preparation of a drug substance for UV-Vis analysis to determine potency [49].
The Scientist's Toolkit: Table 2: Essential Materials for Drug Substance Preparation
| Item | Function |
|---|---|
| Five-place Analytical Balance | Precisely weighs samples to ±0.1 mg for accurate concentration calculation [49]. |
| Foldable Weighing Paper/Boat | Facilitates transfer of powder and minimizes loss of the valuable sample [49]. |
| Class A Volumetric Flask | Provides high-precision volume measurement for preparing the primary stock solution. |
| Appropriate Diluent | Dissolves the API without causing degradation or spectral interference [49]. |
| Ultrasonic Bath or Shaker | Applies energy to ensure complete dissolution of the API in the diluent [49]. |
| Pipette & HPLC Vial | Transfers an aliquot of the final solution for analysis in the spectrophotometer [49]. |
Workflow:
- Weighing: Tare a folded weighing paper on a calibrated five-place balance. Accurately weigh 25-50 mg of the API reference standard or sample. Quantitatively transfer all powder into an appropriate Class A volumetric flask (e.g., 50 mL) using a funnel. Use the diluent to rinse any residual powder from the paper and funnel into the flask [49].
- Solubilization (Dissolution): Fill the flask approximately halfway with the diluent. Place it in an ultrasonic bath (with optimized time, avoiding excessive heat) or on a mechanical shaker until all particles are completely dissolved and the solution is clear [49].
- Dilution to Volume: After dissolution, carefully bring the volume to the mark on the flask with the diluent. Mix the solution thoroughly by inverting the flask multiple times to ensure homogeneity [49].
- Sample Presentation: Using a clean pipette, transfer an aliquot (e.g., 1.5 mL) of the solution into a clean HPLC vial or directly into a cuvette for UV-Vis measurement. For light-sensitive compounds, use amber vials [49].
Protocol for Immediate-Release Tablet Preparation ("Grind, Extract, and Filter")
This protocol details the preparation of a solid oral dosage form to extract the API for analysis [49].
Workflow:
- Particle Size Reduction: Weigh and record the average weight of 10-20 tablets. Crush the tablets into a fine, homogeneous powder using a mortar and pestle. For content uniformity, a single tablet can be crushed inside folded weighing paper using a pestle [49].
- Quantitative Transfer: Transfer the entire crushed powder (or an amount equivalent to the average tablet weight) quantitatively into a volumetric flask. Rinse the mortar and pestle with the diluent to ensure complete transfer [49].
- Extraction: Add a portion of the diluent to the flask. Extract the API by sonicating or shaking for a validated period to ensure complete release from the excipient matrix [49].
- Filtration: After extraction, dilute the solution to volume. Filter a portion of the solution through a 0.45 µm syringe filter (nylon or PTFE). Discard the first 0.5 mL of the filtrate to saturate the filter membrane. Collect the subsequent clear filtrate in an HPLC vial for analysis [49].
The following workflow diagram illustrates the parallel paths for preparing drug substances and drug products.
Critical Controls and Best Practices
The Blank Solution
The blank solution is used to zero the spectrophotometer, establishing a baseline absorbance of zero. It must contain all the components present in the sample solution except the analyte of interest [50] [52]. For a drug product analysis, this typically means a solution prepared from all excipients (placebo) taken through the entire sample preparation protocol. Using the blank correctly accounts for the absorbance of the solvent, cuvette, and other chemical components, ensuring that the measured absorbance is due solely to the API [50].
Contamination Control
Vigilant contamination control is non-negotiable. Key practices include:
- Cuvette Care: Handle cuvettes only by the opaque sides. Clean them meticulously with high-purity solvents after each use and store them in a clean, dust-free environment [50] [32].
- Solvent Quality: Use high-purity solvents and reagents to prevent introducing UV-absorbing contaminants.
- Equipment Hygiene: Use clean, dedicated glassware and pipette tips for each sample to prevent cross-contamination [53].
Documentation and SOPs
Robust analytical procedures are built on a foundation of strong documentation. Detailed Standard Operating Procedures (SOPs) for sample preparation must be established and rigorously followed. These SOPs should cover every aspect, from sample weighing and dissolution to filtration and instrument calibration, ensuring consistency and reproducibility across different analysts and laboratories [49] [53]. All steps, including sample weights, dilution factors, and any deviations from the procedure, must be meticulously recorded.
Addressing Matrix Effects and Light Scattering in Complex Formulations
Ultraviolet-Visible (UV-Vis) spectroscopy is a cornerstone analytical technique in pharmaceutical research for the quantification of drugs and biomolecules. However, the accurate analysis of complex formulations is often compromised by matrix effects and light scattering phenomena [54] [55]. Matrix effects arise from the sample components other than the analyte, which can alter the detector response, while light scattering from particulates or aggregates leads to baseline artifacts and inflated absorbance readings [55] [2]. This application note, framed within a broader thesis on sample preparation, provides detailed protocols and strategies to mitigate these challenges, ensuring reliable and accurate UV-Vis analysis for drug development professionals.
Technical Background: Key Challenges in UV-Vis Analysis
Light Scattering Artifacts
Rayleigh and Mie scattering from particulates, soluble protein aggregates, or large proteins causes significant inaccuracy in concentration measurements via UV spectroscopy and Beer's Law. This scattering results in baseline elevation and distortion, which, if uncorrected, leads to the overestimation of analyte concentration [55]. Traditional correction equations can be inadequate, especially when samples vary in their particulate or soluble aggregate levels [55].
Matrix Effects
The "matrix effect" refers to the influence of all sample components other than the analyte on the quantitation process. In UV-Vis, this can manifest as solvatochromism, where the absorptivity of an analyte is altered by the solvent polarity or pH of the mobile phase [54] [56]. Components of the sample matrix with similar retention properties can also be co-eluted, potentially interfering with detection [54].
Table 1: Common Sources of Interference in UV-Vis Analysis of Complex Formulations
| Interference Type | Source | Impact on Analysis |
|---|---|---|
| Rayleigh/Mie Scattering [55] | Particulates, protein aggregates, large proteins, nanospheres | Baseline artifacts; inaccurate concentration measurements |
| Solvatochromism [54] [56] | Changes in solvent polarity or pH | Alters molar absorptivity (ε), affecting absorbance and calculated concentration |
| Ionization/Competitive Effects [54] | Competing compounds in the matrix (esp. in MS) | Ion suppression or enhancement; not a primary UV-Vis issue but critical in LC-MS |
| Stray Light [56] | Imperfections in the spectrophotometer | Causes non-linearity at high absorbances, leading to inaccurate readings |
Experimental Protocols
Comprehensive Sample Preparation Protocol for HPLC-UV/Vis Analysis
This protocol is designed to mitigate matrix effects and reduce light scattering in nano-formulations and other complex samples prior to drug quantitation by HPLC-UV/Vis [57].
Guideline: This is a standard method for drug quantitation where the mobile phase and detection wavelength are compound-specific [57].
Materials and Reagents:
- HPLC grade methanol
- Aqueous buffered solution (as appropriate for the formulation)
- 50 mL conical tube
- 1.5 mL microcentrifuge tubes
- Water bath sonicator
- Microcentrifuge (capable of 20,000 rcf)
- Vortex mixer
- Glass maximum recovery HPLC vials
Procedure:
- Solvent Preparation: Pour 10 mL of HPLC grade methanol into a 50 mL conical tube [57].
- Initial Dilution: Dilute the formulation sample 100-fold in HPLC grade methanol by adding 10 μL of the sample to 990 μL of fresh methanol in a 1.5 mL microcentrifuge tube [57].
- Sonication: Sonicate the samples for 8 minutes in a water bath sonicator. To prevent sample degradation, place a small ice pack into the water bath to avoid high temperatures [57].
- Mixing: Vortex each sample for 10 seconds at the highest speed to ensure it is well-mixed [57].
- Centrifugation: Centrifuge the samples at 20,000 rcf for 10 minutes at 4°C. This critical step pellets particulates and aggregates that cause light scattering [57].
- Secondary Dilution: Transfer the supernatant to a clean microcentrifuge tube and perform a further dilution:
- Final Mixing: Vortex the diluted supernatant for 10 seconds at the highest speed to mix thoroughly [57].
- Vial Preparation: Pipet 80 μL of the final sample solution into a glass maximum recovery HPLC vial. Carefully cap the vial [57].
- Bubble Check: Flick the vial with a finger to ensure no air bubble is trapped at the bottom [57].
- Analysis: Place the vial into the HPLC autosampler tray for analysis [57].
Notes:
- Ensure all solvents are compatible with the detection method; avoid solvents with high UV absorbance at the analytical wavelength [57].
- The injection volume should be optimized for sensitivity without exceeding column capacity [57].
Protocol for Validating UV-Vis Method Linearity and Assessing Matrix Effects
Objective: To confirm the Beer-Lambert law holds for the analyte in the chosen matrix and to identify the presence of matrix effects.
Materials and Reagents:
- Stock solution of pure analyte
- Matrix blanks (e.g., sterile culture media, buffer solution without analyte, placebo formulation)
- Appropriate solvent for dilution
- UV-Vis spectrophotometer with quartz cuvettes (for UV analysis)
Procedure:
- Preparation of Calibration Standards: Prepare a series of standard solutions of the pure analyte in a simple solvent (e.g., water or buffer) across the desired concentration range.
- Preparation of Matrix-Matched Standards: Prepare a second series of standard solutions in the matrix blank (e.g., placebo formulation diluted in the same solvent).
- Absorbance Measurement: Measure the absorbance of all standard solutions at the wavelength of maximum absorbance (λmax) using the appropriate solvent or matrix blank as the reference.
- Data Analysis: Plot absorbance (A) vs. concentration (c) for both the pure solvent standards and the matrix-matched standards.
- Linearity and Matrix Effect Assessment:
- Linearity Check: The calibration curve for the pure analyte should be linear (A = εlc) across the working range. Deviations may indicate chemical interactions or instrumental issues like stray light at high concentrations [56].
- Matrix Effect Identification: Compare the slopes of the two calibration curves. A statistically significant difference in slope indicates that the matrix is affecting the detector response, a phenomenon known as the matrix effect [54].
Data Analysis and Mitigation Strategies
Advanced Correction for Light Scattering
For samples with significant scattering, a curve-fitting baseline subtraction approach based on fundamental Rayleigh and Mie scattering equations is superior to simple baseline subtraction. This method, which also factors in instrument baseline artifacts, has been validated with protein size standards, aggregates, and nanoparticles [55]. Implementing this correction requires specialized software or algorithms to model and subtract the scattering contribution from the absorbance spectrum accurately.
Strategic Approaches to Mitigate Matrix Effects
Several strategies can be employed to overcome matrix effects and ensure accurate quantitation.
Table 2: Strategies for Mitigating Matrix Effects and Light Scattering
| Strategy | Description | Application Context |
|---|---|---|
| Sample Preparation [57] | Dilution, sonication, and centrifugation to remove particulates and interfereing compounds. | Essential first step for all complex formulations, especially those containing proteins or nanoparticles. |
| Matrix-Matched Calibration [54] | Using calibration standards prepared in a matrix blank that mimics the sample. | Corrects for consistent matrix-induced changes in analyte response. |
| Standard Addition Method | Adding known quantities of analyte to the sample and measuring the increase in response. | Useful when the sample matrix is complex, variable, or difficult to replicate. |
| Internal Standard (IS) [54] | Adding a known amount of a non-interfering compound similar to the analyte to every sample and calibrator. | Corrects for losses during preparation and variations in injection volume; highly effective for LC methods. |
The Scientist's Toolkit
Table 3: Essential Research Reagent Solutions and Materials
| Item | Function/Benefit |
|---|---|
| HPLC Grade Methanol [57] | High-purity solvent for sample dilution and preparation; minimizes UV-absorbing contaminants. |
| Quartz Cuvettes [2] | Required for UV range analysis as they are transparent down to ~200 nm; glass and plastic cuvettes absorb UV light. |
| Aqueous Buffered Solutions [58] | Provides a stable pH environment for samples like proteins and nucleic acids, ensuring consistent absorbance. |
| Water Bath Sonicator [57] | Aids in homogenizing samples and dissolving aggregates, reducing light scattering. |
| Refrigerated Microcentrifuge [57] | Pellet removal of particulates and protein aggregates that cause light scattering. |
| Internal Standard [54] | A compound added to samples to correct for analyte loss during preparation and instrument variability. |
Workflow Visualization
The following diagram illustrates the logical workflow for addressing analytical challenges in complex formulations, from problem identification to solution validation.
Analysis and Mitigation Workflow
Accurate UV-Vis analysis of complex pharmaceutical formulations is achievable through a systematic approach that addresses the intertwined challenges of light scattering and matrix effects. As detailed in this application note, rigorous sample preparation protocols involving dilution, sonication, and centrifugation are foundational. Coupling these with advanced scattering corrections and robust quantification strategies like the internal standard method provides a comprehensive framework for obtaining reliable data. Adherence to these protocols and a thorough understanding of the underlying phenomena are crucial for ensuring product quality and accelerating drug development.
In pharmaceutical analysis, the Beer-Lambert Law establishes the fundamental principle for UV-Vis spectrophotometry, positing a linear relationship between analyte concentration and measured absorbance [59]. This law is expressed as A = ϵ · c · l, where A is absorbance, ϵ is the molar absorptivity, c is the analyte concentration, and l is the path length. However, in practice, this linear relationship often deviates at higher analyte concentrations, leading to non-linearity that compromises quantitative accuracy. For drug development professionals, these deviations represent significant challenges in method validation, potency assays, and impurity profiling, where accuracy and reproducibility are paramount.
Non-linearity arises from multiple sources. Chemical effects include spectral band saturation at high concentrations and molecular interactions that alter absorptivity. Physical effects encompass light scattering and path length variations. Instrumental effects are equally critical, involving detector non-linearity, stray light, and wavelength inaccuracies [60]. Charge-coupled device (CCD) spectrometers, common in modern instruments, exhibit inherent non-linearity due to their operational physics; the amount of accumulated charge in the potential well does not scale perfectly with integration time or light intensity, introducing systematic errors [61] [62]. Understanding and correcting for these effects is therefore not merely a procedural step but an essential component of ensuring data integrity in pharmaceutical development.
Detecting and Quantifying Non-Linearity
Recognizing Deviations from the Beer-Lambert Law
The first step in managing non-linearity is its detection. A straightforward method involves preparing a series of standard solutions across the expected concentration range and plotting absorbance against concentration. A linear regression fit applied to this data should yield a straight line. Significant deviations, evidenced by a consistent curve or a pattern in the residuals (the differences between observed and predicted absorbance values), indicate non-linearity. Visually, the calibration curve may show a plateau or "roll-over" at higher concentrations instead of a straight line. Furthermore, the correlation coefficient (R²) of the linear fit, while useful, is insufficient alone; a high R² can sometimes mask systematic non-linear trends, particularly over narrower concentration ranges.
Instrumental non-linearity can be quantified separately from chemical non-linearity. Studies demonstrate that the non-linearity of a CCD detector can distort signals by up to 5% for some measurements, with non-linearity errors at an intensity of about 50,000 counts (from a maximum of 65,535) reaching up to 1000 counts on the intensity scale [62]. This translates to a significant error of approximately 0.04 absorption units, which is substantial for pharmaceutical assays requiring high precision. For reliable quantitative measurements, it is generally recommended to maintain absorbance values between 0.1 and 1.0, which correspond to 90% and 10% light transmission, respectively. Measurements with an absorbance greater than 3.0 are not recommended due to greatly increased error and reduced accuracy [36].
The following table summarizes the primary sources of non-linearity and their impact on pharmaceutical analysis:
Table 1: Key Sources of Non-Linearity and Their Impact
| Source Category | Specific Source | Impact on Spectroscopic Data | Relevance to Pharmaceutical Formulations |
|---|---|---|---|
| Chemical | Band Saturation at High Concentration | Absorbance plateaus, violating Beer-Lambert proportionality [60]. | Critical for high-concentration API potency assays. |
| Molecular Interactions (e.g., H-bonding) | Alters molar absorptivity (ϵ), causing non-linear shifts [60]. | Important in dissolvable films or complex co-formulations. | |
| Physical | Light Scattering (e.g., from particulates) | Causes additive or multiplicative spectral effects [60]. | Affects analysis of suspensions or poorly dissolved samples. |
| Path Length Variations | Inconsistent absorbance readings for the same concentration [59]. | A risk with poor cuvette handling or in microplate readers. | |
| Instrumental | Detector Non-Linearity (CCD/CMOS) | Signal response deviates from ideal linear model at high and low light levels [61] [62]. | A fundamental hardware limitation affecting all measurements. |
| Stray Light | Causes negative deviation at high absorbance, flattening the calibration curve [62] [59]. | Major source of error in high-absorbance samples. | |
| Integration Time Uncertainty | Introduces systematic error with random characteristics due to variable potential well filling [61]. | Impacts method robustness when scaling protocols. |
Strategic Correction Methodologies
Foundational Wet-Lab Protocols: Dilution and Sample Preparation
Proper sample preparation is the first and most practical defense against non-linearity. The core principle is to ensure the analyte of interest is within the instrument's linear dynamic range.
Protocol 1: Dilution of High-Concentration Drug Substances (DS)
- Purpose: To accurately quantify the potency of a pure drug substance (API) whose predicted absorbance falls outside the linear range.
- Materials: Analytical balance (±0.1 mg), weighing paper or boat, volumetric flask (Class A), appropriate diluent (e.g., acidified water, buffer, or solvent-water mixture), ultrasonic bath or vortex mixer, pipettes, and HPLC vials [49].
- Procedure:
- Weighing: Accurately weigh approximately 25-50 mg of the API standard onto a tared, folded weighing paper using a calibrated analytical balance. For hygroscopic compounds, allow the sample to warm to room temperature before opening and perform the weighing swiftly [49].
- Quantitative Transfer: Transfer the powder quantitatively into an appropriate volumetric flask (e.g., 50 mL or 100 mL) using a funnel. Rinse the weighing paper thoroughly with the diluent to ensure complete transfer.
- Solubilization: Fill the flask approximately halfway with the pre-selected diluent. Solubilize the API using a validated method, such as sonication in a water bath for a specified time (e.g., 5-10 minutes) or vortex mixing. Scrutinize the solution to ensure all particles are dissolved. Precaution: Prolonged sonication can generate heat and potentially degrade the API; mitigate this by adding ice to the bath or using a shaker instead [49].
- Dilution to Volume: Bring the solution to the final volume with the diluent, ensuring the meniscus base aligns with the flask's mark. Mix the solution thoroughly by inverting the flask multiple times.
- Further Dilution (if needed): If the initial stock solution is still too concentrated, perform a serial dilution. Precisely pipette an aliquot of the stock solution into a new volumetric flask and dilute to volume. This creates a sample whose absorbance at the target wavelength falls between 0.1 and 1.0 AU.
Protocol 2: Grind, Extract, and Filter for Solid Oral Dosage Forms (Tablets/Capsules)
- Purpose: To extract the API from a solid dosage form (tablet or capsule) and prepare a solution within the linear absorbance range.
- Materials: Mortar and pestle, volumetric flask, diluent, sonicator or wrist-action shaker, syringe, and 0.45 µm disposable membrane filter (e.g., Nylon or PTFE) [49].
- Procedure:
- Particle Size Reduction: For a composite assay, weigh and crush not less than 10-20 tablets in a mortar and pestle to a fine, homogeneous powder. For content uniformity testing, a single tablet can be wrapped in weighing paper and crushed with a pestle [49].
- Quantitative Transfer: Weigh an amount of powder equivalent to the average tablet weight (for composite) or transfer all powder from a single unit (for content uniformity) into a volumetric flask. Rinse the mortar and pestle with the diluent to ensure complete transfer.
- Extraction: Add diluent to the flask and extract the API using a validated method, such as sonication or shaking on a wrist-action shaker for a specified time. The diluent and extraction time must be optimized during method development to ensure complete API recovery [49].
- Filtration: Filter an aliquot of the solution directly into an HPLC vial using a 0.45 µm syringe filter. Discard the first 0.5 mL of the filtrate to saturate the filter and avoid concentration changes [49]. The resulting filtrate is ready for spectrophotometric analysis.
Instrumental and Mathematical Correction Techniques
When dilution alone is insufficient or impractical for the analytical workflow, instrumental and computational corrections are essential.
- Non-Linearity Correction for CCD Detectors: As detailed in the search results, the non-linear response of a CCD can be modeled and corrected. One proposed method involves a quadratic correction function derived from the CCD's equivalent circuit model, which accounts for a leakage current that is independent of light intensity. This method can reduce non-linearity error from several hundred counts to about 40 counts [62]. Another study proposed a "nonlinear correction method for the error caused by the change of the integration time," which normalized spectral data collected under different integration times to a common baseline, significantly improving predictive model performance [61].
- Advanced Chemometric Modeling: Linear models like Partial Least Squares (PLS) can be extended to handle non-linearity.
- Polynomial Regression: A simple extension that includes higher-order terms (e.g., squared concentrations). While interpretable, it can overfit high-dimensional spectral data [60].
- Kernel PLS (K-PLS): This method maps data into a higher-dimensional feature space where linear relationships hold, effectively capturing complex non-linearities without explicitly computing the new features [60].
- Artificial Neural Networks (ANNs): These are highly flexible and suitable for modeling very complex non-linear relationships, particularly with large datasets like those from hyperspectral imaging [60].
The following diagram illustrates the decision-making workflow for selecting and applying the appropriate non-linearity correction strategy:
Diagram 1: Workflow for correcting non-linearity.
Essential Research Reagent Solutions
The following table lists key materials and reagents critical for implementing the protocols described and ensuring accurate results.
Table 2: Essential Research Reagent Solutions for Non-Linearity Correction
| Item | Function/Explanation | Application Context |
|---|---|---|
| Class A Volumetric Flasks | Provides high-precision volume measurement, critical for accurate dilution and quantitative transfer [49]. | Preparation of standard and sample solutions in Protocols 1 & 2. |
| Appropriate Diluent (e.g., Buffer, Solvent) | Dissolves the analyte without interfering absorbance at the target wavelength; composition affects API solubility and stability [49]. | Solubilization and dilution of both drug substances and products. |
| 0.45 µm Syringe Filters (Nylon/PTFE) | Removes particulate matter from extracted dosage forms that could cause light scattering and erroneous absorbance readings [49]. | Clarification of sample solutions in Protocol 2. |
| Certified Reference Standard | A substance with certified purity and concentration used to create the calibration curve, the benchmark for all quantitation [49]. | Establishing the true calibration function for detecting non-linearity. |
| Absorbance Reference Standards | Solutions with known, stable absorbance values at specific wavelengths; used to verify the accuracy and linearity of the spectrophotometer [59]. | Instrument qualification and periodic verification of performance. |
Effectively correcting for non-linearity is not a single action but a systematic process integral to robust analytical method development in pharmaceuticals. It begins with vigilant sample preparation—judicious use of dilution and rigorous extraction techniques—to bring measurements into the instrument's linear dynamic range. When fundamental sample preparation is inadequate, a deep understanding of instrumental limitations, particularly CCD detector physics, combined with the application of advanced, validated chemometric models, provides a powerful framework for restoring accuracy. By adhering to the detailed protocols for dilution and dosage form extraction, leveraging the decision workflow for correction strategies, and utilizing the essential research tools outlined herein, scientists can ensure their UV-Vis methods yield precise, reliable, and defensible data critical for drug development and quality control.
In the quantitative analysis of pharmaceutical formulations using UV-Vis spectroscopy, the accuracy and reproducibility of results are highly dependent on rigorous control of environmental and operational factors. Key parameters such as temperature, pH of the solvent medium, and instrumental baseline stability can significantly influence spectral data by altering absorbance values, shifting peak maxima, and introducing artifacts. Failure to manage these factors can compromise the validity of concentration measurements, potentially impacting drug potency and stability assessments. This document provides detailed protocols and application notes to standardize these critical parameters, ensuring data integrity within pharmaceutical research and development.
The Impact of Temperature and Correction Protocols
Effects on Spectral Data and Concentration Measurement
Temperature variations induce changes in solute-solvent interactions, leading to measurable effects on UV-Vis spectra. These effects include band shifting, band broadening, and changes in absorbance intensity, which can directly lead to inaccuracies in concentration determinations via Beer's Law [63]. Such temperature effects are inherent in processes like cooling crystallization but are also relevant in routine spectrophotometric assays. Advanced chemometric methods, such as Loading Space Standardization (LSS), have been validated to correct for these nonlinear spectral variations, enabling accurate solute concentration prediction even across a temperature range [63].
Protocol: Temperature Correction Using Loading Space Standardization (LSS)
Objective: To standardize UV-Vis spectra measured at varying temperatures to a reference temperature, thereby removing temperature-induced spectral variance.
Materials and Equipment:
- UV-Vis spectrophotometer with fiber-optic ATR probe
- Temperature-controlled reaction vessel (e.g., Mettler Toledo OptiMax)
- Calibration samples of the analyte across a range of concentrations and temperatures
Procedure:
- Calibration Data Acquisition: Prepare standard solutions of the target analyte (e.g., l-ascorbic acid) at multiple concentrations. Acquire UV-Vis spectra for these solutions across the entire expected operational temperature range [63].
- Model Construction: Subject the collected spectral data matrix to singular value decomposition (SVD) to express it in terms of scores and loadings.
- Temperature Modeling: Model the effect of temperature on the loadings by fitting a second-order polynomial to the relationship between loadings and temperature.
- Spectral Standardization: For any new sample spectrum measured at a specific temperature (T₁), use the fitted polynomial to calculate the loading matrix for a predefined reference temperature (Tref). Transform the sample spectrum to appear as if it were measured at Tref [63].
- Concentration Prediction: Use the temperature-corrected spectra with your established calibration model (e.g., Partial Least Squares, PLS) for accurate solute concentration determination.
Data Presentation: The following table summarizes the performance of different modeling approaches for predicting l-ascorbic acid concentration, highlighting the effectiveness of temperature correction [63].
Table 1: Efficacy of Temperature Correction Models for UV Spectrometry
| Model Type | Preprocessing | Number of Latent Variables | RMSECV (g/100 g solvent) |
|---|---|---|---|
| Global PLS | None | High | 0.18 |
| Global PLS | First Derivative | Variable | 0.23 |
| Isothermal Local Model | None | Low | 0.01 |
| Global PLS with LSS | Temperature Correction | Low (same as local) | 0.06 |
Experimental Workflow for Temperature Management
The following diagram illustrates the logical workflow for acquiring and correcting UV-Vis spectra affected by temperature variation.
The Critical Role of pH in Sample Preparation
Implications for Pharmaceutical Analysis
The pH of a solvent system is a critical parameter in UV-Vis analysis as it can dramatically alter the electronic environment of a molecule, leading to shifts in its absorption spectrum. For a drug substance, this can affect the accuracy of concentration measurements and assessments of chemical stability [64]. The potency of active pharmaceutical ingredients (APIs) can be compromised if the pH forces the molecule into a chemical state with different UV absorption characteristics. Furthermore, controlling pH is essential for mimicking biological conditions, such as the acidic environment of the stomach for oral dosage forms, to predict performance accurately [64].
Protocol: pH-Based Sample Preparation for Troche Analysis
Objective: To accurately quantify tartrazine in Co-enzyme Q10 troches using pH-controlled dissolution to ensure consistent spectral output.
Materials and Equipment:
- pH 10 buffer (prepared from boric acid and sodium hydroxide)
- Volumetric flasks (10 mL, 100 mL)
- UV-Vis spectrophotometer with plastic cuvettes
- Analytical balance
Procedure:
- Buffer Preparation: Prepare a pH 10 buffer solution. Solution A: Dissolve 12.37 g boric acid in 1 L distilled water with 100 mL 1.0 N NaOH. Solution B: 0.1 N sodium hydroxide. Combine 59.6 mL of Solution A with 40.4 mL of Solution B [65].
- Sample Preparation: Select a troche at random and dissolve it in 20 mL of the pH 10 buffer. Allow the sample to stand overnight to ensure complete dissolution and equilibration [65].
- Calibration Standards: Prepare standard solutions of tartrazine in the concentration range of 50-150 mg/troche using the same pH 10 buffer and the same standing protocol [65].
- Spectroscopic Measurement: Read the absorbance of the sample and standards at 530 nm using plastic cuvettes [65].
- Quantification: Construct a calibration curve from the standard absorbances and use it to determine the tartrazine content in the troche sample.
Table 2: Example UV-Vis Analytical Methods for Various Pharmaceutical Formulations
| Formulation | API | Wavelength (nm) | Sample Preparation Summary | Key Factor |
|---|---|---|---|---|
| Co-enzyme Q10 Troches | Tartrazine | 530 | Dissolve in pH 10 buffer, stand overnight [65] | pH-controlled solvent |
| Lidocaine Dental Gel | Lidocaine | 210 | Dissolve in ethanol, double dilution, stand overnight [65] | Organic solvent, double dilution |
| Metoprolol Tablets | Metoprolol | 280 | Dissolve in distilled water [65] | Aqueous solvent |
| Furosemide Tablets | Furosemide | 300 | Dissolve in 75% methanol, sonicate [65] | Solvent mixture, sonication |
Managing Instrument Baseline Drift and Artifacts
Causes and Identification
Baseline drift is a common issue characterized by an unsteady, shifting baseline instead of a flat line at zero absorbance. Primary causes include:
- Instrumental Factors: Fluctuations in lamp intensity, detector sensitivity drift, and misalignment of optical components [66].
- Environmental Influences: Temperature fluctuations and vibrations in the laboratory can introduce noise and drift [66].
- Sample and Matrix Effects: The presence of undissolved particles, bubbles, or insoluble aggregates in the sample can cause light scattering (Rayleigh and Mie scattering), leading to baseline artifacts and inaccurate concentration readings [55].
Protocol: Baseline Correction for Scattering Artifacts
Objective: To correct UV-Vis spectra for baseline artifacts caused by light scattering from particulates or protein aggregates.
Materials and Equipment:
- UV-Vis spectrophotometer
- Software capable of baseline subtraction and curve fitting
Procedure:
- Identify Scattering: Observe the spectral baseline for an upward curve or shift, particularly at lower wavelengths, which is characteristic of light scattering.
- Apply Curve-Fitting Baseline Subtraction: Use a validated algorithm based on fundamental Rayleigh and Mie scattering equations to model and subtract the scattering contribution from the sample spectrum [55]. This approach is superior to simple linear baseline subtraction as it accounts for the physical nature of the artifact.
- Validate the Correction: Apply the correction method to control samples with known scattering properties (e.g., protein size standards, nanospheres) to ensure it does not introduce errors [55].
- Measure Absorbance: Use the corrected spectrum for accurate absorbance measurement at the wavelength of interest.
General Maintenance and Handling to Minimize Drift
- Regular Calibration: Perform regular instrument calibration using standard reference materials [66].
- Environmental Control: House the spectrophotometer in a stable environment with controlled temperature and humidity, and protected from vibrations [66].
- Proper Sample Handling: Ensure samples are properly clarified by filtration or centrifugation to remove particulates and bubbles before measurement [32]. Use matched cuvettes and consistent path lengths.
The Scientist's Toolkit: Essential Research Reagents and Materials
Table 3: Key Reagents and Materials for UV-Vis Analysis of Pharmaceuticals
| Item | Function/Benefit | Example Use Case |
|---|---|---|
| Fiber-Optic ATR Probe | Enables in-situ measurements in reaction mixtures without the need for sampling [63]. | Monitoring solute concentration during cooling crystallization. |
| pH Buffer Solutions | Provides a stable, known pH environment to control the ionization state of the analyte [65]. | Quantifying tartrazine in troches at pH 10. |
| Quartz Cuvettes | Suitable for UV range measurements due to high UV transmission. Essential for low-wavelength analysis [32]. | Analyzing Lidocaine gel at 210 nm. |
| HPLC Grade Solvents | High-purity solvents minimize UV-absorbing contaminants that can interfere with the analysis. | Preparing standard solutions for calibration curves. |
| Chemometric Software | Implements advanced algorithms (PLS, LSS) for multivariate calibration and temperature correction [63]. | Correcting spectra for temperature effects via LSS. |
| Syringe Filters (0.45 μm or 0.2 μm) | Removes undissolved particles and aggregates from samples to reduce light scattering [32]. | Clarifying a solution of Ketoprofen PLO emulsion prior to measurement. |
Integrated Workflow for Comprehensive Factor Management
The following diagram summarizes the integrated experimental workflow, from sample preparation to data correction, incorporating the management of all three factors discussed.
Within the framework of thesis research on sample preparation for UV-Vis analysis of pharmaceutical formulations, the refinement of analytical methods is paramount for ensuring accuracy, precision, and compliance. A recent comprehensive examination of pharmaceutical analyses published between 2015 and 2023 reveals that UV-Vis spectrophotometry remains a cornerstone technique, applied to 56% of pharmaceutical dosage forms, underscoring its critical role in quality control [67]. Furthermore, a significant proportion of these analyses (28%) are conducted in the 200-240 nm range, a region rich in chromophoric activity for many active pharmaceutical ingredients (APIs) [67]. This application note details advanced statistical and chemometric protocols designed to optimize and validate UV-Vis methods, providing researchers and drug development professionals with robust tools for method refinement.
Key Research Reagent Solutions
The following table catalogues essential materials and reagents crucial for executing the experimental protocols outlined in this document.
Table 1: Essential Research Reagents and Materials for UV-Vis Analysis of Pharmaceuticals
| Item | Function/Description | Application Example |
|---|---|---|
| Quartz Cuvettes | Sample holders transparent to UV light; standard pathlength is 1 cm [2]. | Required for all UV range measurements below 400 nm [2]. |
| HPLC-Grade Solvents | High-purity solvents (e.g., water, methanol, acetonitrile) to minimize background absorbance [68]. | Preparation of sample and standard solutions for calibration [68]. |
| Formulated Cleaners | Alkaline or acidic cleaning agents used in clean-in-place (CIP) validation [69]. | Interference testing for cleaning validation studies [69]. |
| Biomolecule Standards | Model process soils like Bovine Serum Albumin (BSA) or monoclonal antibodies [69]. | Studying method applicability to proteinaceous residues and degradation [69]. |
| Nitric Acid (HNO₃) | High-purity acid for digesting pharmaceutical samples for elemental analysis [70]. | Sample preparation for elemental impurity analysis via ICP-MS/OES [70]. |
Quantitative Data on Current UV-Vis Usage in Pharma
An analysis of recent literature provides a quantitative baseline for method development trends in pharmaceutical UV-Vis spectroscopy.
Table 2: Statistical Trends in Pharmaceutical UV-Vis Spectrophotometry (2015-2023) [67]
| Analysis Category | Sub-category | Percentage of Studies |
|---|---|---|
| Sample Type | Pharmaceutical Dosage Forms | 56% |
| Bulk Materials | 27% | |
| Pure Substances | 16% | |
| Biological/Herbal Materials | ~2.4% | |
| Wavelength Range | > 300 nm | 44% |
| 240 - 300 nm | 27% | |
| 200 - 240 nm | 28% |
Experimental Protocols for Method Refinement
Protocol 1: Wavelength Selection and Model Soil Interference Testing
This protocol establishes the optimal analytical wavelength and assesses interference from process-related soils, critical for ensuring method specificity [69].
- Instrument Preparation: Use a UV-Vis spectrophotometer equipped with a deuterium lamp for the UV range. Verify performance using a holmium oxide or other certified reference filter [2].
- Solution Preparation:
- Standard Solution: Prepare a ~1000 ppm stock solution of the analyte (e.g., API) in a suitable solvent (e.g., water, buffer). serially dilute to a concentration within the linear range of the instrument [69].
- Model Soil Solutions: Prepare separate ~1000 ppm solutions of relevant model soils, such as Bovine Serum Albumin (BSA), a monoclonal antibody (mAb), or insulin [69].
- Interference Test Solutions: Prepare 1:1 (v/v) mixtures of the standard analyte solution and each model soil solution [69].
- Spectra Acquisition: Using a quartz cuvette with a 1 cm pathlength, collect full spectra from 190 nm to 400 nm for the standard, model soil, and interference test solutions against a solvent blank [69] [2].
- Data Analysis: Identify the wavelength of maximum absorbance (λmax) for the analyte from the standard's spectrum. Analyze the model soil spectra for overlapping absorbance. Confirm that the absorbance at the chosen λmax in the interference test is additive and not supressed or enhanced [69].
Protocol 2: Validation of Linearity, Precision, and Accuracy
This protocol validates key performance parameters of the optimized UV-Vis method according to ICH Q2(R1) guidelines, as demonstrated in HPLC/UV method development [68].
- Linearity and Range:
- Prepare a minimum of six standard solutions of the analyte at concentrations spanning the expected working range (e.g., 10–60 μg/mL) [68].
- Analyze each concentration in triplicate. Measure the absorbance at the predetermined λmax.
- Plot mean absorbance versus concentration and perform linear regression analysis. The correlation coefficient (r) should be greater than 0.99 [68].
- Precision (Repeatability):
- Prepare six independent sample solutions from a homogeneous source at 100% of the test concentration.
- Analyze all six samples on the same day using the same instrument.
- Calculate the % Relative Standard Deviation (%RSD) of the absorbance measurements. An %RSD of less than 5% is typically acceptable [68].
- Accuracy (Recovery):
- Prepare samples at three different concentration levels (e.g., 80%, 100%, 120% of the target concentration) using a placebo matrix spiked with a known quantity of the analyte. Use three preparations for each level [68].
- Analyze the samples and calculate the percentage of the analyte recovered against the known added amount. Mean recovery should be within the range of 95–105% [68].
Protocol 3: Sample Preparation for Complex Formulations
Certain formulations may require digestion to fully extract the analyte for accurate quantification.
- Direct Dilution Test: Attempt to dissolve a representative sample in an appropriate solvent (e.g., DMSO, aqueous buffer) with sonication if necessary [70].
- Microwave Digestion (if direct dilution fails):
- Accurately weigh a sample and place it in a digestion vessel.
- Add concentrated nitric acid (HNO₃). Use a closed-vessel microwave digestion system as the preferred method to prevent loss of volatile analytes and ensure complete dissolution [70].
- Run a controlled digestion program. After cooling, dilute the digestate to volume with high-purity water.
- Analysis and Comparison: Analyze both the direct dilution and digested samples. If results from direct dilution are consistent with those from digestion, direct dilution is acceptable. Significant discrepancies indicate digestion is necessary for accurate results [70].
Chemometric Optimization Workflows
The following diagrams, generated with DOT language, illustrate logical workflows for implementing statistical and chemometric approaches to method refinement.
Wavelength Selection & Interference Assessment
Analytical Method Validation Pathway
Ensuring Compliance: Method Validation, Regulatory Standards, and Comparative Analysis
In pharmaceutical analysis, the accuracy of Ultraviolet-Visible (UV-Vis) spectroscopy for determining drug purity, potency, and identity is fundamentally dependent on robust sample preparation methods. Sample preparation is a critical pre-analytical step that transforms a pharmaceutical formulation into a state suitable for spectroscopic analysis, directly influencing the reliability and reproducibility of the results. Within a rigorous regulatory framework, these methods must be formally validated to ensure they consistently produce samples that meet predefined quality criteria. This application note provides detailed protocols for the validation of sample preparation methods according to the ICH Q2(R1) guideline, framing them within the context of academic research on pharmaceutical formulations [71].
The principles outlined in ICH Q2(R1) provide a foundational framework for validating analytical procedures, ensuring their suitability for intended use [71] [72]. While the recent evolution to ICH Q2(R2) introduces a more comprehensive lifecycle approach, the core validation parameters established in Q2(R1) remain essential for demonstrating method robustness [72]. This document details how to apply these parameters—specificity, accuracy, precision, linearity, and range—specifically to sample preparation methodologies for UV-Vis analysis, ensuring compliance and data integrity in pharmaceutical research and development.
Core Validation Parameters for Sample Preparation
The validation of a sample preparation method requires a systematic assessment of key performance characteristics. The following parameters, derived from ICH Q2(R1), must be evaluated to demonstrate the method's robustness [71] [1]. The subsequent sections provide detailed experimental protocols for their determination.
- Specificity: The ability of the sample preparation protocol to yield a solution where the analyte of interest (e.g., the Active Pharmaceutical Ingredient, API) is effectively separated from excipients, impurities, and degradation products, ensuring that the subsequent UV-Vis measurement is free from interference [71] [1]. This is typically assessed by comparing the spectra of placebo and spiked samples.
- Accuracy: The closeness of agreement between the theoretical concentration of the analyte in the sample and the mean result obtained from the prepared sample after analysis. It indicates the ability of the sample preparation method to quantitatively recover the analyte from the pharmaceutical matrix [71] [72].
- Precision: The closeness of agreement between a series of measurements obtained from multiple samplings of the same homogeneous sample preparation. Precision is considered at three levels: repeatability (same operating conditions over a short interval), intermediate precision (within-laboratory variations), and reproducibility (between laboratories) [71] [72].
- Linearity and Range: The linearity of a sample preparation method is its ability to produce test results that are directly proportional to the concentration of the analyte in the sample within a given range. The range is the interval between the upper and lower concentration levels of the analyte for which suitable levels of accuracy, precision, and linearity have been demonstrated [71].
Table 1: Acceptance Criteria for Key Validation Parameters
| Validation Parameter | Recommended Acceptance Criteria | Associated Experimental Measure |
|---|---|---|
| Accuracy | Mean Recovery: 98.0–102.0% | Percentage Recovery |
| Repeatability (Precision) | Relative Standard Deviation (RSD) ≤ 2.0% | RSD of Multiple Preparations |
| Linearity | Correlation Coefficient (R²) ≥ 0.998 | R² of Calibration Curve |
| Range | Typically 80–120% of target concentration | Verified by meeting accuracy and linearity within bounds |
Materials and Reagents
The following reagents and solutions are essential for the execution of the validation protocols described herein.
Table 2: Essential Research Reagent Solutions
| Item | Function/Description | Key Considerations |
|---|---|---|
| Active Pharmaceutical Ingredient (API) Reference Standard | Provides a purified benchmark for method development and validation. | Must be of certified purity and stored according to supplier specifications. |
| Placebo Formulation | Contains all excipients of the final dosage form except the API. | Used to assess specificity and interference during sample preparation. |
| Pharmaceutical Dosage Form | The actual tablet, capsule, or liquid formulation being tested. | Must be from a single, well-characterized batch for validation studies. |
| High-Purity Solvent (e.g., HPLC-grade Methanol, Water, Buffer) | Dissolution medium for the analyte, ensuring compatibility with UV-Vis analysis. | Must be transparent (non-absorbing) at the analytical wavelength; degas if necessary [1] [26]. |
| Standard Volumetric Glassware (Flasks, Pipettes) | For accurate dilution and preparation of standard and sample solutions. | Must be Class A to ensure measurement accuracy and traceability. |
| Syringe Filters (e.g., 0.45 µm Nylon or PVDF) | Clarification of the sample solution post-dissolution/sonication. | Removes undissolved particulates that cause light scattering, a critical step for accurate UV-Vis readings [1]. |
Experimental Protocol: ICH Q2(R1) Validation Workflow
This section outlines a detailed, step-by-step protocol for validating a sample preparation method for a solid oral dosage form (e.g., tablet) intended for UV-Vis analysis.
Specificity and Selectivity Assessment
- Placebo Solution Preparation: Accurately weigh a quantity of the placebo mixture equivalent to the tablet weight. Transfer to a volumetric flask, add the specified solvent (e.g., 0.1 M HCl or phosphate buffer), and subject to the same preparation process (sonication, shaking, filtration) as the test sample. Dilute to volume with the solvent.
- Standard Solution Preparation: Prepare a standard solution of the API reference standard at the target concentration in the same solvent.
- Analysis and Comparison: Scan the placebo solution and the standard solution across the relevant UV-Vis range (e.g., 200-400 nm). The placebo solution should not show any significant absorbance at the analytical wavelength (λ_max) chosen for the API.
Accuracy (Recovery) Determination
- Spiked Sample Preparation: Prepare a mixture of the placebo formulation. Accurately spike this mixture with known quantities of the API reference standard at three concentration levels: 80%, 100%, and 120% of the target assay concentration. Prepare three independent samples (n=3) for each level.
- Sample Preparation: For each spiked sample, carry out the complete sample preparation procedure (dissolution, dilution, filtration).
- UV-Vis Analysis: Measure the absorbance of each prepared solution at the λ_max of the API.
- Calculation: Calculate the concentration of API in each solution from a pre-established calibration curve. Determine the percentage recovery for each sample using the formula:
- % Recovery = (Measured Concentration / Theoretical Concentration) × 100
Precision Evaluation
- Repeatability: Using a single, homogeneous batch of the dosage form, prepare and analyze six independent sample solutions (n=6) at 100% of the test concentration by a single analyst using the same equipment within a short time span.
- Calculation: Calculate the mean, standard deviation, and Relative Standard Deviation (RSD) of the six results. The RSD is calculated as:
- RSD (%) = (Standard Deviation / Mean) × 100
- Intermediate Precision: Repeat the repeatability study on a different day, with a different analyst, or using a different piece of equipment (e.g., another spectrophotometer). The combined RSD from both sets of results should meet the predefined criteria.
Linearity and Range Establishment
- Standard Curve Preparation: Prepare a series of standard solutions from the API reference standard to cover a range of concentrations, typically from 50% to 150% of the target assay concentration. A minimum of five concentration levels is recommended.
- Analysis: Measure the absorbance of each standard solution at the λ_max.
- Data Analysis: Plot the absorbance (y-axis) against the corresponding concentration (x-axis). Perform linear regression analysis to determine the correlation coefficient (R²), slope, and y-intercept of the calibration curve.
Diagram 1: ICH Q2(R1) sample preparation method validation workflow.
Advanced Application: In-line Monitoring and Real-Time Release Testing
Modern pharmaceutical manufacturing is shifting towards Real-Time Release Testing (RTRT), which relies on continuous process monitoring to replace traditional end-product testing [73]. In this context, sample preparation takes on a new meaning, often involving the direct, in-line measurement of powder blends or tablets without complex dissolution.
- Technology Overview: UV-Vis spectroscopy can be implemented in-line using fiber-optic probes to measure diffuse reflectance from tablet surfaces. The raw spectral data is converted into the CIELAB color space (L, a, b, C), which correlates with critical physical attributes of the product [73].
- Correlation with Physical Attributes: Studies have demonstrated a linear relationship between the chroma value (C*) derived from UV-Vis reflectance and key tablet properties such as porosity and tensile strength. This is because surface roughness and porosity directly affect how light is scattered and reflected [73].
- Validation Considerations: For such in-line methods, validation must demonstrate that the measured color parameter (e.g., C*) is a reliable predictor of the Critical Quality Attribute (CQA). This involves establishing a validated calibration model linking the spectroscopic signal to the reference method data (e.g., mechanical strength tester for hardness) across the intended operational range [73].
Table 3: In-line UV-Vis for Physical Attribute Monitoring
| Attribute Monitored | UV-Vis Measurement Principle | Validation Focus |
|---|---|---|
| API Content | Direct absorption of UV light by the API in a powder or compacted state [73]. | Specificity against excipients, accuracy, and range. |
| Porosity | Diffuse reflectance and cavity effect; increased porosity reduces reflected light, affecting L* and C* values [73]. | Linearity of C* vs. reference porosity measurements. |
| Tensile Strength | Correlation with surface smoothness; higher compression force creates smoother surfaces, increasing specular reflection and altering C* [73]. | Robustness of the C*-tensile strength correlation model. |
The rigorous validation of sample preparation methods is a non-negotiable prerequisite for generating reliable and regulatory-compliant data in pharmaceutical UV-Vis analysis. By systematically applying the principles of ICH Q2(R1) to assess specificity, accuracy, precision, linearity, and range, researchers can build a robust foundation of data integrity for their work. As the industry evolves towards continuous manufacturing and real-time release, the principles of validation remain paramount, extending from traditional dissolved samples to advanced in-line spectroscopic applications. Adherence to these detailed protocols ensures that sample preparation, often the most vulnerable step in the analytical process, is transformed into a source of strength and confidence in research outcomes.
In the realm of pharmaceutical analysis, the journey from a raw sample to a reliable result is paramount. For research on sample preparation for UV-Vis analysis of pharmaceutical formulations, this path is built upon a foundation of rigorous method validation. This process provides documented evidence that an analytical procedure is suitable for its intended purpose, ensuring that the data generated for drug development is trustworthy, reproducible, and defensible to regulators [74]. The core of this validation rests on assessing key performance characteristics, which include specificity, accuracy, precision, linearity, and range. These parameters collectively guarantee that a method can consistently produce meaningful and correct information about a drug substance or product, ultimately safeguarding public health [75] [74].
Section 1: Defining the Key Parameters
The International Conference on Harmonisation (ICH) guidelines have established harmonized definitions and requirements for analytical method validation. The following parameters are critical for demonstrating that a method is reliable.
Specificity
Specificity is the ability of a method to assess unequivocally the analyte in the presence of other components that may be expected to be present in the sample matrix [74]. This includes excipients, impurities, degradation products, or other active ingredients. In chromatographic methods, specificity is typically demonstrated by the resolution between the analyte peak and the closest eluting potential interferent. The use of photodiode-array (PDA) detectors to perform peak purity tests, or mass spectrometry (MS) for unequivocal identification, are powerful tools for confirming specificity [74].
Accuracy
The accuracy of an analytical method is defined as the closeness of agreement between a measured value and a value accepted as a true or reference value [74]. It is a measure of exactness, often expressed as the percentage of analyte recovered from the sample. For drug products, accuracy is evaluated by analyzing synthetic mixtures spiked with known quantities of components, while for impurities, it is determined by spiking the sample with known amounts of those impurities [74].
Precision
Precision expresses the closeness of agreement between a series of individual measurements obtained from multiple sampling of the same homogeneous sample under the prescribed conditions [74]. It is generally considered at three levels:
- Repeatability (intra-assay precision): Precision under the same operating conditions over a short time interval.
- Intermediate Precision: Agreement within a laboratory with variations such as different days, analysts, or equipment.
- Reproducibility: Precision between different laboratories, as in collaborative studies [74].
Precision is typically reported as the standard deviation or the relative standard deviation (%RSD) of a series of measurements [74].
Linearity
Linearity is the ability of a method to elicit test results that are directly, or through a well-defined mathematical transformation, proportional to the concentration of analyte in samples within a given range [74]. It is established by plotting a calibration curve, for example, absorbance versus concentration in UV-Vis analysis, and is often quantified by the coefficient of determination (r²) [75] [74].
Range
The range of a method is the interval between the upper and lower concentrations of analyte for which it has been demonstrated that the method has an acceptable level of precision, accuracy, and linearity [74]. The specified range is derived from the linearity data and must be justified based on the intended application of the method.
Table 1: Summary of Key Validation Parameters and Their Definitions
| Parameter | Definition | Typical Measurement |
|---|---|---|
| Specificity | Ability to measure analyte amid potential interferents | Resolution factor; peak purity via PDA or MS [74] |
| Accuracy | Closeness to the true or reference value | Percent recovery of the known, added amount [74] |
| Precision | Closeness of agreement between individual test results | Standard deviation or % Relative Standard Deviation (%RSD) [74] |
| Linearity | Proportionality of response to analyte concentration | Coefficient of determination (r²) from a calibration curve [75] [74] |
| Range | Interval where precision, accuracy, and linearity are acceptable | The specified concentration range (e.g., 4–20 μg/mL) [75] [74] |
Section 2: Experimental Protocols for Validation
This section provides detailed methodologies for determining the key validation parameters within the context of UV-Vis analysis of a pharmaceutical formulation.
Protocol for Specificity Testing in UV-Vis Analysis
For a UV-Vis method, specificity must be demonstrated against the sample matrix.
Materials:
- Standard stock solution of the analyte
- Placebo formulation (containing all excipients but no active ingredient)
- Solvent (e.g., methanol, distilled water)
Procedure:
- Prepare Solutions:
- Standard Solution: Dilute the standard stock solution to a target concentration within the expected range.
- Placebo Solution: Prepare a solution of the placebo formulation at the same concentration as in the final sample solution.
- Spiked Placebo Solution: Prepare a solution of the placebo formulation spiked with a known amount of the analyte standard.
Scan Spectra:
- Using a double-beam UV-Vis spectrophotometer, scan the absorbance of the standard, placebo, and spiked placebo solutions across the relevant wavelength range (e.g., 200-400 nm) [75].
Analysis:
- Overlay the obtained spectra. The method is considered specific if the placebo solution shows no significant absorbance (e.g., no interference) at the wavelength used for the analysis of the analyte.
- The spectrum of the spiked placebo should correspond with that of the standard, confirming the analyte can be measured in the presence of the formulation matrix.
Protocol for Accuracy and Precision (Repeatability)
This experiment often combines the assessment of accuracy and precision through recovery studies.
Materials:
- Standard stock solution of the analyte
- Placebo formulation
- Volumetric flasks, pipettes
Procedure:
- Spike Placebo:
- Accurately weigh three different levels of placebo formulation (e.g., corresponding to 50%, 100%, and 150% of the target test concentration) into separate volumetric flasks.
- Spike each level with known, precise amounts of the standard stock solution. Each concentration level should be prepared in triplicate, resulting in nine separate samples [74].
Sample Preparation:
- Prepare the samples as per the analytical method (e.g., sonicate, dilute to volume with solvent) [75].
Analysis and Calculation:
- Analyze each sample using the validated UV-Vis method.
- Accuracy: For each sample, calculate the percent recovery using the formula:
(Measured Concentration / Theoretical Concentration) * 100. Report the mean recovery for each level [74]. - Precision (Repeatability): Calculate the mean, standard deviation, and %RSD of the measured concentrations for the nine determinations (or for the six determinations at the 100% level) [74].
Table 2: Example Acceptance Criteria for Accuracy and Precision
| Parameter | Acceptance Criteria (Example) |
|---|---|
| Accuracy (Recovery) | 98.0% - 102.0% |
| Precision (Repeatability, %RSD) | Not more than (NMT) 2.0% |
Protocol for Linearity and Range
This protocol establishes the relationship between analyte concentration and instrument response.
Materials:
- Standard stock solution of the analyte
Procedure:
- Prepare Calibration Standards:
- From the standard stock solution, prepare a series of at least five standard solutions that cover the specified range of the method (e.g., 80%, 90%, 100%, 110%, 120% of the target concentration) [74]. A wider range, such as 4–20 μg/mL for one analyte and 4.5–22.5 μg/mL for another, may be established as needed [75].
Analysis:
- Analyze each standard solution in the order of increasing concentration.
Data Analysis:
- Plot the instrument response (e.g., absorbance) versus the concentration of the analyte.
- Calculate the regression line using the least-squares method. The output should include the slope, y-intercept, and coefficient of determination (r²).
- The range is the concentration interval over which acceptable linearity (e.g., r² > 0.998), accuracy, and precision are demonstrated.
Section 3: The Scientist's Toolkit: Research Reagent Solutions
The following table details essential materials and reagents required for the development and validation of a UV-Vis method for pharmaceutical analysis.
Table 3: Essential Research Reagents and Materials for UV-Vis Analysis
| Item | Function / Explanation |
|---|---|
| Analytical Standard | High-purity reference material of the analyte used to prepare calibration standards and for accuracy (recovery) studies [74]. |
| Placebo Formulation | A mixture of all excipient components without the active ingredient; critical for demonstrating specificity and assessing matrix effects [74]. |
| Spectroscopic Grade Solvent | High-purity solvent (e.g., methanol) used to dissolve samples and standards; minimizes UV absorption background noise [75]. |
| Volumetric Glassware | Precisely calibrated flasks and pipettes to ensure accurate and precise preparation of standard and sample solutions [75]. |
Section 4: Workflow Visualization
The following diagram illustrates the logical relationship and workflow for establishing the key validation parameters in pharmaceutical UV-Vis analysis.
Diagram 1: Validation parameter workflow.
The validation workflow is not merely a sequence of tasks but an interconnected system where the outcome of one parameter underpins the reliability of the next. Specificity ensures the analytical signal originates solely from the analyte, which is a foundational requirement. Once confirmed, the linearity and range of the method are established, defining the quantitative boundaries within which the method operates. Accuracy is then assessed to confirm the method's trueness within this range. Finally, precision testing across different conditions verifies the method's reliability, culminating in a fully validated analytical procedure [74].
Sample preparation is a critical foundational step in ultraviolet-visible (UV-Vis) spectroscopy, directly determining the accuracy, reliability, and reproducibility of analytical results in pharmaceutical research. This technique's principle is based on measuring the amount of discrete wavelengths of UV or visible light absorbed by or transmitted through a sample, providing information on sample composition and concentration [2]. Effective sample preparation ensures that the sample is in an optimal state for measurement, mitigating interference and aligning the analyte concentration with the instrument's dynamic range for Beer-Lambert's law applications [2].
Within the pharmaceutical industry, UV-Vis spectroscopy serves as an indispensable tool for tasks ranging from drug identification and nucleic acid purity checks to quality control in manufacturing processes [2]. The choice between solution-based and solid-phase analysis techniques presents researchers with distinct pathways, each carrying specific advantages, limitations, and suitability for particular applications. This application note provides a detailed comparison of these techniques, supplemented with structured protocols to guide researchers in selecting and implementing the most appropriate methodology for their specific pharmaceutical formulation challenges.
Fundamental Principles of UV-Vis Analysis in Pharmaceuticals
UV-Vis spectroscopy functions by measuring the absorption of ultraviolet or visible light by molecules, which causes electronic transitions from ground state to excited states [2]. The amount of light absorbed at a specific wavelength follows the Beer-Lambert Law (A = εlc), where A is absorbance, ε is the molar absorptivity coefficient (a property of the substance), l is the path length of light through the sample (typically 1 cm), and c is the concentration of the analyte [2] [58]. This relationship forms the quantitative foundation for determining analyte concentrations in pharmaceutical formulations.
The instrumentation typically comprises a light source (deuterium lamp for UV, tungsten/halogen lamp for visible range), a wavelength selector (monochromator or filters), a sample compartment, and a detector (photodiodes or photomultiplier tubes) that converts light signals into electronic data for analysis [2] [58]. For quantitative accuracy, absorbance values should ideally be kept below 1 to remain within the instrument's dynamic range, achievable through sample dilution or path length adjustment [2].
Sample Preparation Techniques: A Comparative Analysis
The selection of an appropriate sample preparation technique represents one of the most critical decisions in the analytical process, with significant implications for analysis time, cost, and result reliability. The following sections and comparative table provide a detailed examination of the primary methodologies available to pharmaceutical researchers.
Table 1: Comparison of Sample Preparation Techniques for UV-Vis Analysis
| Technique | Key Advantages | Limitations & Challenges | Primary Pharmaceutical Applications |
|---|---|---|---|
| Solution Analysis [32] | - Simple, straightforward protocol- Controlled environment with known path length- Easy to reduce aggregation via dilution- High reproducibility | - Requires appropriate, pure solvents- Potential solvent absorption interference- Not representative of solid dosage forms- Limited volume capacity in cuvettes | - Drug quantification in formulations- Stability testing and impurity profiling- Kinetics monitoring- Biomolecule characterization (proteins, nucleic acids) |
| Solid-Phase Analysis (DRS) [29] | - Non-destructive analysis- No solvents required (environmentally friendly)- Direct analysis of solid dosage forms- Cost-effective and rapid | - Homogeneity challenges in powder mixtures- Scattering effects may interfere- Complex data processing requiring chemometrics- Limited for deeply colored or turbid samples | - API quantification in tablets/powders- Content uniformity assessment- Process Analytical Technology (PAT)- Real-time monitoring in manufacturing |
| Solid-Phase Extraction [76] | - Effective pre-concentration of analytes- Matrix simplification and interference removal- Enhanced sensitivity for trace analysis- Wide range of sorbent options | - Additional preparation time required- Potential for sample loss or contamination- Sorbent selection critical for efficiency- Increased method development complexity | - Sample cleanup for complex matrices- Trace analysis in biological fluids- Impurity isolation and identification- Environmental monitoring of pharmaceuticals |
Solution-Based Analysis
Solution-based analysis involves dissolving the sample in an appropriate solvent at an optimal concentration for measurement in a standard quartz cuvette [32]. This approach provides a controlled environment of known path length and enables easy manipulation of experimental conditions.
Key Considerations:
- Cuvette Selection: Quartz cuvettes are essential for UV analysis as they are transparent to most UV light, unlike plastic or glass which can absorb UV wavelengths [2].
- Solvent Compatibility: The solvent must be transparent in the spectral region of interest and not react chemically with the analyte [32].
- Concentration Optimization: The sample concentration must be carefully controlled to ensure absorbance values remain within the instrument's optimal detection range (typically 0.1-1.0 AU) [2].
- Reference Measurements: A reference measurement should be taken of the cuvette filled with the diluting solvent alone to account for optical effects introduced by the quartz cuvette or solvent [32].
Solid-Phase Analysis Using Diffuse Reflectance Spectroscopy (DRS)
UV-Vis Diffuse Reflectance Spectroscopy (DRS) enables direct analysis of solid pharmaceutical formulations without the need for dissolution [29]. This technique is particularly valuable for analyzing tablets, capsules, and powders in their native state.
Key Considerations:
- Homogeneity Requirements: Solid samples must be thoroughly mixed and presented uniformly to ensure representative sampling and reproducible results [29].
- Matrix Effects: Excipients and other components in pharmaceutical formulations can scatter light and complicate spectral interpretation, often requiring chemometric analysis for accurate quantification [29].
- Non-Destructive Nature: As a non-destructive technique, DRS allows for subsequent analysis of the same sample using complementary methods [29].
Advanced Extraction Techniques
Sample preparation techniques based on liquid-solid extraction have evolved significantly, with solid-phase extraction (SPE) and its variations becoming prominent for complex matrices [76]. These methods are particularly valuable when analytes need concentration or isolation from interfering substances.
Key Considerations:
- Sorbent Selection: Metal-organic frameworks (MOFs) have emerged as promising sorbents due to their high specific surface area, tunable pore size, and wide modification possibilities [76].
- Technique Selection: The choice between SPE, solid-phase microextraction (SPME), magnetic solid-phase extraction (MSPE), and other variants depends on the sample volume, analyte concentration, and matrix complexity [76].
- Miniaturization Trends: Recent developments focus on miniaturized extraction techniques that reduce solvent consumption and sample requirements while maintaining high extraction efficiency [76].
Detailed Experimental Protocols
Protocol 1: Solution Analysis for API Quantification
This protocol outlines the procedure for preparing solution samples to quantify active pharmaceutical ingredients (APIs) using UV-Vis spectroscopy, adapted from established methodologies [32] [77].
Materials and Reagents:
- API reference standard
- Appropriate solvent (e.g., water, buffer, organic solvent)
- Quartz cuvettes (1 cm path length recommended)
- Volumetric flasks
- Analytical balance
- Pipettes
- Filtration equipment (0.45 μm or 0.22 μm filters)
Procedure:
- Cuvette Preparation: Clean quartz cuvettes thoroughly using a standard glass washing procedure. Rinse with the solvent to be used in the analysis to remove any residual contaminants [32].
- Stock Solution Preparation: Accurately weigh approximately 10 mg of API reference standard and dissolve in an appropriate solvent in a 100 mL volumetric flask to obtain a stock solution of 100 μg/mL [77].
- Working Standard Preparation: Prepare a series of working standards by diluting the stock solution with the same solvent to create a calibration curve spanning the expected concentration range (e.g., 2-20 μg/mL) [77].
- Reference Measurement: Fill a cuvette with the pure solvent and collect a reference spectrum to establish a baseline [32].
- Sample Measurement: Replace the reference with each working standard and collect absorbance spectra across the appropriate wavelength range (typically 200-400 nm for UV-active compounds) [77].
- Data Analysis: Identify the wavelength of maximum absorbance (λmax) for the API and construct a calibration curve by plotting absorbance versus concentration at this wavelength.
Validation Parameters:
- Linearity (R² > 0.995)
- Precision (%RSD < 2.0)
- Accuracy (85-115% recovery)
- Limit of Detection (LOD) and Quantitation (LOQ)
Protocol 2: Solid-Phase Analysis of Tablets Using DRS
This protocol describes the quantification of APIs in solid formulations using UV-Vis Diffuse Reflectance Spectroscopy with chemometric analysis, based on research by [29].
Materials and Reagents:
- Pharmaceutical tablets
- API reference standards
- Excipients (e.g., microcrystalline cellulose, magnesium stearate, lactose)
- Geometric dilution apparatus
- Vortex mixer or tumbler
- Analytical balance
- UV-Vis spectrophotometer with diffuse reflectance accessory
Procedure:
- Sample Preparation: Grind and homogenize a representative number of tablets (e.g., 4 tablets for 2 g total mass) using a mortar and pestle or mechanical grinder [29].
- Laboratory Sample Preparation: Prepare laboratory samples simulating the tablet composition by mixing API standards and excipients using geometric dilution to ensure homogeneity [29].
- Standard Addition Series: For each API, prepare four standard addition samples with added concentrations of 0%, 5%, 10%, and 15% w/w by mixing 100 mg of the ground tablet mixture with appropriate amounts of pure API and excipient to reach a final mass of 300 mg [29].
- Homogenization: Thoroughly mix each standard addition sample using a Vortex mixer or tumbler for approximately 10 minutes to ensure complete homogeneity [29].
- Spectral Acquisition: Load each sample into the diffuse reflectance accessory and collect UV-Vis spectra across the 200-400 nm range [29].
- Chemometric Analysis: Process the spectral data using the Net Analyte Signal (NAS) method or other multivariate calibration techniques to quantify the API content in the presence of interfering excipients [29].
Validation:
- Validate results by comparison with HPLC reference methods [29]
- Assess method precision through replicate analyses
- Evaluate accuracy through recovery studies
Protocol 3: Chemometric-Assisted Analysis of Multiple APIs
This protocol employs chemometric tools for the simultaneous quantification of multiple pharmaceuticals with spectral overlap, based on methodology from [77].
Materials and Reagents:
- Reference standards for all APIs of interest
- Appropriate solvent system
- Quartz cuvettes
- Volumetric flasks
- UV-Vis spectrophotometer
- Computer with chemometric software (e.g., MATLAB)
Procedure:
- Stock Solution Preparation: Prepare individual stock solutions (100 μg/mL) for each API in the appropriate solvent [77].
- Calibration Set Construction: Use an experimental design (e.g., fractional factorial design) to prepare 25-30 synthetic mixtures containing varying concentrations of all APIs within their linear ranges [77].
- Validation Set Construction: Prepare an independent set of 15-20 validation mixtures using a different experimental design (e.g., central composite design) [77].
- Spectral Acquisition: Collect UV absorption spectra for all mixtures across the 200-400 nm range with a 1 nm interval [77].
- Data Preprocessing: Export spectral data to chemometric software and exclude regions with weak signals or potential interference (e.g., below 220 nm and above 370 nm) [77].
- Model Development:
- Apply the Firefly Algorithm (FA) for wavelength selection to identify the most significant variables for each analyte [77].
- Develop Partial Least Squares (PLS-1) models using the selected wavelengths for each analyte [77].
- Use cross-validation to determine the optimal number of latent variables [77].
- Model Validation: Evaluate model performance using the independent validation set, calculating figures of merit such as root mean square error of prediction (RMSEP) and bias-corrected RMSEP [77].
Workflow Visualization
Diagram 1: Sample Preparation Decision Workflow
The Scientist's Toolkit: Essential Research Reagents and Materials
Table 2: Essential Research Reagents and Materials for Sample Preparation
| Item | Function/Application | Key Considerations |
|---|---|---|
| Quartz Cuvettes | Sample holder for solution analysis | - Transparent to UV and visible light- Various path lengths (1 cm standard)- Require meticulous cleaning [32] [2] |
| Metal-Organic Frameworks (MOFs) | Sorbents for solid-phase extraction | - High specific surface area- Tunable pore size- Enhanced selectivity for specific analytes [76] |
| Microcrystalline Cellulose | Common excipient for solid sample preparation | - Ideal matrix for geometric dilution- Minimal UV interference- Excellent mixing properties [29] |
| Reference Standards | Method calibration and validation | - Certified purity- Structural identity to analyte- Proper storage conditions [77] |
| Appropriate Solvents | Sample dissolution and dilution | - UV transparency in region of interest- Chemical compatibility with analyte- High purity grade [32] |
| Buffer Systems | pH control for biomolecules | - Maintain protein/nucleic acid stability- Minimal absorbance in UV region- Consistent ionic strength [58] |
Applications in Pharmaceutical Research and Development
Drug Formulation and Quality Control
UV-Vis spectroscopy serves as a cornerstone technique in pharmaceutical quality control, enabling rapid assessment of API content in final dosage forms. The technique's speed and simplicity make it ideal for high-throughput environments where rapid analysis is essential [78]. Solid-phase DRS analysis has been successfully applied to quantify acetylsalicylic acid, paracetamol, and caffeine in commercial tablets with results comparable to HPLC reference methods, demonstrating its viability for routine quality assessment [29].
Process Analytical Technology (PAT)
In pharmaceutical manufacturing, UV-Vis spectroscopy has emerged as a valuable PAT tool for real-time monitoring of critical process parameters [79]. Its implementation in hot melt extrusion processes allows for immediate detection of API-polymer interactions, solubility thresholds, and potential oversaturation conditions [79]. The short integration time (millisecond-range) delivers rapid results with high sensitivity, enabling immediate parameter adjustments during continuous manufacturing processes [79].
Green Analytical Chemistry
Solid-phase spectrophotometric techniques align with green chemistry principles by eliminating solvent consumption in sample preparation [29]. Methodologies employing chemometric analysis further enhance environmental friendliness by reducing sample preparation steps and avoiding toxic organic solvents while maintaining analytical performance [77]. The recent development of methods with high Analytical GREEnness (AGREE) scores demonstrates the potential for maintaining analytical excellence while reducing environmental impact [77].
The selection of an appropriate sample preparation technique for UV-Vis analysis represents a critical decision point in pharmaceutical analysis, with significant implications for data quality, analytical efficiency, and environmental impact. Solution-based methods offer simplicity and well-established protocols for standardized analyses, while solid-phase techniques provide non-destructive, environmentally friendly alternatives particularly suited to PAT applications. The integration of chemometric tools has dramatically expanded the capability of UV-Vis spectroscopy to resolve complex pharmaceutical mixtures, enabling simultaneous quantification of multiple analytes despite significant spectral overlap.
As pharmaceutical research continues to evolve toward more sustainable and efficient practices, the role of UV-Vis spectroscopy coupled with advanced sample preparation methodologies is expected to expand. Future developments will likely focus on increased miniaturization, enhanced automation, and deeper integration of artificial intelligence for data interpretation, further solidifying the technique's position as an indispensable tool in the pharmaceutical analyst's arsenal.
In the highly regulated pharmaceutical industry, data integrity is a critical component of Good Manufacturing Practice (GMP), ensuring that products are consistently produced and controlled according to quality standards. Data integrity refers to the completeness, consistency, and accuracy of data throughout its entire lifecycle, from initial generation and recording to processing, use, and archiving [80]. Regulatory authorities worldwide, including the FDA, EMA, and WHO, emphasize that data integrity is fundamental to demonstrating product safety and efficacy [80] [81].
The ALCOA+ framework serves as the global standard for ensuring data integrity in regulated environments. Originally articulated by the FDA in the 1990s, ALCOA has evolved into ALCOA+ to address both paper and electronic records in modern pharmaceutical manufacturing and research settings [82] [83]. This framework provides a set of measurable principles that help organizations maintain reliable, trustworthy records that can withstand regulatory scrutiny. For researchers conducting UV-Vis analysis of pharmaceutical formulations, adhering to ALCOA+ principles is not merely a regulatory requirement but a fundamental aspect of generating scientifically valid and defensible analytical data.
The ALCOA+ Principles: Definitions and Applications
ALCOA+ represents an acronym that encompasses core principles for data integrity. The original ALCOA attributes have been expanded with additional criteria to form ALCOA+, creating a comprehensive framework for data management in GMP environments [84].
Core ALCOA Principles
Table 1: The Core ALCOA Principles for Data Integrity
| Principle | Definition | Application in Pharmaceutical Analysis |
|---|---|---|
| Attributable | Data must be linked to the person or system that created or modified it, including date and time [82] [85]. | User-specific login credentials for UV-Vis software; analyst signatures on notebook entries. |
| Legible | Data must be readable and understandable throughout the retention period [82] [84]. | Permanent ink for manual entries; readable electronic formats that don't require proprietary software. |
| Contemporaneous | Data should be recorded at the time of the activity with accurate timestamps [82] [81]. | Real-time recording of UV-Vis measurements; automatic date/time stamps in instrument software. |
| Original | The first capture of data must be preserved, or a certified copy created under controlled procedures [82] [85]. | Direct capture of spectral data to computer; preservation of raw data files without alteration. |
| Accurate | Data must be error-free and faithfully represent what occurred [82] [81]. | Proper instrument calibration; documented amendments without obscuring original entries. |
Additional ALCOA+ Principles
The expansion to ALCOA+ added crucial elements that address the complete data lifecycle:
Complete: All data, including repeat tests, failed results, metadata, and audit trails, must be present with no deletions or omissions [84] [83]. For UV-Vis analysis, this includes all spectral scans, method parameters, and any recalculations.
Consistent: Data should follow a chronological sequence with consistent dating and timestamps that align across systems [82] [84]. The sequence of events in analytical workflows must be logically documented without contradictions.
Enduring: Data must be maintained in a durable format for the entire required retention period [84] [81]. Electronic data should be stored on controlled media with appropriate backups, avoiding thermal paper for printer outputs.
Available: Data must be readily retrievable for review, audit, or inspection throughout the retention period [82] [84]. Storage systems must be searchable and properly indexed to facilitate timely retrieval.
The relationship between these principles creates a comprehensive framework for data integrity, as illustrated below:
Application of ALCOA+ in UV-Vis Spectroscopy of Pharmaceutical Formulations
Ultraviolet-visible (UV-Vis) spectroscopy is an essential analytical technique in pharmaceutical laboratories, used for tasks ranging from raw material identification and drug substance quantification to dissolution testing and quality control [2]. The technique measures the amount of discrete wavelengths of UV or visible light absorbed by a sample, providing information about sample composition and concentration [2]. When implementing UV-Vis methods for pharmaceutical analysis, each ALCOA+ principle has specific applications that ensure data integrity throughout the analytical process.
UV-Vis Instrument Components and ALCOA+ Considerations
A UV-Vis spectrophotometer consists of several key components, each requiring specific controls to maintain data integrity:
Table 2: UV-Vis Spectrophotometer Components and Data Integrity Considerations
| Component | Function | ALCOA+ Considerations |
|---|---|---|
| Light Source | Provides light across UV and visible wavelengths (e.g., deuterium lamp for UV, tungsten/halogen for visible) [2]. | Regular calibration records (Accurate, Complete); source replacement logs (Attributable, Contemporaneous). |
| Wavelength Selector | Selects specific wavelengths for sample examination (monochromators, filters) [2]. | Wavelength accuracy verification (Accurate); calibration certificates (Complete, Enduring). |
| Sample Holder | Contains the sample during analysis (typically quartz cuvettes for UV) [2]. | Cuvette cleaning logs (Attributable); pathlength verification (Accurate). |
| Detector | Converts light intensity into electronic signal (e.g., photomultiplier tubes, photodiodes) [2]. | Detector performance validation (Accurate, Complete); linearity verification (Accurate). |
| Software | Processes signals, controls instrument, and stores data [8]. | Access controls (Attributable); audit trails (Complete); electronic signatures (Attributable); backup procedures (Enduring, Available). |
Analytical Method Validation for UV-Vis Techniques
For UV-Vis methods used in pharmaceutical analysis, proper analytical method validation is required to demonstrate that the technique is suitable for its intended purpose [86]. Regulatory authorities mandate validation before initial use, when transferring methods between laboratories, or when modifying existing methods [86]. The validation parameters align closely with ALCOA+ principles, particularly Accuracy and Completeness.
Table 3: Analytical Method Validation Parameters for UV-Vis Spectroscopy
| Validation Parameter | Definition | Target Values for UV-Vis Assays |
|---|---|---|
| Accuracy | Closeness of agreement between the value found and the accepted true value [86]. | Recovery of 98-102% for drug substance assays. |
| Precision | Closeness of agreement between a series of measurements [86]. | RSD ≤ 1% for repeatability of drug assays. |
| Specificity | Ability to measure the analyte accurately in the presence of other components [86]. | No interference from excipients or degradation products. |
| Linearity | Ability to obtain results proportional to analyte concentration [86]. | Correlation coefficient (r²) ≥ 0.998. |
| Range | Interval between upper and lower concentrations with suitable accuracy, precision, and linearity [86]. | Typically 80-120% of target assay concentration. |
| Limit of Detection (LOD) | Lowest amount of analyte that can be detected [86]. | Signal-to-noise ratio ≥ 3:1. |
| Limit of Quantification (LOQ) | Lowest amount of analyte that can be quantified [86]. | Signal-to-noise ratio ≥ 10:1; accuracy and precision as defined. |
The workflow below illustrates how ALCOA+ principles integrate with the typical stages of UV-Vis analytical method validation and execution:
Experimental Protocol: ALCOA+-Compliant UV-Vis Analysis of Drug Formulations
This detailed protocol demonstrates the application of ALCOA+ principles to a specific pharmaceutical analysis scenario: determining the concentration of an active pharmaceutical ingredient (API) in a tablet formulation using UV-Vis spectroscopy.
Research Reagent Solutions and Materials
Table 4: Essential Materials and Reagents for UV-Vis Analysis of Pharmaceutical Formulations
| Item | Specification | Function in Analysis | ALCOA+ Consideration |
|---|---|---|---|
| Reference Standard | Certified API standard with known purity (from qualified supplier) | Primary reference for calibration curve | Certificate of Analysis (Accurate, Attributable); storage conditions logged (Complete) |
| Sample Formulation | Representative batch of tablet formulation | Test article for analysis | Chain of custody documentation (Attributable, Complete) |
| Solvent | HPLC-grade or specified in analytical method | Dissolution and dilution medium | Quality certificate (Accurate); expiration date tracking (Complete) |
| Volumetric Glassware | Class A volumetric flasks and pipettes | Precise volume measurements | Calibration records (Accurate, Complete); identification numbers (Attributable) |
| Cuvettes | Quartz, specified pathlength (typically 1 cm) | Sample containment during analysis | Cleaning log (Attributable); inspection records (Complete) |
| UV-Vis Spectrophotometer | Validated system with Part 11-compliant software [8] | Spectral measurement and data capture | Qualification records (Accurate, Complete); access controls (Attributable); audit trails (Complete) |
Step-by-Step Analytical Procedure
Step 1: Sample Preparation (Standard and Test Solutions)
- Weigh approximately 50 mg of reference standard (record actual weight to 4 decimal places) using calibrated analytical balance.
- Transfer quantitatively to 500 mL volumetric flask and dilute to volume with specified solvent to create stock solution.
- Prepare serial dilutions to create minimum of 5 standard solutions covering the calibration range (typically 80-120% of target concentration).
- For test formulation: weigh and powder not less than 10 tablets. Weigh tablet powder equivalent to one tablet weight and prepare similarly to standard.
ALCOA+ Compliance Actions:
- Record all weights with analyst signature and date/time (Attributable, Contemporaneous).
- Document actual weights, dilution factors, and calculations (Accurate, Complete).
- Use controlled worksheets or electronic laboratory notebook (Original, Legible).
Step 2: Instrument Preparation and Qualification
- Power on UV-Vis spectrophotometer and allow lamp to warm up for time specified in manufacturer instructions.
- Perform system suitability tests using predetermined criteria (e.g., wavelength accuracy check using holmium oxide filter, stray light verification, absorbance accuracy check using potassium dichromate solution).
- Document all system suitability results against acceptance criteria.
ALCOA+ Compliance Actions:
- Record instrument ID, software version, and method parameters (Attributable, Complete).
- Document system suitability results with pass/fail determination (Accurate, Complete).
- Store electronic method file in secure location with version control (Original, Enduring).
Step 3: Spectral Acquisition and Data Collection
- Set method parameters according to validated procedure: wavelength range, scan speed, slit width, and data interval.
- Blank the instrument using the same solvent used for sample preparation.
- Measure standards and samples in predetermined sequence, including quality control samples.
- For quantitative analysis, measure absorbance at specified wavelength (typically λmax of API).
ALCOA+ Compliance Actions:
- Ensure automatic timestamping of all measurements (Contemporaneous).
- Maintain sequence information linking each result to specific sample preparation (Attributable, Consistent).
- Save raw spectral data in original format without alteration (Original, Accurate).
Step 4: Data Processing and Calculation
- Generate calibration curve by plotting absorbance versus concentration of standard solutions.
- Determine correlation coefficient, slope, and intercept of regression line.
- Calculate API concentration in test samples using the regression equation.
- Apply any necessary correction factors (e.g., dilution factor, average tablet weight).
ALCOA+ Compliance Actions:
- Document all calculations with formulas shown (Accurate, Complete).
- Ensure audit trail captures any data processing steps (Complete, Consistent).
- Preserve original data while allowing for clearly marked and justified reprocessing if needed (Original, Accurate).
Step 5: Documentation and Reporting
- Compile complete analytical report including: sample preparation details, instrument conditions, raw data, calculations, and final results.
- Include deviation documentation if acceptance criteria are not met.
- Second person review all data, calculations, and documentation.
- Archive electronic and paper records according to data retention policy.
ALCOA+ Compliance Actions:
- Implement second-person review with documented approval (Attributable, Accurate).
- Ensure all records are properly indexed for retrieval (Available).
- Transfer records to secure archive with appropriate metadata (Enduring, Available).
Regulatory Framework and Compliance Strategy
Regulatory authorities worldwide require implementation of ALCOA+ principles as part of GMP compliance. The FDA's 21 CFR Part 11 provides specific requirements for electronic records and signatures, while other regulations including EU GMP Annex 11 similarly emphasize data integrity controls [80] [84]. For UV-Vis systems, this requires implementing technical controls such as user access management, audit trails, and electronic signatures in the instrument software [8].
A successful data integrity strategy extends beyond technical solutions to encompass quality culture and organizational practices. Management should allocate sufficient resources for system validation and staff training, while maintaining zero tolerance for data manipulation [80]. Personnel at all levels should understand their roles in maintaining data integrity and the regulatory impact of non-compliance.
Common data integrity issues identified during regulatory audits include backdating records, incomplete data sets, shared login credentials, inadequate audit trail review, and insufficient data backup procedures [80]. A robust internal audit program with regular data integrity assessments can identify and address potential vulnerabilities before regulatory inspections.
By systematically applying ALCOA+ principles to UV-Vis spectroscopy and other analytical techniques, pharmaceutical organizations can ensure the generation of reliable, defensible data that supports product quality and patient safety while maintaining regulatory compliance.
In the development of Hemoglobin-Based Oxygen Carriers (HBOCs) as blood substitutes, the accurate quantification of hemoglobin (Hb) is a critical quality attribute that directly influences product efficacy and safety [87]. Precise measurement of Hb content, encapsulation efficiency, and yield is essential for confirming oxygen delivery capacity and economic viability, while preventing adverse effects from free hemoglobin [87]. Within pharmaceutical formulation research, particularly for biopharmaceuticals like HBOCs, the selection of appropriate UV-Vis spectroscopy methods is often driven by tradition rather than systematic evaluation of available options [87]. This case study provides a comprehensive comparative evaluation of UV-Vis spectroscopy-based Hb quantification methods, with a focus on their application in HBOC development and quality control. We present detailed protocols and analytical considerations to guide researchers in selecting optimal methodologies for characterizing blood substitute formulations.
Principles of UV-Vis Spectroscopy for Hb Analysis
Ultraviolet-visible (UV-Vis) spectroscopy is an analytical technique that measures the amount of discrete wavelengths of UV or visible light absorbed by or transmitted through a sample [2]. The fundamental principle governing quantitative analysis in UV-Vis spectroscopy is the Beer-Lambert Law, expressed as A = εlc, where A is absorbance, ε is the molar absorptivity coefficient (L·mol⁻¹·cm⁻¹), l is the path length (cm), and c is the concentration (mol·L⁻¹) [58]. This relationship enables the quantification of analyte concentration based on measured absorbance values.
Hemoglobin exhibits characteristic absorption peaks in the Soret band (~414-450 nm) due to heme electronic transitions, and in the visible region (500-600 nm) corresponding to different oxygenated states [87] [2]. These distinct spectral signatures enable specific identification and quantification of Hb in complex biological matrices, making UV-Vis spectroscopy particularly suitable for HBOC characterization.
Figure 1: UV-Vis Spectrophotometer Workflow for Hb Analysis. This diagram illustrates the fundamental components and workflow of a UV-Vis spectrophotometer for hemoglobin quantification, highlighting the critical role of reference measurement for background correction [2].
Comparative Evaluation of Hb Quantification Methods
Method Selection Criteria
The selection of an appropriate Hb quantification method for HBOC characterization should consider multiple factors: specificity for hemoglobin versus other proteins, accuracy and precision across expected concentration ranges, ease of implementation, cost-effectiveness, and safety considerations regarding reagent toxicity [87]. Additionally, compatibility with HBOC formulation components and potential interference from encapsulation materials or stabilizers must be evaluated.
Methods Comparison
We evaluated three primary UV-Vis spectroscopy-based approaches for Hb quantification, comprising both Hb-specific and general protein quantification methods.
Table 1: Comparison of UV-Vis Spectroscopy-Based Methods for Hemoglobin Quantification
| Method | Principle | Wavelength (nm) | Specificity for Hb | Linear Range | Advantages | Limitations |
|---|---|---|---|---|---|---|
| SLS-Hb | Complex formation with sodium lauryl sulfate | 450-650 [87] | High | 0-2 mg/mL [87] | High specificity, cost-effective, non-toxic reagents | Potential interference from detergents |
| Cyanmethemoglobin | Conversion to cyanmethemoglobin | 540 [88] | High | 1.0-8.0 g/L [88] | International reference method | Toxic reagents (KCN), disposal concerns |
| BCA Assay | Cu²⁺ reduction in alkaline medium | 562 [87] | Low | 0-1.5 mg/mL [87] | Compatibility with additives, high sensitivity | Measures all proteins, not Hb-specific |
| Coomassie Blue (Bradford) | dye-binding to proteins | 595 [87] | Low | 0-1 mg/mL [87] | Rapid, simple protocol | Variable response to different proteins |
| Direct Soret Absorbance | Native Hb Soret band absorption | 414-450 [87] | Medium | Method-dependent | Minimal sample preparation, non-destructive | Interference from turbidity, other heme proteins |
Performance Characteristics
Based on comparative studies, the SLS-Hb method has been identified as the preferred approach for HBOC characterization due to its optimal balance of specificity, accuracy, safety, and practical implementation [87]. The method demonstrates high precision across clinically relevant Hb concentration ranges (0-2 mg/mL) and is particularly suitable for quality control environments where routine testing is required [87]. The cyanmethemoglobin method, while recognized as an international reference standard, presents significant practical limitations due to the toxicity of cyanide reagents, requiring special handling and disposal considerations [87] [88]. Non-specific protein assays (BCA and Bradford) may overestimate Hb content in the presence of other proteins, potentially leading to inaccurate characterization of encapsulation efficiency and drug loading in HBOC formulations [87].
Experimental Protocols
SLS-Hb Quantification Method
Principle
The SLS-Hb method employs sodium lauryl sulfate to lyse red blood cells and form a stable complex with hemoglobin, enabling specific quantification through characteristic absorption spectra between 450-650 nm [87].
Materials and Reagents
Table 2: Essential Research Reagents for SLS-Hb Quantification
| Reagent/Material | Specifications | Function | Notes |
|---|---|---|---|
| Sodium Lauryl Sulfate (SLS) | High purity, ≥99% | Hemolysis and complex formation with Hb | Prepare fresh solution in distilled water |
| Hemoglobin Standard | Lyophilized bovine Hb | Calibration curve generation | Confirm purity and source |
| Phosphate Buffer | 0.1 M, pH 7.0-7.4 | Maintain physiological pH | Avoid Tris buffers which may interfere |
| Cuvettes | Quartz, 1 cm path length | UV-Vis transparent sample holder | Ensure cleanliness and proper matching |
| UV-Vis Spectrophotometer | Scanning capability | Absorbance measurement | Daily calibration with standards |
Step-by-Step Protocol
Reagent Preparation: Prepare SLS reagent solution (2.5 g/L) in phosphate buffer (0.1 M, pH 7.4). Filter through 0.45 μm membrane to remove particulates.
Standard Curve Preparation:
- Prepare stock Hb standard solution (2 mg/mL) in buffer
- Create serial dilutions: 0, 0.25, 0.5, 1.0, 1.5, and 2.0 mg/mL
- Mix 100 μL of each standard with 2.5 mL SLS reagent
- Incubate 5-10 minutes at room temperature for complex development
Sample Preparation:
- Dilute HBOC samples appropriately in buffer (typical dilution 25-700× depending on expected Hb concentration)
- Mix 100 μL of diluted sample with 2.5 mL SLS reagent
- Incubate 5-10 minutes at room temperature
Spectrophotometric Analysis:
- Zero instrument with SLS reagent blank
- Measure absorbance of standards and samples from 450-650 nm
- Record specific absorbance values at 560 nm and 600 nm for quantitative analysis
Data Analysis:
- Generate standard curve (absorbance vs. concentration)
- Calculate sample concentrations using linear regression equation
- Apply appropriate dilution factors for original concentration
Sample Preparation Considerations for HBOC Formulations
Proper sample preparation is critical for accurate Hb quantification in HBOC formulations. Key considerations include:
- Sample Clarification: Centrifuge turbid samples at 10,000 × g for 10 minutes to remove particulates that cause light scattering [1]
- Buffer Compatibility: Ensure compatibility between HBOC formulation buffers and quantification reagents
- Encapsulation Disruption: For encapsulated HBOCs, implement appropriate disruption methods (sonication, detergents) to release hemoglobin while maintaining stability
- Dilution Optimization: Perform preliminary dilutions to ensure absorbance readings fall within the linear range of 0.1-1.0 AU [1]
Method Validation Parameters
For pharmaceutical quality control applications, validate the SLS-Hb method according to ICH Q2(R1) guidelines:
- Linearity: R² > 0.995 across working range
- Accuracy: 98-102% recovery of spiked standards
- Precision: <2% RSD for intra-day and inter-day variability
- Specificity: No interference from HBOC matrix components
Advanced Applications in HBOC Development
Encapsulation Efficiency Determination
For encapsulated HBOC formulations, Hb quantification is essential for determining critical quality attributes:
- Total Hb Content: Measure after complete disruption of carriers using SLS method
- Unencapsulated Hb: Quantify in supernatant after separation of carriers (centrifugation or filtration)
- Calculation:
- Encapsulation Efficiency (%) = (Total Hb - Unencapsulated Hb) / Total Hb × 100
- Drug Loading = Mass of Encapsulated Hb / Total Carrier Mass
Stability Monitoring
UV-Vis spectroscopy enables real-time stability assessment of HBOC formulations through:
- Spectral Shift Detection: Changes in absorption maxima indicating heme oxidation or denaturation
- Methemoglobin Formation: Increased absorbance at 630 nm indicating oxidation to non-functional methemoglobin
- Aggregation Assessment: Increased baseline scattering due to particle aggregation
Regulatory and Quality Control Considerations
In pharmaceutical QA/QC environments, spectroscopic methods must comply with regulatory requirements including ICH Q2(R1) for method validation and 21 CFR Part 211 for laboratory controls [1]. Implementation of the SLS-Hb method should include:
- Instrument Qualification: IQ/OQ/PQ documentation for spectrophotometers
- Method Transfer Protocols: For multi-site implementation
- Data Integrity: Adherence to ALCOA+ principles for all generated data
- Quality Control Samples: Inclusion of control charts with upper and lower control limits
Figure 2: HBOC Characterization Workflow Using SLS-Hb Method. This quality control workflow illustrates the complete process from sample preparation to batch release decision, incorporating feedback loops for out-of-specification results.
The selection of appropriate Hb quantification methods is paramount for the rigorous characterization of hemoglobin-based oxygen carriers. Based on comprehensive evaluation, the SLS-Hb method offers the optimal combination of specificity, accuracy, safety, and practical implementation for pharmaceutical quality control environments. This method enables reliable determination of critical quality attributes including Hb content, encapsulation efficiency, and product yield, supporting the advancement of HBOC formulations through development pipelines. Proper method validation and adherence to regulatory guidelines ensure the generation of reliable data for quality decision-making and ultimately contribute to the development of safe and effective blood substitute products.
Conclusion
Effective sample preparation is the cornerstone of reliable UV-Vis spectroscopy in pharmaceutical analysis, directly impacting the accuracy of data used to confirm drug identity, purity, potency, and stability. By mastering the foundational principles, implementing robust methodological workflows, proactively troubleshooting common issues, and adhering to stringent validation protocols, laboratories can ensure regulatory compliance and enhance patient safety. The future of pharmaceutical analysis points towards greater integration of sample preparation with Process Analytical Technology (PAT) for real-time monitoring, increased automation to improve reproducibility, and the adoption of green chemistry principles to minimize waste. A meticulous approach to sample preparation not only guarantees data integrity but also accelerates drug development and reinforces quality control across the entire pharmaceutical manufacturing lifecycle.
References
- 1. Spectroscopic Methods in Pharma QA/QC: UV-Vis, IR, and ... [https://www.labmanager.com/spectroscopic-methods-in-pharma-qa-qc-uv-vis-ir-and-nmr-applications-34005]
- 2. UV-Vis Spectroscopy: Principle, Strengths and Limitations ... [https://www.technologynetworks.com/analysis/articles/uv-vis-spectroscopy-principle-strengths-and-limitations-and-applications-349865]
- 3. UV Spectrophotometry as a Pharmaceutical Testing Solution [https://www.hunterlab.com/blog/uv-spectrophotometry-as-a-pharmaceutical-testing-solution/]
- 4. UV-Vis Spectrophotometer Applications [https://www.thermofisher.com/us/en/home/industrial/spectroscopy-elemental-isotope-analysis/molecular-spectroscopy/uv-vis-spectrophotometry/applications.html]
- 5. Improve Your Pharmaceutical Workflows with Innovative ... [https://www.spectroscopyonline.com/view/improve-your-pharmaceutical-workflows-with-innovative-uv-vis-spectroscopy]
- 6. Color Analysis for Pharmaceutical Products using UV- ... [https://www.thermofisher.com/blog/behindthebench/color-analysis-for-pharmaceutical-products-using-uv-visible-absorption-techniques/]
- 7. UV/Vis Spectroscopy for DNA & Protein Analysis [https://www.unchainedlabs.com/uv-vis-spectroscopy/]
- 8. Pharma-Compliant Analysis with Flexible UV-Vis [https://www.spectroscopyonline.com/view/pharma-compliant-analysis-with-flexible-uv-vis]
- 9. Beer-Lambert Law: Statement, Equation, Advantage & ... [https://www.sciencefacts.net/beer-lambert-law.html]
- 10. Beer-Lambert Law | Transmittance & Absorbance [https://www.edinst.com/resource/the-beer-lambert-law/]
- 11. The Beer-Lambert Law [https://chem.libretexts.org/Bookshelves/Physical_and_Theoretical_Chemistry_Textbook_Maps/Supplemental_Modules_(Physical_and_Theoretical_Chemistry)/Spectroscopy/Electronic_Spectroscopy/Electronic_Spectroscopy_Basics/The_Beer-Lambert_Law]
- 12. Understanding the Limits of the Bouguer-Beer-Lambert Law [https://www.spectroscopyonline.com/view/understanding-the-limits-of-the-bouguer-beer-lambert-law]
- 13. Beer–Lambert law for optical tissue diagnostics [https://pmc.ncbi.nlm.nih.gov/articles/PMC8553265/]
- 14. Derivation of Beer Lambert Law [https://byjus.com/physics/derivation-of-beer-lambert-law/]
- 15. Application of a UV-vis spectrometer to investigate the ... [https://www.sciencedirect.com/science/article/pii/S0022354924004131]
- 16. Instrumentation of a UV-Visible Spectrophotometer - JASCO Inc [https://jascoinc.com/learning-center/theory/spectroscopy/uv-vis-spectroscopy/instrumentation/]
- 17. What is a monochromator in a UV-Vis spectrophotometer? [https://knowledge.cphnano.com/en/pages/what-is-a-spectral-bandwidth]
- 18. How Important is Absorbance Linearity? [https://www.oceanoptics.com/medical-life-sciences/how-important-is-absorbance-linearity/]
- 19. Monochromator vs. Spectrometer [https://www.bmglabtech.com/en/blog/difference-between-a-spectrometer-and-a-monochromator/]
- 20. Specifying accuracy and precision criteria for ultraviolet ... [https://www.spectroscopyeurope.com/quality/specifying-accuracy-and-precision-criteria-ultraviolet-spectrometers]
- 21. The Role of Spectroscopy in Modern Pharmaceutical Industry [https://www.simsonpharma.com/us/blog-details/the-role-of-spectroscopy-in-modern-pharmaceutical-industry]
- 22. Sample Preparation Global Market Report 2025 [https://www.thebusinessresearchcompany.com/report/sample-preparation-global-market-report]
- 23. Development and Validation of Ultraviolet Spectroscopic ... [https://link.springer.com/article/10.1007/s10812-025-01867-4]
- 24. Evaluation of the Quantitative Performance of Different ... [https://www.sciencedirect.com/science/article/pii/S0946672X25001646]
- 25. 2025 Review of Spectroscopic Instrumentation [https://www.spectroscopyonline.com/view/2025-review-of-spectroscopic-instrumentation]
- 26. Ultraviolet and Visible Spectrophotometer in ... [https://pharmaguddu.com/ultraviolet-and-visible-spectrophotometer-in-pharmaceutical-analysis/]
- 27. Comparison of Optical Spectroscopy Techniques for ... [https://www.americanpharmaceuticalreview.com/Featured-Articles/618205-Comparison-of-Optical-Spectroscopy-Techniques-for-Pharmaceutical-Analysis/]
- 28. Quality by Design Considerations for Drop-on-Demand Point ... [https://pmc.ncbi.nlm.nih.gov/articles/PMC11262155/]
- 29. Analysis of Solid Formulates Using UV-Visible Diffused ... [https://www.mdpi.com/2227-9040/12/11/227]
- 30. 4.4: UV-Visible Spectroscopy [https://chem.libretexts.org/Bookshelves/Analytical_Chemistry/Physical_Methods_in_Chemistry_and_Nano_Science_(Barron)/04%3A_Chemical_Speciation/4.04%3A_UV-Visible_Spectroscopy]
- 31. How to overcome interferences in UV – Visible ... [https://lab-training.com/overcome-interferences-uv-visible-spectroscopic-studies/]
- 32. Sample Preparation for UV-Vis Spectroscopy [https://www.ossila.com/pages/preparing-samples-uv-vis-spectroscopy]
- 33. What is Oral Solid Dosage (OSD): A Comprehensive Guide ... [https://vicihealthsciences.com/what-is-oral-solid-dosage/]
- 34. Matrix Effect - an overview [https://www.sciencedirect.com/topics/engineering/matrix-effect]
- 35. What is matrix effect and how is it quantified? [https://sciex.com/support/knowledge-base-articles/what-is-matrix-effect-how-to-quantify-it_en_us]
- 36. Optical density and absorbance measurements [https://www.bmglabtech.com/en/blog/optical-density-for-absorbance-assays/]
- 37. Absorbance vs Concentration [https://byjus.com/chemistry/absorbance-vs-concentration/]
- 38. TN 120 SmartPath™ Technology and High Absorbance [https://www.denovix.com/tn-120-smartpath-and-high-absorbance/]
- 39. Optimization of UV Spectrophotometric Techniques for ... [https://pubmed.ncbi.nlm.nih.gov/40825392/]
- 40. Sustainable UV–spectrophotometric analysis of meloxicam ... [https://www.sciencedirect.com/science/article/abs/pii/S0026265X25033892]
- 41. Penetration depth and effective sample size ... [https://www.sciencedirect.com/science/article/pii/S0022354925003417]
- 42. Selecting The Right Cuvette: A Comprehensive Guide To ... [https://cuvet.co/selecting-the-right-cuvette-a-comprehensive-guide-to-types-materials-and-usage/]
- 43. How to Select Cuvette Material for UV-VIS Absorbance ... [https://lab-training.com/select-right-cuvette-material-uv-vis-absorbance-studies/]
- 44. How should cuvettes be cleaned? [https://www.ssi.shimadzu.com/service-support/faq/uv-vis/cuvettes/2/index.html]
- 45. SOP for Cleaning of U.V. /Visible Spectrophotometer [https://www.pharmaguideline.com/2011/07/sop-for-cleaning-procedure-for-uv.html]
- 46. Cleaning and Handling [https://www.hellma.com/en/cuvettes-laboratory-supplies/cuvettes/cleaning-and-handling]
- 47. Accurate UV-Vis Spectrophotometer Blank Control [https://www.implen.com/uv-vis-spectrophotometer-blank-control/]
- 48. How do spectrophotometers use the blank? [https://www.ssi.shimadzu.com/service-support/faq/uv-vis/instrument-design/22/index.html]
- 49. Sample Preparation of Drug Substances and Products in ... [https://www.chromatographyonline.com/view/sample-preparation-of-drug-substances-and-products-in-regulated-testing-a-primer]
- 50. Top 10 Mistakes to Avoid in UV-Vis Spectrophotometry [https://labindia-analytical.com/Blog_detail/view/Top-10-Mistakes-to-Avoid-in-UV-Vis-Spectrophotometry?srsltid=AfmBOoqmJiOv7ukuKzttZw9NnQiU9lnHwuofOHTdrVEOsgltmx3LWbQJ]
- 51. Spectrophotometry Best Practices | Technical Note 106 [https://www.denovix.com/tn-106-spectrophotometry-best-practices/]
- 52. Common Mistakes to Avoid When Using a UV-Vis ... [https://www.labtechco.com/blog/common-mistakes-uv-vis-spectrophotometer]
- 53. Sample Preparation Techniques for Precision in Analysis [https://www.phenomenex.com/knowledge-center/spe-knowledge-center/sample-preparation-techniques-for-precision-in-analysis?srsltid=AfmBOop0RgxBytb1jrSF90JPOMjZ7cU9xmM_mE8w4_dXxMjR_kR42CLR]
- 54. Matrix Effects on Quantitation in Liquid Chromatography [https://www.chromatographyonline.com/view/matrix-effects-on-quantitation-in-liquid-chromatography-sources-and-solutions]
- 55. Correcting Ultraviolet-Visible Spectra for Baseline Artifacts [https://www.sciencedirect.com/science/article/pii/S0022354923003350]
- 56. Ultraviolet–visible spectroscopy [https://en.wikipedia.org/wiki/Ultraviolet%E2%80%93visible_spectroscopy]
- 57. Protocol for Formulation Preparation for Drug Quantitation ... [https://www.creative-bioarray.com/support/protocol-for-formulation-preparation-for-drug-quantitation-by-hplc-uv-vis.htm]
- 58. UV-Vis Spectrophotometry: In-Depth Analysis Methods For ... [https://www.alwsci.com/news/spectroscopy-uv-vis-spectrophotometry-in-de-81882656.html]
- 59. Principles of Absorbance and UV-Vis Spectrophotometry [https://www.pgeneral.com/news/optimizing-spectrophotometric-measurements-best-practices-for-accurate-absorbance-readings/]
- 60. Beyond Linearity: Identifying and Managing Nonlinear ... [https://www.spectroscopyonline.com/view/beyond-linearity-identifying-and-managing-nonlinear-effects-in-spectroscopic-data]
- 61. A nonlinear correction method for the error caused by ... [https://www.sciencedirect.com/science/article/abs/pii/S1350449521001924]
- 62. Improving Optical Measurements: Non-Linearity ... [https://pmc.ncbi.nlm.nih.gov/articles/PMC6630795/]
- 63. Temperature Correction of Spectra to Improve Solute ... [https://pmc.ncbi.nlm.nih.gov/articles/PMC9680019/]
- 64. Analyzing PH Levels in Pharmaceuticals: Ensuring ... [https://www.boquinstrument.com/a-news-analyzing-ph-levels-in-pharmaceuticals-ensuring-potency-and-stability.html]
- 65. UV/VIS Assays [https://pharmlabs.unc.edu/resources/uvvis/]
- 66. Correcting Baseline Drift in UV-Vis Spectrophotometers [https://eureka.patsnap.com/article/correcting-baseline-drift-in-uv-vis-spectrophotometers]
- 67. A Comprehensive Examination of UV-VIS Spectrophotometric Methods in Pharmaceutical Analysis Between 2015-2023 - PubMed [https://pubmed.ncbi.nlm.nih.gov/38808707/]
- 68. Development and Validation of a HPLC and an UV ... [https://pmc.ncbi.nlm.nih.gov/articles/PMC3263711/]
- 69. In-line UV Spectrometry Monitoring in Cleaning Validation [https://www.pharmtech.com/view/in-line-uv-spectrometry-monitoring-in-cleaning-validation]
- 70. Preparation of Pharmaceutical Samples for Elemental ... [https://www.spectroscopyonline.com/view/preparation-pharmaceutical-samples-elemental-impurities-analysis-some-potential-approaches]
- 71. ICH Q2(R2) Validation of analytical procedures [https://www.ema.europa.eu/en/ich-q2r2-validation-analytical-procedures-scientific-guideline]
- 72. Navigating the Biopharmaceutical Method Validation [https://synergbiopharma.com/navigating-the-evolution-from-ich-q2r1-to-ich-q2r2-and-implementation-of-ich-q14-in-biopharmaceutical-method-validation/]
- 73. Utilization of CIELAB Color Space - PMC - PubMed Central [https://pmc.ncbi.nlm.nih.gov/articles/PMC11944359/]
- 74. Analytical Method Validation: Back to Basics, Part II [https://www.chromatographyonline.com/view/analytical-method-validation-back-basics-part-ii]
- 75. Development and validation of UV-Visible ... [https://pmc.ncbi.nlm.nih.gov/articles/PMC3658078/]
- 76. Overview of Liquid Sample Preparation Techniques for ... [https://pmc.ncbi.nlm.nih.gov/articles/PMC11477957/]
- 77. Rapid UV - Vis spectrophotometric method aided by firefly-PLS models... [https://bmcchem.biomedcentral.com/articles/10.1186/s13065-024-01286-0]
- 78. Advantages and Applications of UV-Vis Analysis [https://www.richmondscientific.com/advantages-and-applications-of-uv-vis-analysis?srsltid=AfmBOopFWERXLuxl3r1-5ADtOpsm-2ecL7ghGBsr1e1QYWN7Mv3JZfur]
- 79. In-Line UV-Vis Spectroscopy as a Fast-Working Process ... [https://pmc.ncbi.nlm.nih.gov/articles/PMC6321000/]
- 80. ALCOA, ALCOA+ and ALCOA++ Principles | Ensuring Data ... [https://www.pharmaguideline.com/2018/12/alcoa-to-alcoa-plus-for-data-integrity.html]
- 81. ALCOA Principles in GMP (Good Manufacturing Practice) [https://pharmuni.com/glossary/gmp-alcoa/]
- 82. The ALCOA++ Principles for Data Integrity in Clinical Trials [https://www.quanticate.com/blog/alcoa-principles]
- 83. Are Data Quality and ALCOA attributes equivalent? [https://www.gmp-journal.com/current-articles/details/are-data-quality-and-alcoa-attributes-equivalent.html]
- 84. Alcoa Validation Data | NNIT [https://www.nnit.com/insights/articles/alcoa-validation-data]
- 85. ALCOA+ - what does it mean? [https://www.gmp-compliance.org/gmp-news/alcoa-what-does-it-mean]
- 86. Analytical Method Validation: Ensuring Quality and ... [https://www.webofpharma.com/2025/11/analytical-method-validation-ensuring.html]
- 87. Comparative Evaluation of UV-Vis Spectroscopy-Based ... [https://www.mdpi.com/2218-273X/14/9/1046]
- 88. Methods and analyzers for hemoglobin measurement in ... [https://pmc.ncbi.nlm.nih.gov/articles/PMC6709845/]